3DCharacterArtist,JunhyunKim_3D 캐릭터 아티스트 김준현 Details
Class introduction
3D character artist, Junhyun Kim
“By using the Blender tool suitable for 3D beginners,
Let’s create your own 3D character.”
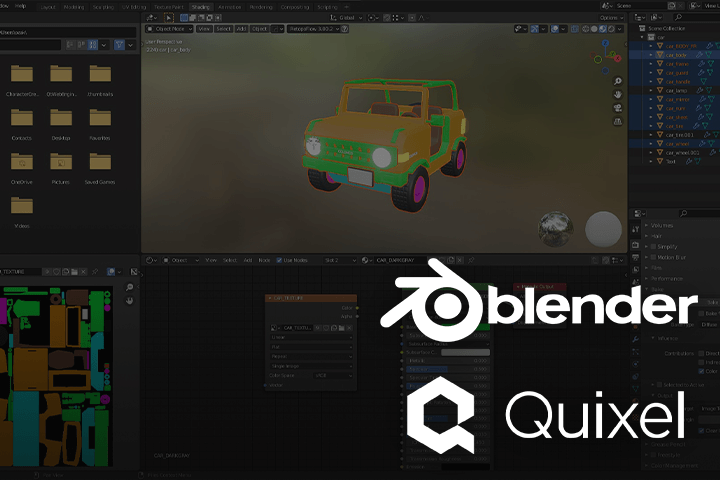
The first step to creating 3D characters 3D basics and application classes using Blender and Quixel Mixer
Do you think that 3D modeling is not something that ‘anyone’ can do, but is only the domain of ‘experts’? Start creating 3D characters in an easy and fun way without any burden with the free and easy-to-use 3D tool 'Blender' and the texturing tool 'Quixel Mixer'.
Basic functions of Blender and Quixel Mixer, as well as modeling, texturing, simple animation, and know-how to create files for 3D printing! Starting with simple desks and chairs that even beginners can easily make, learn the solid basics and solid application methods in 3D production by creating friendly props and characters such as cute dinosaurs and moving cats.
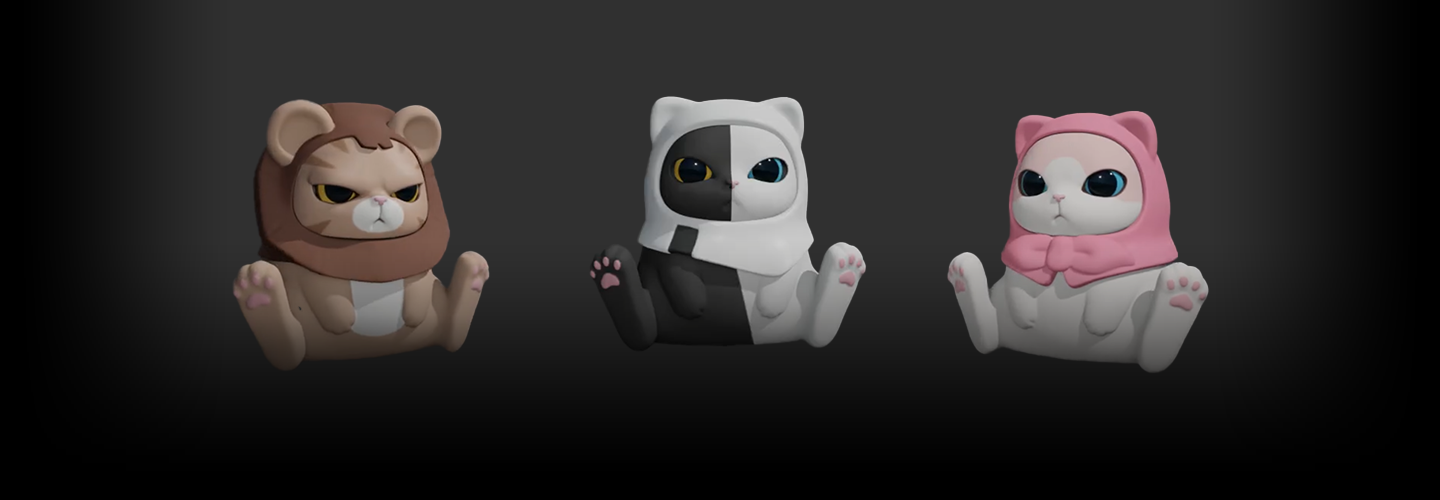
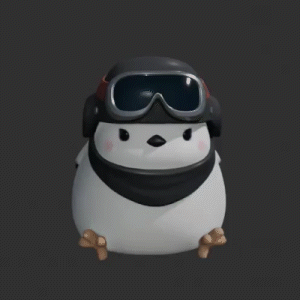
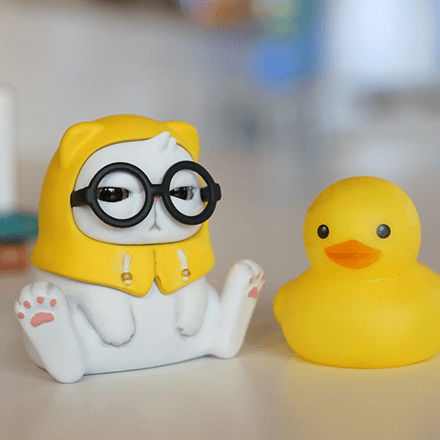
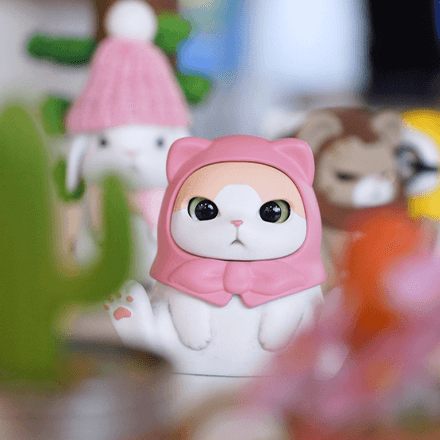
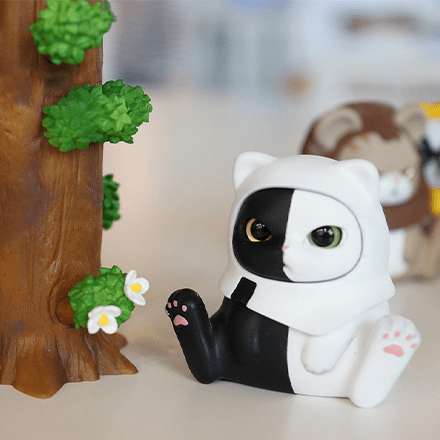
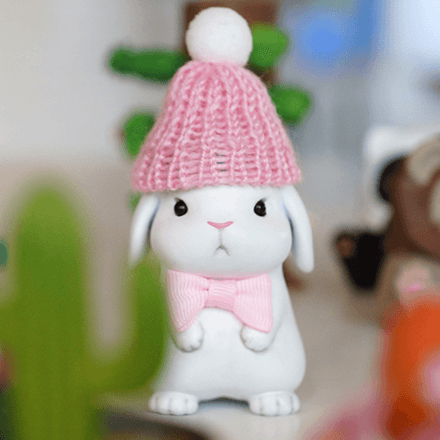
Portfolio of Junhyun Kim, a charming 3D toy character


Why Take This Class?
In this class, you will learn two conflicting modeling methods - traditional polygon modeling and sculpting modeling - so you can feel the pros and cons of each and experience efficient modeling work that suits you.
You can also learn shape key animation to express the character's personality and personality, and learn how to create simple materials to professional and realistic materials using the Quixel Mixer to create results in various styles.

In this class, we will use Blender and Quixel Mixer to create a total of 15 results.
PART. 01
Creating space using various props
-
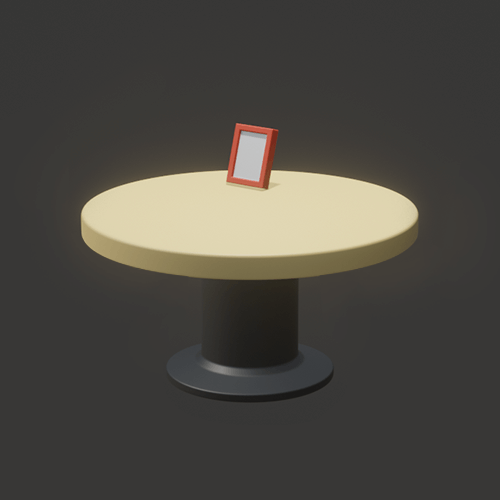
table -
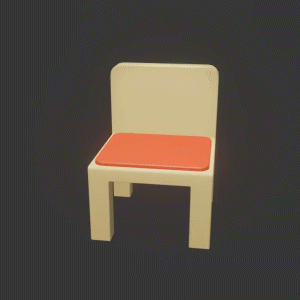
chair -
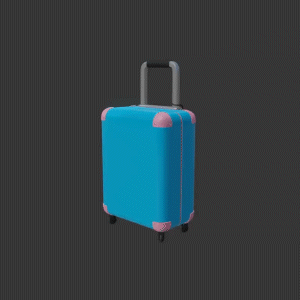
travel carrier -
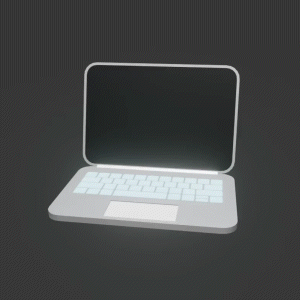
laptop -
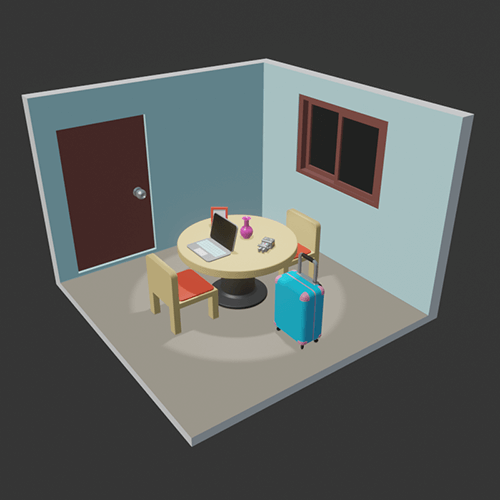
Room space using props
PART. 02
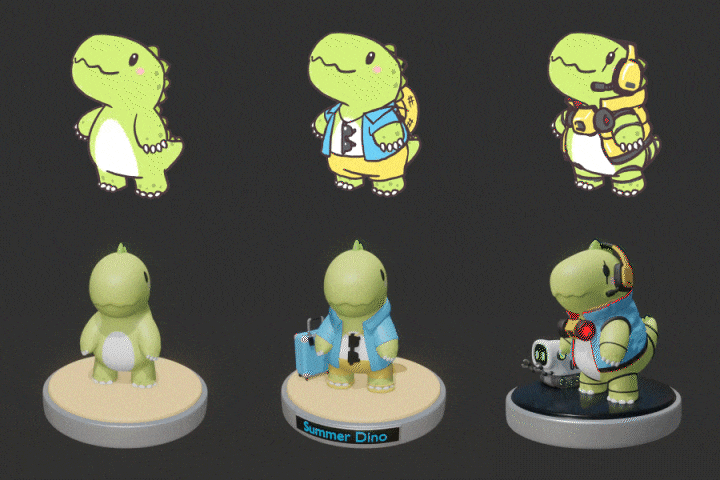
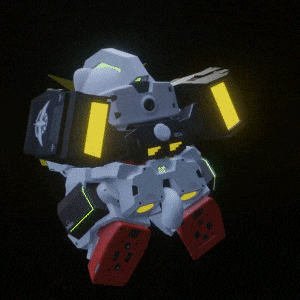
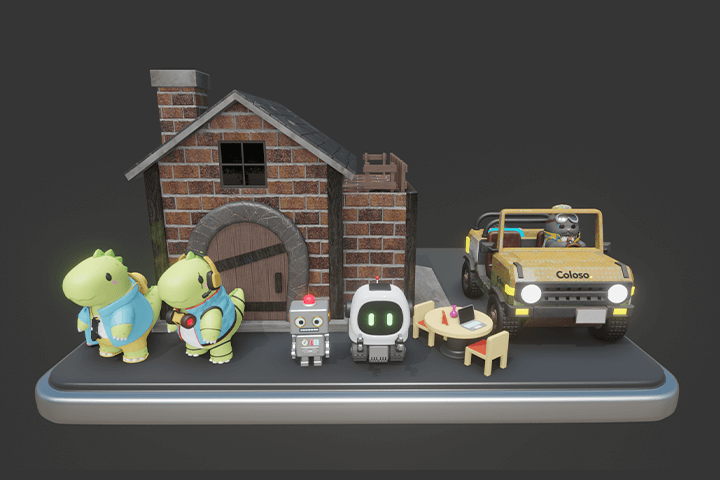
Creating dinosaur characters & moving robots
-
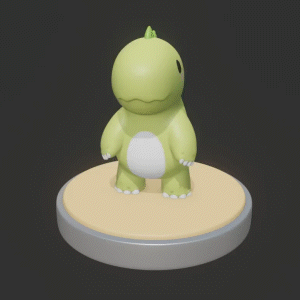
3d dinosaur -
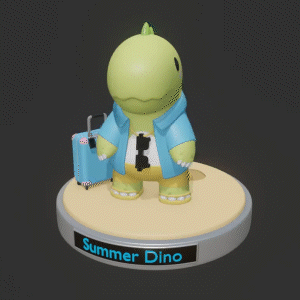
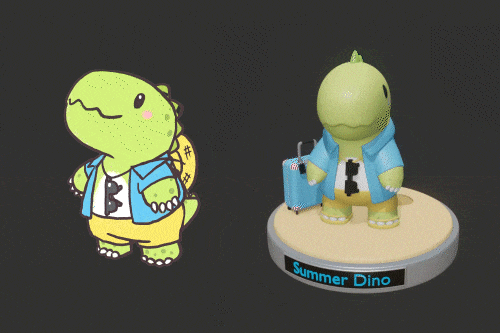
Summer concept 3D dinosaur -
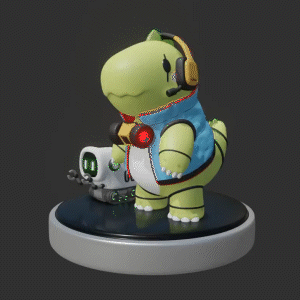
Sci-Fi Concept 3D Dinosaur -
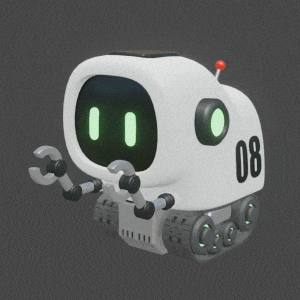
moving robot
PART. 03
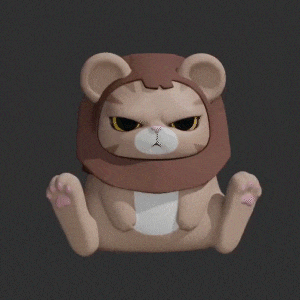
Building a brick house & driving cat
-
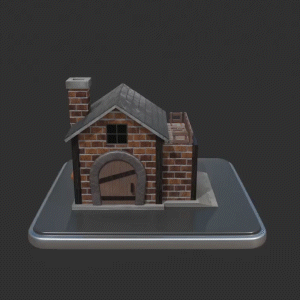
brick house -
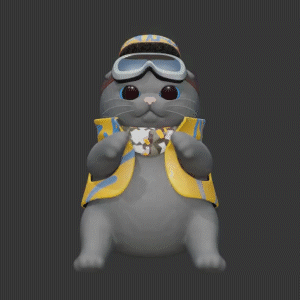
cat -
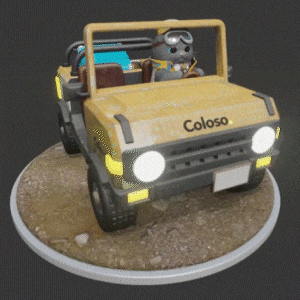
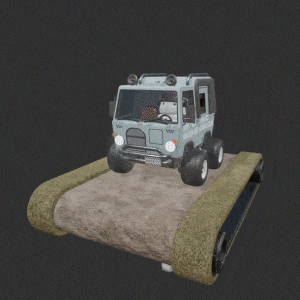
cat and car -
facial expression change
Speaker introduction
3D Character Artist
Junhyun Kim
hello. This is 3D character artist Junhyun Kim. I currently run '8B Studio' and produce blind box figures and blind box figures through my own character brand, 'Duntum School' characters.
We produce handmade toys. We also outsource modeling and mock-up work for artists who have 2D characters but do not have 3D data, and we are conducting character 3D modeling classes at many universities in Korea. If you only create 2D characters, you will also become interested in three-dimensional results such as figures and dolls.
In this class, we will use 'Blender', which is popular among 3D beginners these days, to teach you cute character and tin toy modeling, as well as facial expressions and animations that match the character's personality, helping you brand your character in 3D.
Based on our many years of experience as a 3D character artist and teaching offline character modeling classes, we will teach you how to create adorable toy characters more easily than anyone else.

3D character artist Junhyun Kim
Current) 3D Character Artist
View more history
2019~Present: Blind box figure modeling by many domestic and foreign character artists
2017~Present: 3D character modeling classes conducted at numerous universities in Korea
2015~Present: Participation in VR project production by Korea University of Technology and Education and many companies
2013~Present: Operating ‘Palbok Design Studio’
class features
class features
Key features of Blender and Quickel Mixer that are easy to learn even for beginners
The quality of the results is the same as that of paid 3D tools, but the free tools 'Blender' and 'Quickcel Mixer'! We will teach you how to install the two tools and their basic functions so that even 3D beginners can use them without difficulty. You can learn in detail about various functions such as modeling, sculpting, and animating using 'Blender', as well as UV work, materials and colors with 'Quixel Mixer'.
Creating 3D toy characters based on 2D characters
For students who are curious about how to make a 2D drawing into 3D, we will teach you how to make it from 2D to 3D from start to finish. If you follow the step-by-step process carefully, you will be able to create your own 3D character in addition to the results from the lecture.
Provides learning materials for mastering 3D modeling
In this class, we provide a Blender shortcut file and a simple explanation of 3D terms to help students understand. In addition, we provide learning materials and completed modeling files necessary for modeling so that you can learn modeling easily and quickly.
Class composition
learn this
-
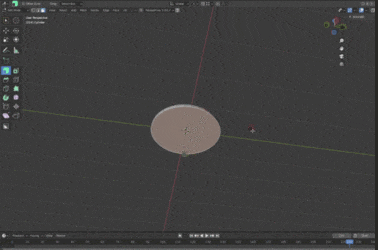 Build modeling foundations through creating props and spacesLearn Blender Edit mode by making simple props such as desks, chairs, picture frames, and vases, and use various Blender functions such as Smooth/Modifier/Snap to create a room-type space filled with props.
 -
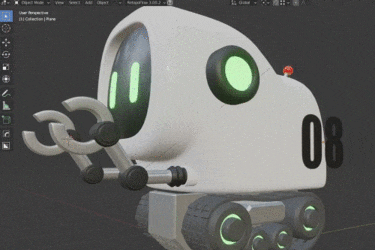 Add detail and animation to your robot characterLearn about materials and colors by applying shiny materials to basic tin toy characters, and furthermore, add simple animations to create lively robot characters.
 -
 Creating dinosaur characters and costumes with various conceptsCreate a dinosaur's arms, legs, and face using Blender's sculpting function and learn how to naturally combine them into a remesher to create a cute, round dinosaur character. Additionally, you will learn how to make summer costumes and science fiction costumes through UV work.
-
 Building a brick house with a Quixel mixerLearn the basic functions of the Quixel mixer by building a small brick house using the texture of bricks. In addition, we will tell you what to do if you want to use other materials.
 -
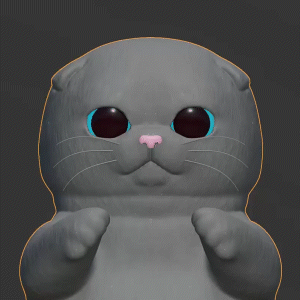
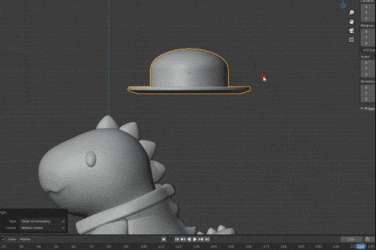
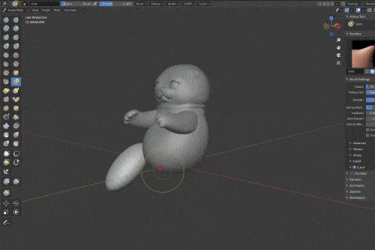 Creating cats and vehicles using sculpting, texturing, and animatingApply all the modeling, sculpting, texturing, and animation methods you learned earlier to create a detailed cat character and a difficult car, and use them to create a cat that drives a car.
 -
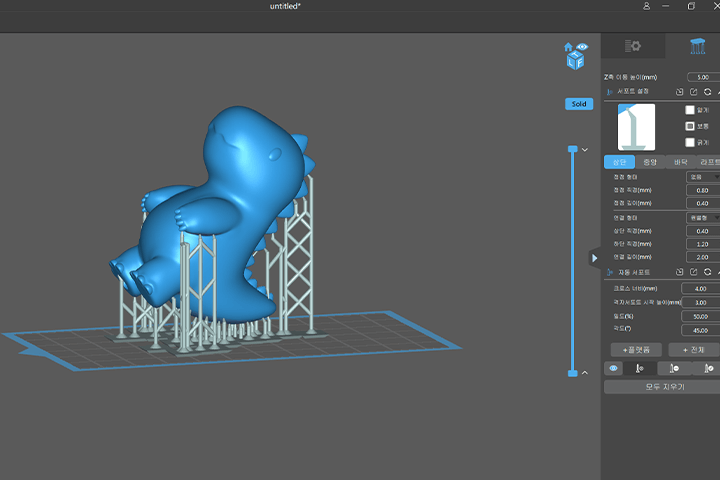 How to convert and utilize data for 3D printingAdditionally, for students who want to print their own 3D characters, we will inform you of how to modify data suitable for 3D printing and the know-how of practitioners who use it.
curriculum
curriculum
Show me the curriculum
SECTION 01. Orientation
01. Greetings - Hello. This is 8B from 8B Studio.
- Instructor introduction
- Lecture Introduction
02. Program introduction
- Introduction to Blender
- Introduction to Quixel Mixer
- Introduction to Quixel Bridge
SECTION 02. Basic usage of blender
03. Learn how to install and use Blender
- Screen control method
- Create and delete basic shapes
- Select, move, zoom, rotate objects
- 3D Basic Concepts Explained
SECTION 03. Creating props and space
04. Making simple props: part1. Desk, chair, picture frame
- Edit mode description, point/line/face selection method
- Edit mode basic tool description
- Shade Smooth, Shade Flat, Auto Smooth
- How to add color to objects
05. Making simple props: part2. laptop, vase
- Modifier Description
- Tips for adding color easily
06. Making simple props: part3. travel carrier
- Modifier Description
- 3D cursor description, origin description
- Using curves
07. Creating a simple character: part1. Tin Toy
- Tin Toy Character Modeling
- Bridge Edge Loop Description
- How to join or separate objects
08. Creating a simple character: part2. Add tin toy color and material
- Material property description
- How to create a material
09. Creating space using props (room type)
- Snap function description
- World space and local space
- Using lights
SECTION 04. Creating a moving robot character
10. Create a futuristic robot character
- How to use subdivision surfaces
- Use modifiers
11. Adding futuristic robot character decals
- Using shiny materials
- How to attach pictures and text where you want
12. Create a simple animation of a futuristic robot
- Parent-child relationship explanation
- How to insert keyframes
- Caterpillar animation
SECTION 05. Creating a dinosaur character using sculpting and texture painting
13. Creating a dinosaur character with sculpting: part1. face, body
- Sculpting Mode Description
- Basic brush description
- Remesher method explained
14. Creating a dinosaur character with sculpting: part2. arms, legs, tail
- How to combine separate parts into one lump
15. Working with Quadrimesher
- How to change sculpting data to low polygon
16. UVW map work
- UVW Map Description
- UV Unwrap Method
17. Texture painting work
- How to color or draw directly in Blender
18. Making summer costumes and props
- How to make props for dinosaur characters
- Constructing a scene
19. Making sci-fi costumes and props
- How to make props for dinosaur characters
- Try using cloth simulation
- Configuring Sun
SECTION 06. Building a brick house with a Quixel mixer
20. Make a cute brick house
- Empty Description
- Use modifiers
21. Working on a cute brick house UV
- How to straighten bent UVs
- UV tips for effective modeling work
22. Color the cute brick house by material
- How to create an ID map
23. Installing the Quixel Mixer and Bridge
- How to Install a Quixel Mixer
- How to Install a Quixel Bridge
24. Working on the cute brick house texture
- Basic usage of Quixel Mixer
25. How to export textures and description of texture maps
- Texture Map Type Description
- How to export texture maps
26. Import HDRI files using the HDRI Heaven site and use them as environmental data
- Introduction to HDRI Heaven Site
- How to import and use HDRI files
27. Turntable animation using camera
- camera description
- Follow Pass Animation Description
SECTION 07. Making a driving cat
28. Create a cat character with sculpting
- Create a cat character with sculpting
29. Working with retopology
- How to create low polygons manually
30. UV work and texture work
- Explore Quixel Mixer layer options
31. Simple character facial expression animation using shape keys
- Shape key description
- Create facial expressions using edit mode and sculpting mode
32. Creating a costume, working with costume textures
- Making cat hats, glasses, and clothes
- How to use decals in Quixel Mixer
33. Building a car: part1. Building a car body
- Building a car using blueprints
- How to make text three-dimensional
34. Building a car: part2. wheels and finishes
- car modeling finish
35. Building a car: part3. UV work and texture work
- Using Quixel Mixer Smart Materials
- Using Quixel Mixer Masking
36. Combining cat and car data
- Import contents of another file with append function
37. Working on car animation
- Use texture animation
SECTION 08. Extra edition
38. Collection of Blender shortcut key descriptions and tips
- A collection of Blender shortcut key descriptions and tips
39. Utilizing Quixel Mega Scan data
- How to import data provided by Mega Scan
- How to edit data provided by Mega Scan
40. Creating 3D printing data
- How to change size for printing
- Precautions when creating printing data
41. Description of various uses after 3D printing
- Examples of various product production using 3D printing data
42. Conclusion
* Curriculum details may change before or after the video is released.
interview
What 3D character artist Junhyun Kim wants to say

Question.01
What are your strengths as a 3D character artist?
What are your strengths as a 3D character artist?
I have a long history of practical experience in numerous fields related to characters, including not only 3D character design, but also emoticon/package/4-panel comics/various goods production. We go beyond simple modeling and even produce character figures using 3D printing. Based on my practical experience, I prepared a class with the know-how to help you brand your own character by learning modeling, creating files for 3D printing, and simple animation .
Question.02
Why did you choose Blender and Quixel Mixer as your 3D character creation tools?
Why did you choose Blender and Quixel Mixer as your 3D character creation tools?
Although Blender and Quixel Mixer are free tools, there is little difference in the quality of the results compared to other paid 3D tools that require a monthly payment. Also, once you become familiar with the tools, you can work faster than other tools in terms of modeling speed, so I chose these tools.
Question.03
What are the main points of this class?
What are the main points of this class?
We focused on ensuring that even those who are new to 3D can get used to it without difficulty. By learning the basic usage and various functions of Blender and Quixel Mixer and creating various results using them, you will gradually enjoy creating 3D characters. In addition, to help students understand, we plan to provide learning materials and a collection of shortcut keys necessary for modeling, simple explanations of 3D terms, and completed modeling files .
Question.04
Who do you recommend this class to?
Who do you recommend this class to?
I recommend it to those who want to make 2D characters into 3D and those who want to use their characters in various ways. By producing in 3D, you can go beyond simply printing-based goods and create three-dimensional results such as figures or plush toys.
We will guide you through the program to use.
This class is conducted using the tools specified below.
Blender 2.93 or higher
- Blender 2.93 can be downloaded directly from the Blender homepage.
Quixel Mixer 2021.1.1 Beta or later
- Quixel Mixer 1.1 Beta can be downloaded directly from the Quixel Mixer website.
* Programs and materials are not provided separately.
[How to resolve mouse click error in Blender 2.93.3]
1. File - Defaults - Load Factory Settings
2. If the above method does not solve the problem
Edit - Preferences - Keymap - (bottom right) Restore
(If there is a problem after pressing Load Factory Settings, a Restore button appears)
3. When neither method works
Download Blender version lower (2.93.1)