IndustrialDesigner,JonghaLee_산업디자이너 이종하 Details
Class introduction
introduction video
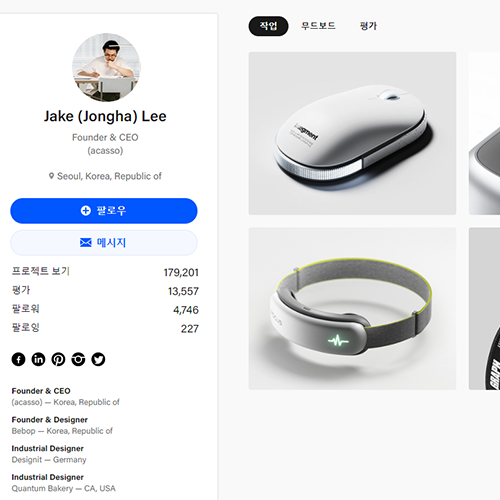
Industrial designer, Jongha Lee
“If you thoroughly learn the essential functions of tools used in industrial design practice and apply them to your own work, you will be able to obtain high-quality product image results.”
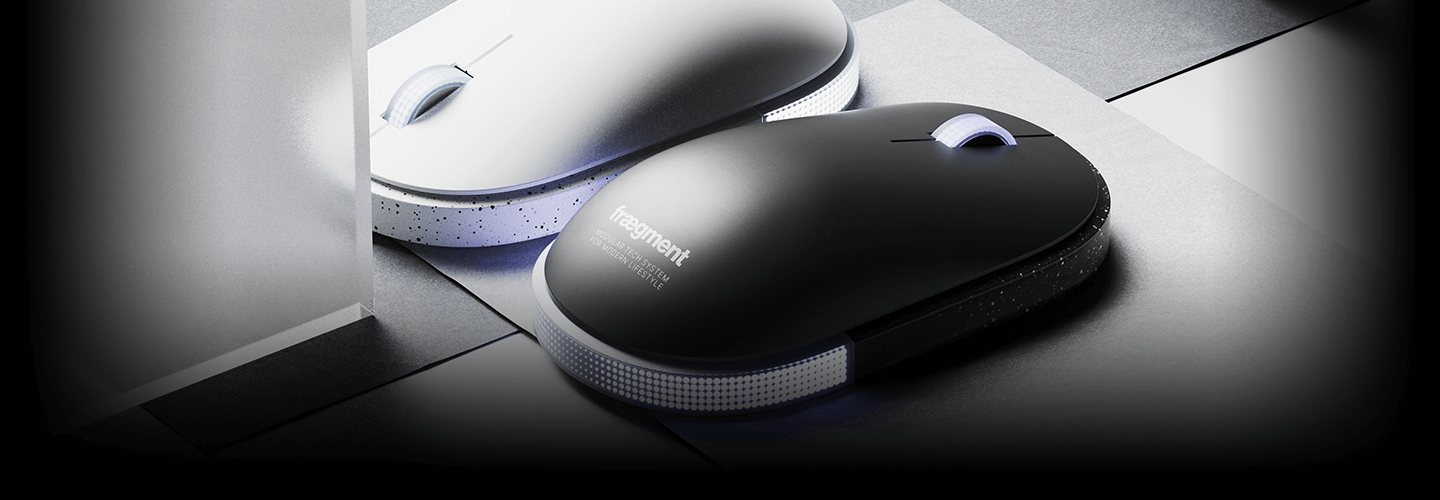
Photo-realistic product images, background details that make the product stand out, and KeyShot & Redshift rendering skills for exceptional visual impact!
Have you ever wondered how to create high-quality, pictorial-like renderings that always look awkward?
For the first time in Korea, we will inform you of the KeyShot know-how of overseas rendering experts, which has been shared in English, and the Redshift know-how for industrial design, which is essential for rendering by working professionals such as Apple and famous overseas companies.
For the first time in Korea, we will inform you of the KeyShot know-how of overseas rendering experts, which has been shared in English, and the Redshift know-how for industrial design, which is essential for rendering by working professionals such as Apple and famous overseas companies.
Project experience in advanced environments such as Silicon Valley and Germany and former) BEBOP. Jongha Lee, a co-founder and an industry-recognized technique expert with experience in starting a (acasso) studio , reveals all the rendering know-how he has accumulated.
Take a look at Coloso's complete rendering course for industrial designers that will help even beginners in modeling and rendering learn all the skills by following them step by step.
Take a look at Coloso's complete rendering course for industrial designers that will help even beginners in modeling and rendering learn all the skills by following them step by step.
Speaker Jongha Lee Lee’s portfolio, the leader in high-quality product rendering
Why Take This Class?
Do you want to make photo-realistic renderings, but post-processing in Photoshop has its limits, and you don't know where to start? However, there has never been a class that teaches fundamental product design expression skills based on advanced use of rendering tools. From how to use Rhino and Keyshot, which are actually used in practice by famous overseas companies, to how to use the popular renderers Redshift, C4D Animation, and Fusion 360 by leading overseas industrial designers, we will teach you all the know-how to become a professional technician who is popular globally.
Do you want to learn just the core of a highly useful tool to keep up with the rendering trends in the industrial design market these days? Do you want to create a product with a creative shape rather than a basic and simple shape that looks more like a photo? Do you want to practice the trendiest essential designs in the industrial design industry right now? One answer to all these questions is the Coloso Jongha Lee class.

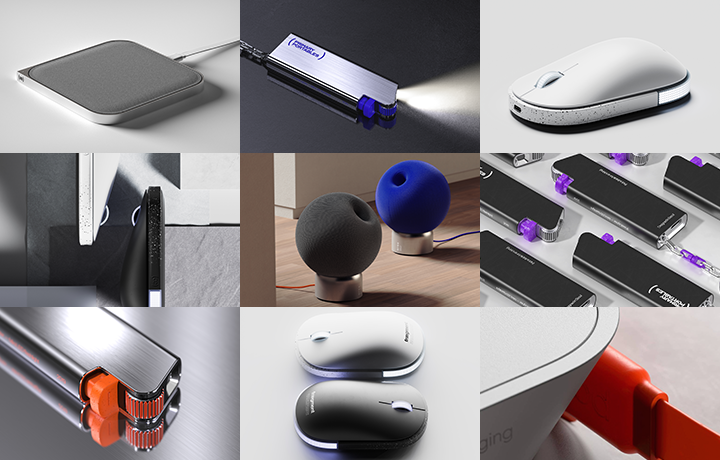
We introduce practical examples produced in this class.
Part 01. Modeling
Learn Rhino's core functions and how to use them so that you can accurately express modeling techniques based on the latest trends as intended.
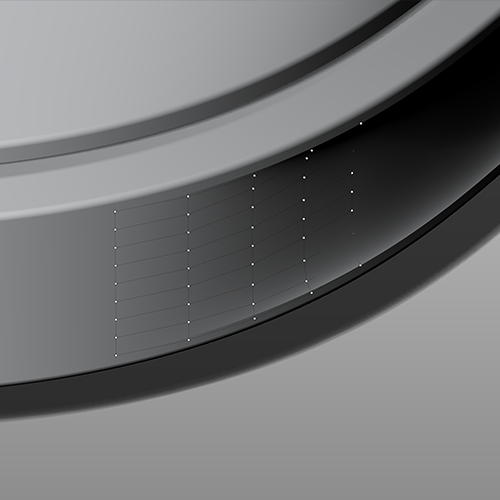
Surface Modeling
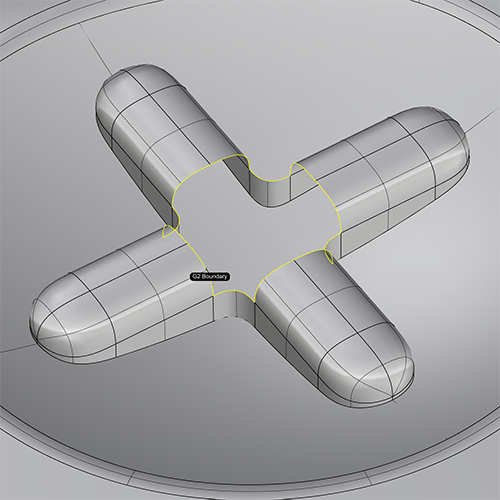
Emboss & Engrave
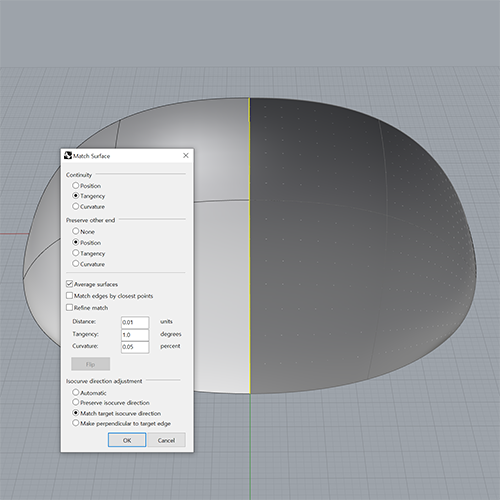
Match Surface Command
※ The image above is an example image of the function learned in Part 01. section.
Part 02. Rendering
We will compare and learn in detail the KeyShot and Redshift techniques for realistic texture mapping and lighting that do not require post-processing.
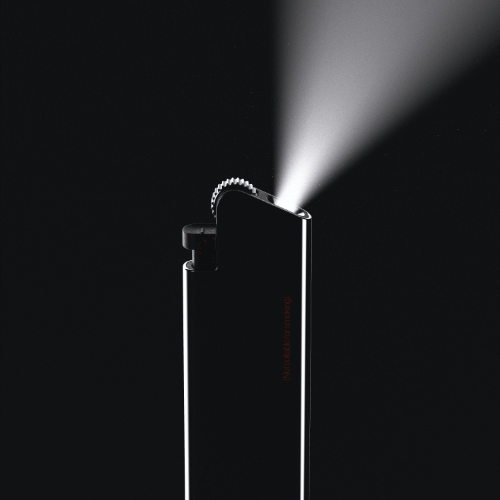
Volumetric Lighting
Texturing
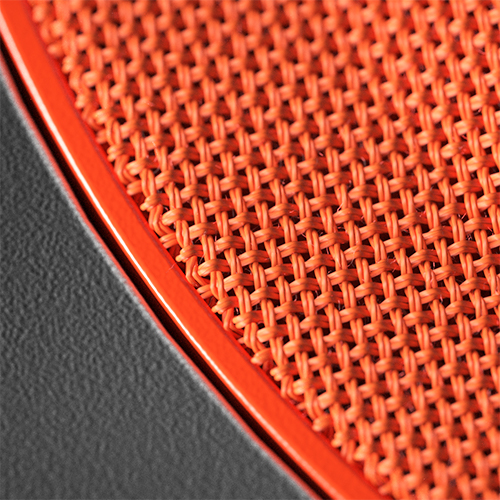
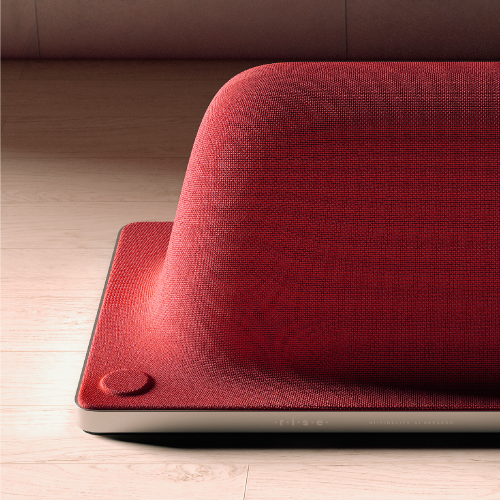
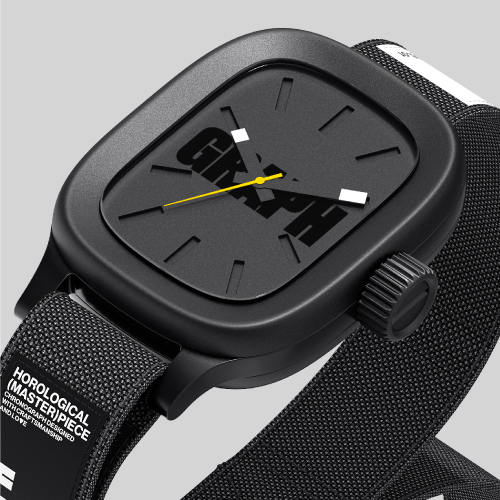
Real Fabric
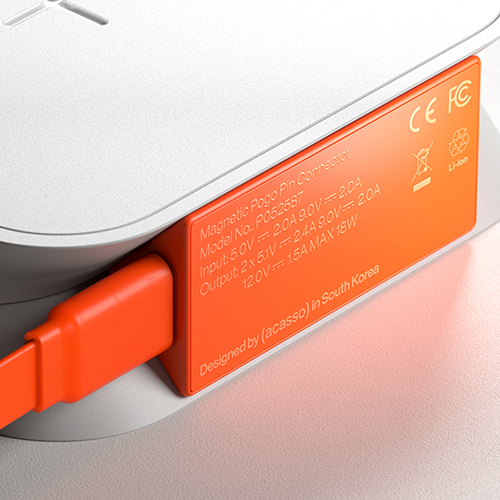
Graphic Labeling
Translucent Plastic

Lighting & Composition
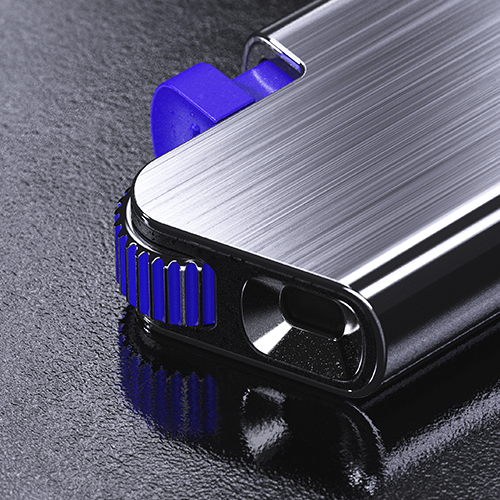
Part 03. Final Output
Rather than consisting of basic geometry, we complete carefully selected examples with the most widely used product lines in the industrial design field.
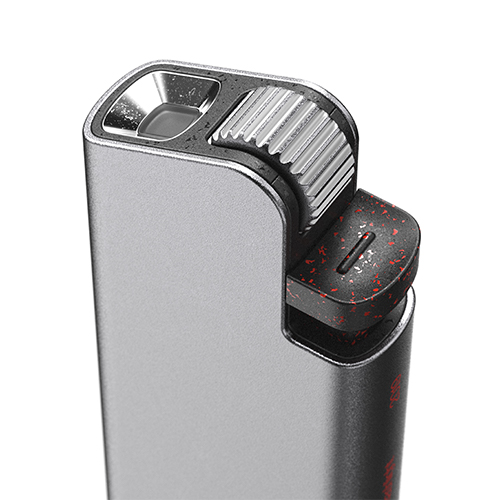
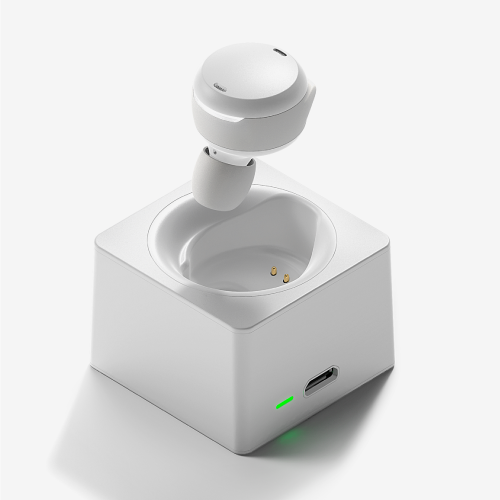
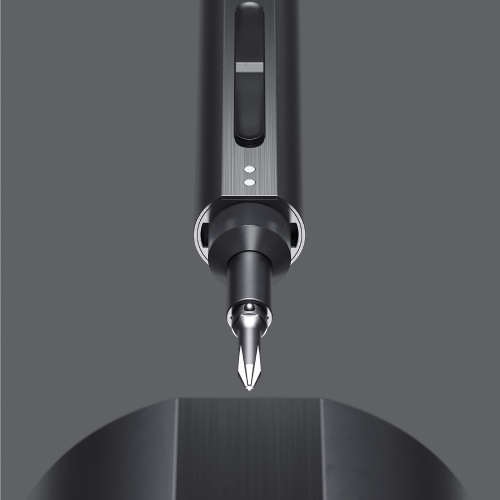
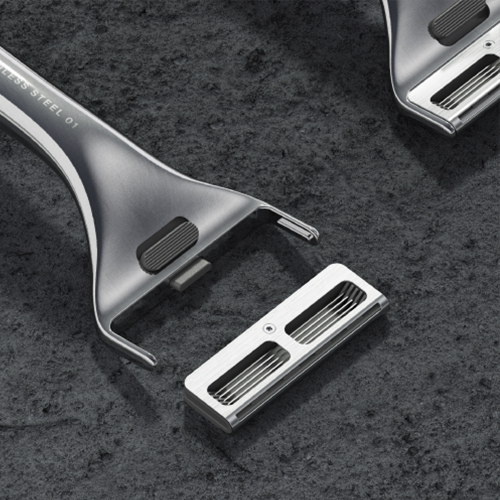
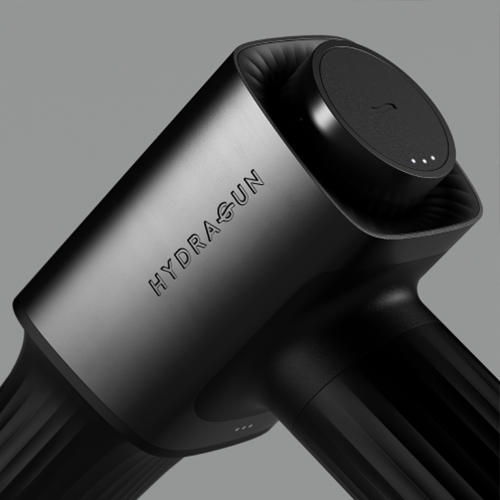
Mini Flashlight
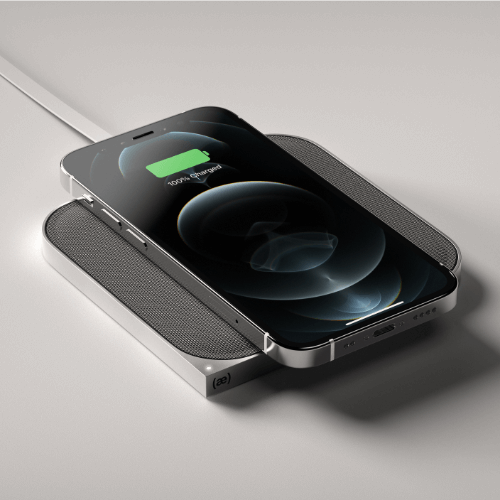
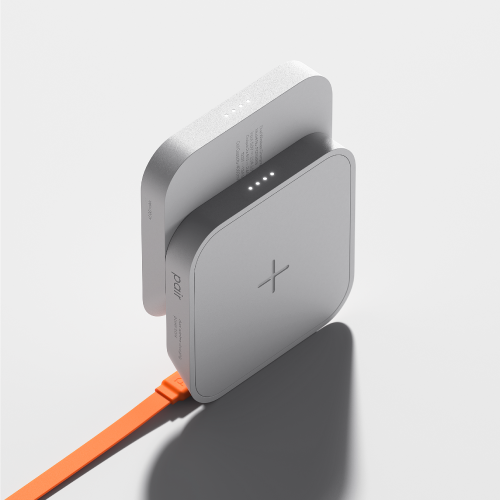
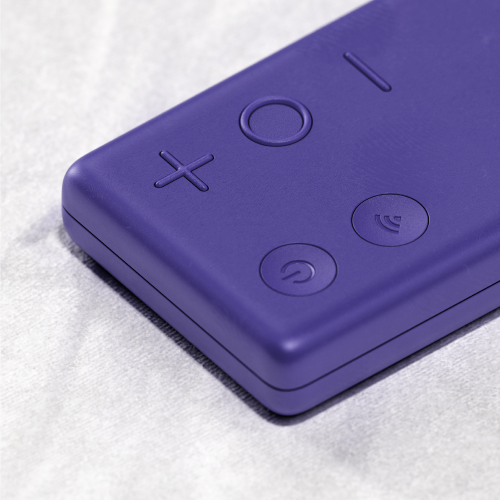
Wireless Charging Powerbank

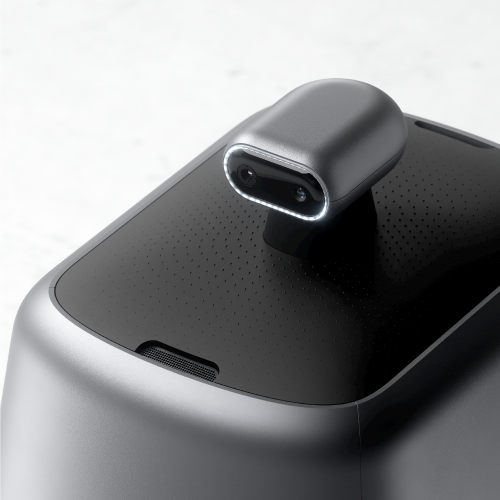
Wireless Charger
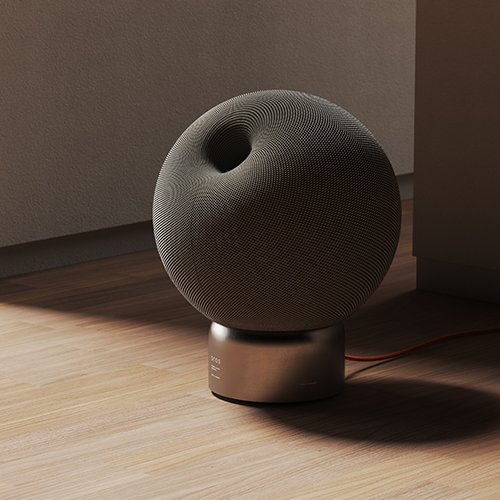
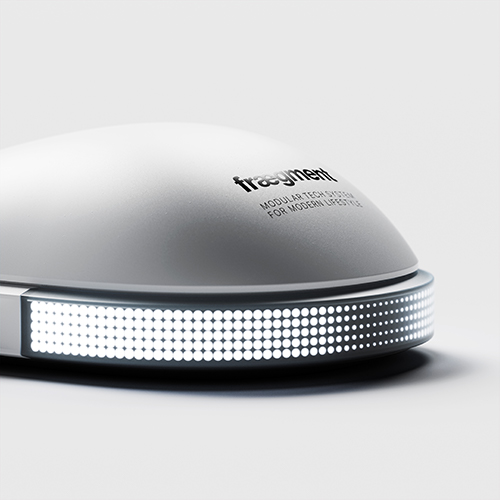
Bluetooth Speaker

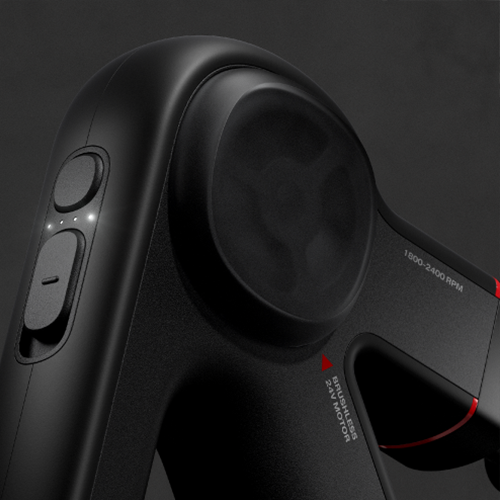
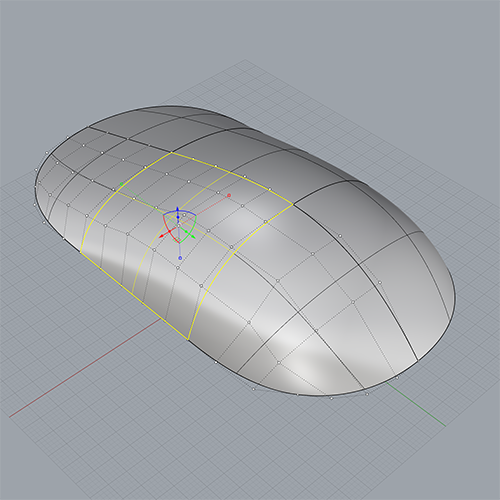
Gaming Mouse

Gaming Mouse Composition
Speaker introduction
industrial designer
Jongha Lee
Hello, this is industrial designer Jongha Lee. I worked as a product designer for Quantum Bakery, a startup located in Silicon Valley, USA, and Designit, Germany, and collaborated with various global companies such as Audi, Bosch, Nespresso, Harman International, HyperX, and Midea.
BEBOP in Korea. Since co-founding the studio, I am currently working on various projects as the CEO and design director of (acasso), which mainly conducts its own product design and development.
Through this class, we will help those working in the industrial design field gain a deeper understanding and use of product rendering, which is the most difficult and necessary aspect.

class features
class features
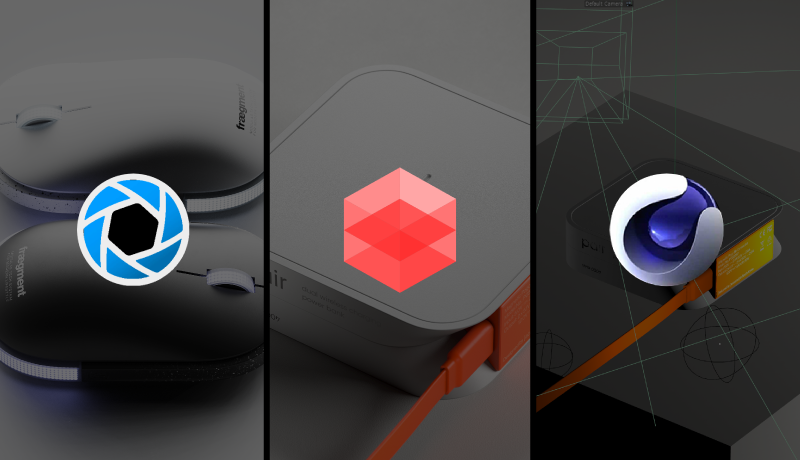
KeyShot & Redshift & C4D Korea’s first industrial design class
From Rhino modeling that captures the vitality of product design to Korean Redshift lectures optimized for high-quality rendering! You can learn about renderings used in American and European industrial design practices, rendering applications appropriate for the situation, and how to use and integrate with various programs.
Highly usable product design practice example that reflects industry trends
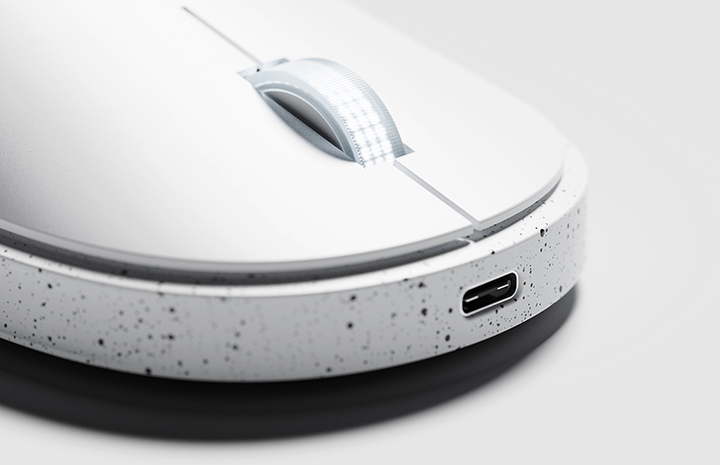
We will create an example that includes elements that we were curious about in practical expression methods, such as essential asset designs such as flash lights, wireless chargers, and mice, shade gradation, engraving/embossing applied to product logos, and silkscreen printed graphics.
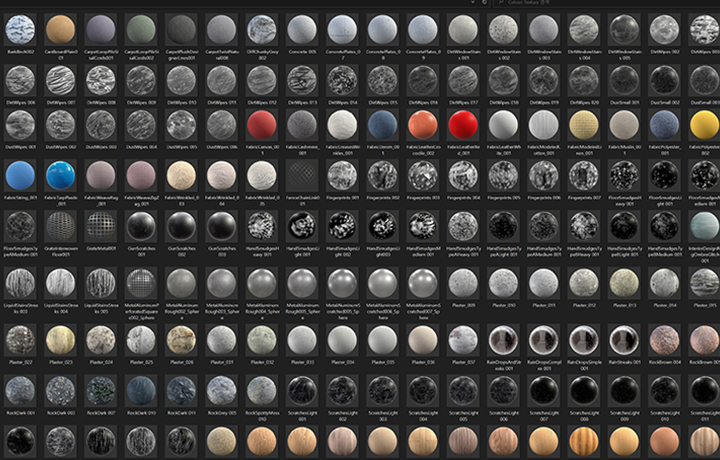
Texture combination summary PDF file containing practical know-how is provided.
In addition to various design-related information collected while establishing and running a design studio, we will teach you all the secrets to improving quality, such as useful texture source sources and combination know-how, and reference sites for use in the field.
Class composition
learn this
Mastering how to use KeyShot to minimize Photoshop corrections
Instead of excessive Photoshop, which creates an artificial feel, we will learn how to use Material Graph and Node, as well as texturing techniques such as UV Unwrapping and Displacement, and lighting know-how to enable natural rendering using only KeyShot.
Redshift for differentiated quality with just a hint of difference
Using Redshift, a GPU-based renderer used by most famous overseas companies, we will implement effects that could not be expressed with KeyShot, such as lighting details including Volumetric Lighting, depth expression, and sampling, at faster rendering speeds.
How to create a sensuous product using light and camera properly
We will teach you everything from basic theories such as lighting, camera composition, screen composition, and proportion to make your product look attractive, as well as techniques and environment settings using KeyShot & Redshift's Custom HDRI and Physical Lighting.
Rhino modeling skills that cover everything from principles to core functions in one go
You will learn editing-oriented surface modeling, modeling using surfaces and match curves to implement accurate shapes, single-span surface modeling to smooth shading gradients, and plug-ins for smooth connection joints.
Know-how to utilize appropriate program for each situation for synergy effect
Learn how to use complex tools optimally suited to your situation so that you can increase quality and work speed by using only the necessary functions of various programs such as Rhino, Fusion 360, KeyShot, Redshift, Cinema 4D, and Photoshop.
Domestic and international employment and portfolio tips and SNS and Behance management methods
Industrial design studio BEBOP. Based on his experience as a co-founder and now the CEO of (acasso), he generously discloses his know-how for overseas employment, how to construct a 3D product design portfolio, and even the know-how for uploading to SNS and Behance for this purpose.
curriculum
curriculum
Show me the curriculum
SECTION 01. Intro
01.INTRO
- Speaker Introduction
- Why you need to build tool proficiency
- Class key points and curriculum introduction
SECTION 02. Mini LED Flashlight
02. Rhino basic settings and Keyshot scene settings 1
- Introduction to Rhino Work Flow
- Description of Aluminum Extrusion Process
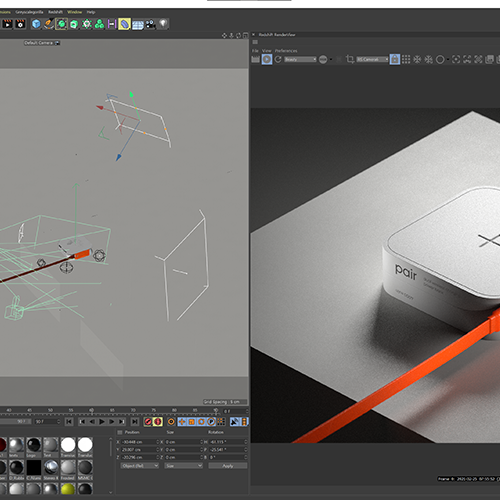
- How to move a model from Rhino to Keyshot using the Keyshot plugin
- How to set up KeyShot camera composition
- Setting KeyShot camera focal length and angle of view
- How to use KeyShot HDRI Editor
03. Keyshot scene settings 2
- Setting lighting using minimal pins in KeyShot HDRI Editor
- How to set up the Lighting tab
- Concept of Global Illumination
- How to create the desired product shadow style
04. Creating realistic materials using Keyshot Material Graph 1
- Description of the bead blasting process
- Description of the anodizing process
- Introducing a site/YouTube channel containing information on metal processes and manufacturing processes.
- How to use PureRef when creating materials in KeyShot
- Creating a Bead Blasted Aluminum material
- Try the Preview Color feature
- Try out various Noise Textures
- Create a Speckled Plastic material using Spots node
- Try using Gradient node
05. Creating realistic materials using Keyshot Material Graph 2
- Intentional Imperfection Rendering
- Applying Pollution Texture in KeyShot
- Create an invisible pollution effect using the Color To Number node
- Applying graphics using KeyShot’s Label function
- Express realistic printing effects with custom bump maps
- Setting up a render scene using KeyShot Studio features
06. Color variations
- Apply a square logo
- Change the color of applied graphics using the Color Adjust node
- Change the color of Spots using the Color Gradient node
07. Hudujeong
- Create Sharp Images Using Unsharp Mask in Photoshop
- Correct contrast by creating a Levels, Brightness/Contrast adjustment layer in Photoshop
- Save an enhanced image using Export As in Photoshop
08. Rendering using Scattering Medium material
- Description of KeyShot’s Scattering Medium material
- Expressing light trails using Scattering Medium material and Spotlight
SECTION 03. Wireless Charger
09. Concept of Single Span Surface Modeling
- Understanding the Single Span concept (Degree and Control Point relationship)
- How to distinguish between U and V directions in Rhino Surface
- Various Rhino surface modeling techniques
- Difference between Tangency and Curvature connection
- Differences between Rhino Sweep1 (one rail) and Sweep2 (two rail)
- Using Rhino Rail Revolve
- Aligning control points using Set XYZ Coordinates in Rhino
- Modeling Rhino Surfaces with Single Span
10. Wireless charger modeling 1
- Using PureRef when modeling Rhino
- Designing guidelines as a foundation for modeling
- Efficient modeling using Rhino Mirror and Polar Array commands
- Draw smooth corner lines using Rhino's Adjust Curve Blend feature
- Extract lines from surface edges using the Rhino DupEdge command
- Single Span Surface Modeling using designed guidelines
11. Wireless charger modeling 2
- Modeling the Rhino 'X' engraved symbol
- Apply fillet to wireless charger model
12. Wireless charger rendering
- Setting up layers for rendering
- Moving a model to KeyShot using the Rhino KeyShot plugin
- Create a Brushed Aluminum material using the Brushed node
- Apply Brushed Texture only to the side of the housing with Cylinder Mapping Type
- Masking a Brushed Texture Using a Color Gradient Node
- Import external textures into KeyShot Material Graph
- Create a soft suede leather material with a suede texture
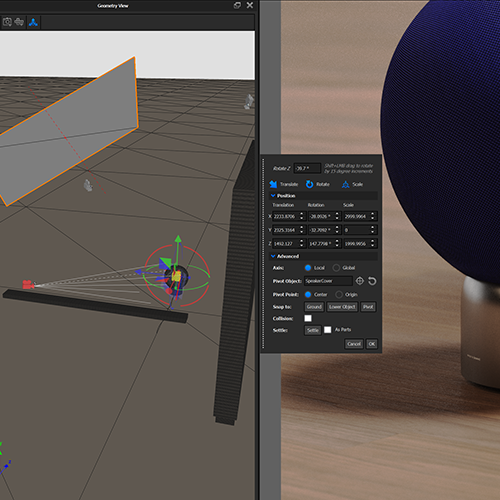
- Apply realistic engraved graphics to housing using the Displacement node
- Using KeyShot Geometry View and Snap to: Lower Object Features
- Render after setting up rendering
SECTION 04. Bluetooth Speaker
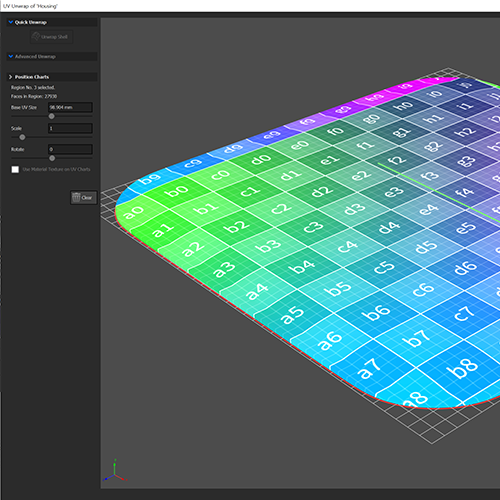
13. UV Mapping / Unwrapping
- Introduction and analysis of Bluetooth speaker examples
- What are U and V?
- UV Mapping/Unwrapping Concept
14. Rhino Modeling / Fabric Cover UV Mapping
- Cylindrical base modeling
- How to set housing thickness using the Shell command
- fabric cover modeling
- Try Fabric Cover UV Mapping
- Apply 2D Checker Texture to Understand UV Flow
- Learn about various UV Mapping types
- Unwrapping the fabric cover on the UV Plane
- Try editing the unwrapped mesh
- Mesh the Nurbs model using the Quad Remesh function.
- Create guide curves for a natural mesh topology
- Try Quad Remesh again using guide curves
15. Rhino Modeling / Metal Base UV Mapping
- Separate only the side surface of the base using Rhino's Explode command.
- Try UV mapping the separated side surface
- Mesh the side surface using the Rhino Mesh command and then transfer it to KeyShot.
- Apply Brushed Metal material in KeyShot
16. Power cable modeling / UV Mapping
- Model cables using Rhino’s History function and Pipe command.
- Sweep 1 - Cable modeling using the Rail function (How to specify Seam)
- Try UV Unwrapping of the Cable Model
- Apply Real Cloth material to cables in KeyShot
17. KeyShot Rendering: Material 1
- Setting Pin in HDRI Editor
- Try the Real Cloth material
- Customize the Weave Pattern of Real Cloth material
- Try 3D Ply on the Real Cloth material
- Making plastic material for speaker interior (using granite node)
- Expressing Silgis using the Scratches node
- Making a two-ply fabric cover
18. KeyShot Rendering: Material 2
- Applying a Brushed Texture to a Metal Base
- Placing product logo with KeyShot Label function
- Changing the color of the logo printed on the base using Opacity Map
- Apply subtle negative bumps to your logo using Bump Map
- Adjust the LED area using Gradient Type: Spherical in the Color Gradient node.
- Applying the power cable material
- Setting up a render scene using KeyShot Studio features
- Specify Render Layer
19. KeyShot Rendering: Post-Processing
- Create sharp images using Unsharp Mask in Photoshop
- Try adjusting the contrast by creating a Levels, Brightness / Contrast adjustment layer in Photoshop.
- Correct contrast by area using Clown Pass
- Save an enhanced image using Export As in Photoshop
SECTION 05. Gaming Mouse
20. Introduction to Gaming Mouse example
- Gaming mouse product design concept
- Gaming mouse model analysis
21. Rhino Advanced Surface Modeling 1: Original Model Analysis
- Analyzing the original 3D model using the Explode command and Untrim command
22. Rhino Advanced Surface Modeling 2: Upper Housing, Bumper, Bottom
- Model from scratch while referring to the original 3D model
- Create guidelines using just the required number of Control Points
- Grab a total of 4 edge curves with the Surface From 2, 3 or 4 Edge Curves command.
- Connect smoothly using the Match Surface command
- Align Control Points using the Set XYZ Coordinates command
- Cut modeling time in half using the Mirror command
23. Rhino Advanced Surface Modeling 3: Detail modeling, applying fillets using Fusion 360
- Fading Edge Surface Modeling
- Try Match Edges by Closest Points as an option in the Match Surface command.
- Applying a texture to the mouse wheel using the Polar Array command
- How to use Offset Curve for easy Control Point editing
- Placing LEDs on a curved surface using the Flow along Curve command
- Try applying fillets that are difficult to apply in Rhino using Fusion 360.
- Transferring 3D data from Fusion 360 back to Rhino
24. KeyShot Advanced Rendering 1: Advanced Material Graph
- Create complex materials using various Procedural Texture nodes in Keyshot Material Graph.
- Apply a custom pollution texture
- Try Cloudy Plastic material
- Applying various labels
25. KeyShot Advanced Rendering 2: Advanced Material Graph
- Express a disappearing spot pattern using the Color Gradient node in Keyshot Material Graph.
- Apply engraved detail to the side of the mouse using the Displace node
26. KeyShot Advanced Rendering 3: Camera and Preferences
- Try setting lighting with less than 2 pins in HDRI Editor.
- Highlight specific details using Depth of Field
- Setting up Studio
27. Photoshop post-editing 1: How to export multiple images at once
- Try basic correction
- Saving multiple images at once
28. KeyShot Advanced Rendering 4: Rendering with Props
- Place various props in the scene
- Applying wrinkled fabric texture
29. Photoshop Post-Editing 2: Correcting rendered images using props
- Try basic correction
- Select and correct only the parts you need using Clown Pass
SECTION 06. Cinema 4D & Redshift Rendering
30. Introduction to Redshift
- Why I became interested in renderers other than KeyShot
- Introduction to Redshift
- Examples of motion graphics work created using Redshift
31. Cinema 4D UI Description
- Cinema 4D basics and UI explanation
- Redshift basics and UI explanation
32. Cinema 4D & Redshift Rendering Demo 1
- Cinema 4D & Redshift Rendering Demonstration
33. Cinema 4D & Redshift Rendering Demo 2
- Cinema 4D & Redshift Rendering Demonstration
interview
What industrial designer Jongha Lee ha wants to say

Question.01
What are your strengths as an industrial designer?
What are your strengths as an industrial designer?
Through practical experience in Silicon Valley, USA , we specialize in designing products that can actually be mass-produced . We can share everything from the realistic design and modeling methods needed to launch a product to the know-how on using KeyShot and Redshift, which are optimized for high-quality rendering . We will not only help you handle tool functions well, but also help you apply any material or design concept and express it in your own style.
Question.02
What are the main points of this class?
What are the main points of this class?
By upgrading our rendering skills, we focused on shortening work time and producing the best quality efficiently . Rather than staying at the KeyShot level that can be met in existing domestic lectures, it also covers Redshift used in overseas practice, so you will be able to develop true rendering capabilities with minimal use of Photoshop . In addition, we have prepared to utilize only the core functions of tools such as Rhino, Fusion 360, C4D, and Photoshop to the fullest extent .
Question.03
What did you focus on when constructing the curriculum?
What did you focus on when constructing the curriculum?
We have prepared a curriculum with the goal of simply modeling, rendering, and post-processing products of our own design . In addition , we selected the actual product groups most commonly used in industrial design and composed examples that are highly usable and not too harsh to like or dislike so that you can learn practical techniques . In addition, we included all the detailed expressions that product designers like so that they can be expressed as tastefully as possible through each example.
Question.04
Who do you recommend this class to?
Who do you recommend this class to?
This is a lecture that teaches you from the basics to advanced modeling and rendering, which are the most difficult and necessary for industrial design professionals, so those who want renderings that look more like photos than photos , those who feel 2% of disappointment with the existing methods of using various tools , We plan to reveal the know-how we have accumulated over the past few years for those who have a thirst for product visualization and those who are concerned about sensuous production and expression of product design.
We will guide you through the program to use.
This class is conducted using the tools specified below.
– Rhino 7
– Fusion 360
– Keyshot 10
– Redshift v3
– Cinema 4D R23
– Photoshop CC
* Rhino 5, Keyshot 9, Redshift v3, Cinema 4D R20, Photoshop 2016 or later are recommended.
* Programs and materials are not provided separately.