Details
Introducción
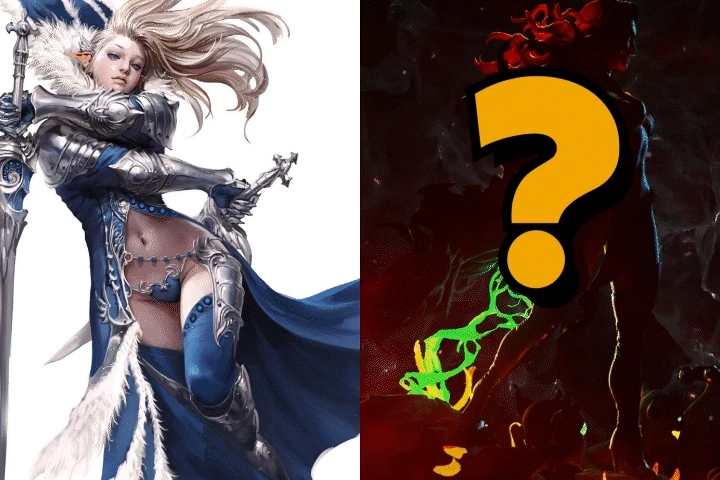
Modelado 3D de siguiente nivel: Traduciendo el 2D a mundos Unreal
¡Supera tus límites convirtiendo conceptos 2D en impresionantes modelos 3D! SoMuch3D, un artista digital experimentado con más de 20 años de experiencia en diseño de personajes 3D, está listo para enseñarte todo lo necesario para crear modelos 3D épicos con un método único y práctico. Este curso es el siguiente paso ideal para estudiantes con conocimientos y habilidades básicas de modelado 3D, ofreciendo orientación práctica sobre cómo integrar Unreal en su proceso creativo. Al finalizar el curso, estarás listo para crear personajes 3D profesionales de alta calidad en tu portafolio.
¿Estás familiarizado con el proceso de creación 3D pero no sabes qué hacer a continuación? ¡Este curso es el siguiente paso perfecto para ayudarte a avanzar con confianza! A medida que la industria del diseño evoluciona rápidamente, es esencial que diseñadores como tú se mantengan a la vanguardia con habilidades avanzadas. SoMuch3D ha creado esta CLASS para aquellos listos para desafiarse a sí mismos transformando diseños 2D en modelos 3D completamente realizados a través de Unreal. Aprenderás a modelar, texturizar y presentar eficientemente un personaje 3D basado en arte conceptual 2D, todo mientras mantienes la integridad y originalidad de tu diseño durante todo el proceso. Al final, estarás equipado para crear piezas de portafolio sólidas y dar vida a tus personajes con personalidad y propósito. ¡Aprende modelado 3D desde una Perspectiva completamente nueva y comienza a crear personajes que realmente destaquen!
Beneficios de CLASS
Regalo especial de SoMuch3D
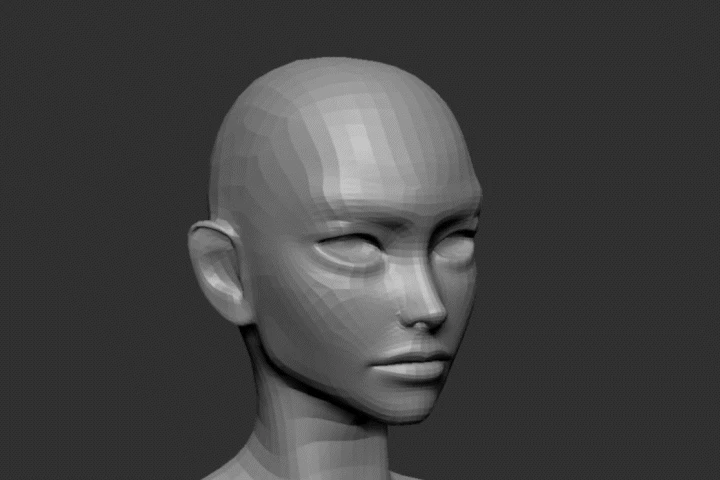
Malla de base de inicio
Esta es la malla con la que empezaremos en ZBrush. Tiene una geometría clara y un buen punto de partida.
Malla retopologizada con UV
- Esta malla será lo que usaremos zwrap para envolver a nuestro personaje una vez que tengamos las proporciones y la forma final de la anatomía de nuestro personaje.
- Una vez envuelto, proyectaremos cualquier detalle y subdivisiones a nuestra nueva malla con UV.
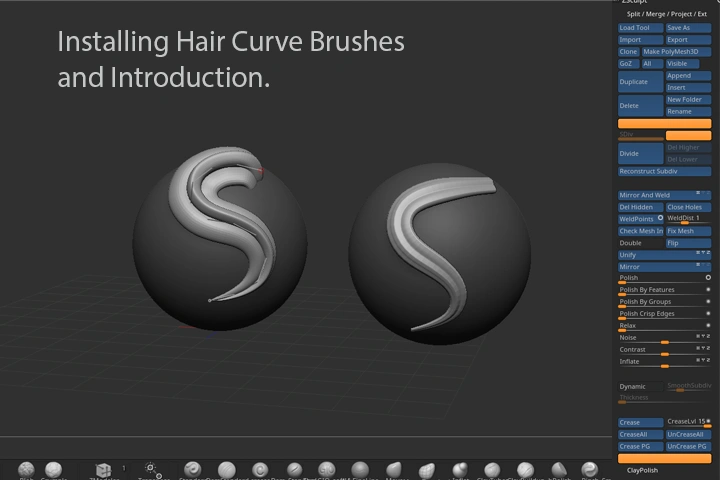
Enlaces al set de pincel
- Lugares donde nuestros estudiantes pueden encontrar pinceles, pinceles IMM y pinceles de curva de cabello que necesitaremos para nuestro proyecto
Archivo de referencia
- Un archivo pureref que contendrá material de referencia que he creado para brindarnos una comprensión sólida de nuestro objetivo y pautas.
Recomendación
¿Quién debería tomar esta CLASS?
Artista 3D de nivel intermedio
Artistas de personajes de nivel principiante a medio que buscan perfeccionar su proceso y aprender los mejores métodos para adaptar un concepto de personaje 2D a 3D. Si entiendes el proceso y el proceso, pero buscas alcanzar el siguiente nivel de competencia, ¡únete a mí!
¿Necesita una pieza sólida para su cartera?
¿Quieres mejorar tu portafolio? Te ayudaré a crear un portafolio impactante, brindándote los conocimientos y consejos para que destaque entre la multitud. Aprende los mejores métodos para presentar tu trabajo y evita errores comunes que pueden debilitarlo o distorsionarlo.
¿Quieres familiarizarte más con las mejores herramientas?
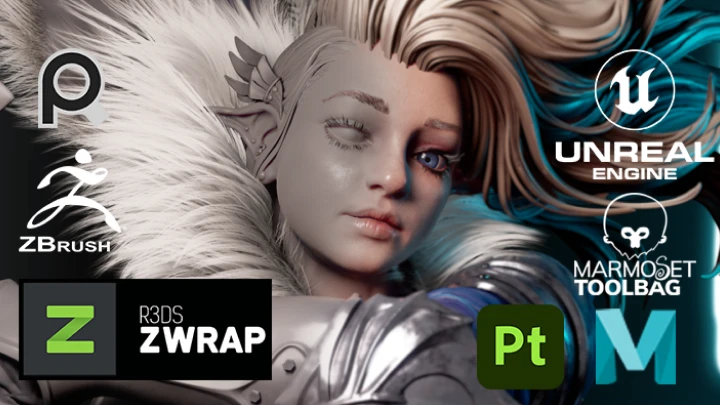
Familiarízate con las aplicaciones líderes de la industria: En este curso, adquirirás experiencia práctica con las aplicaciones de creación de personajes 3D más utilizadas. Estas son las herramientas esenciales que todo aspirante a artista de personajes necesita conocer.
Portafolio del artista 3D experto SoMuch3D
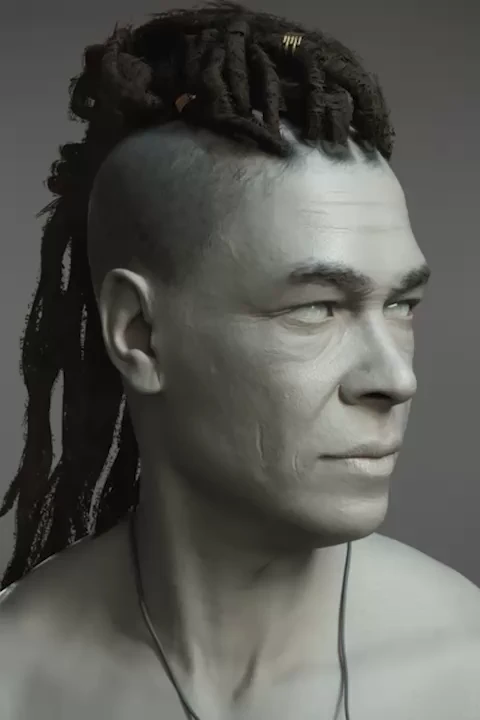
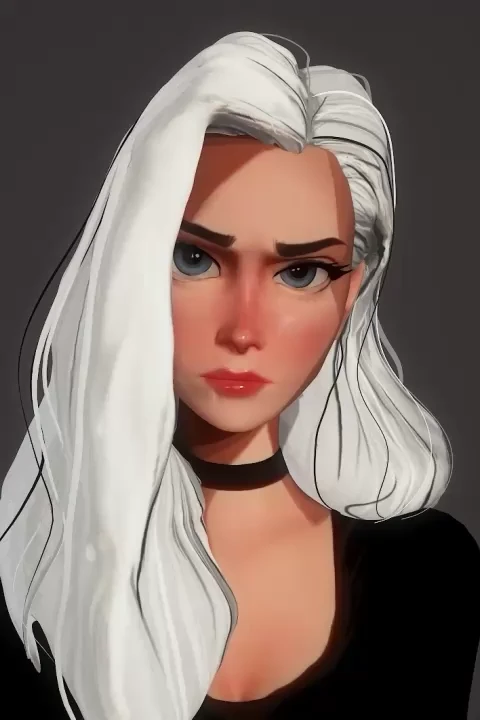
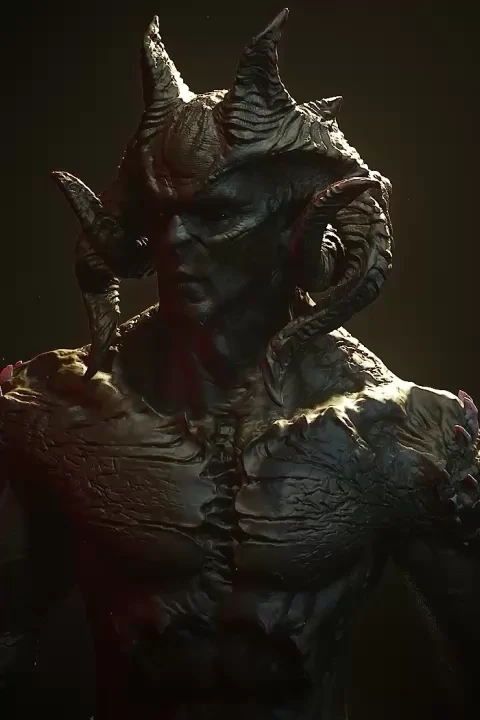
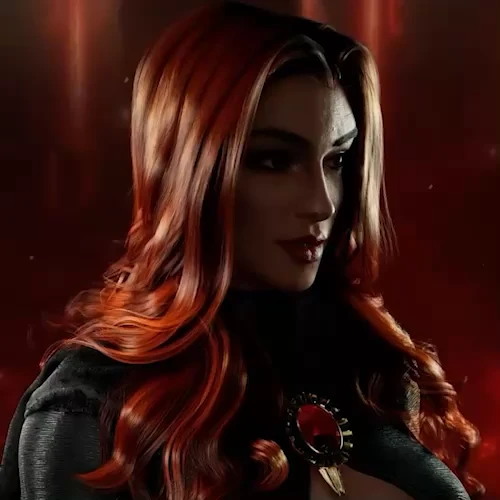
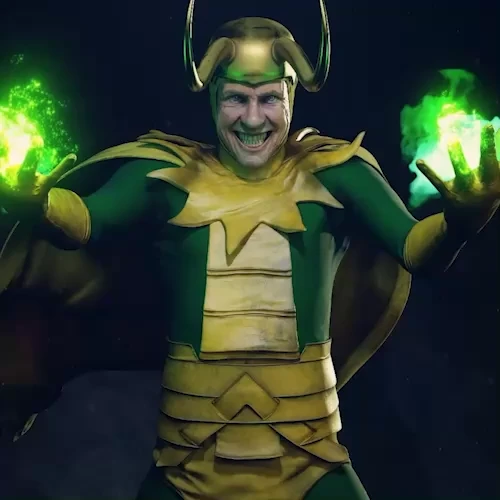
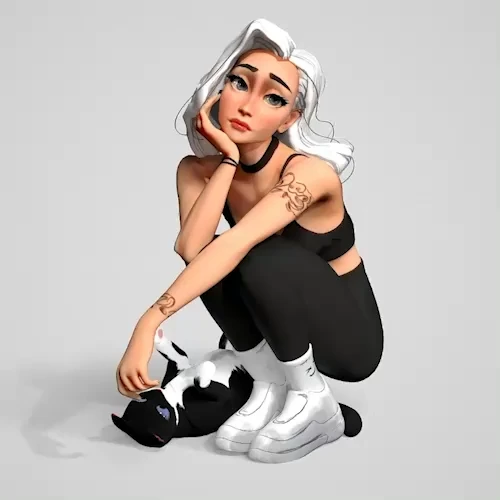

*Este Portfolio incluye fanart.

Mejora tus personajes: modelado 2D a 3D con escultura profesional
La capacidad de usar múltiples programas puede ser una habilidad clave para los diseñadores a lo largo de sus carreras. SoMuch3D ha creado el curso perfecto para ayudarte a dominar Unreal, una herramienta líder en la industria para la creación de contenido 3D, y a dar vida a tus diseños 2D en 3D con confianza.
Este curso te guiará a través de todo el proceso de creación de un personaje 2D y su delicada traducción a 3D, sin perder nada del encanto del diseño original.
Este curso te guiará a través de todo el proceso de creación de un personaje 2D y su delicada traducción a 3D, sin perder nada del encanto del diseño original.
Nos centraremos especialmente en esculpir y texturizar elementos detallados como prendas, armaduras y cabello, creando un modelo de alta calidad de arriba a abajo y preparándolo para la integración con Unreal .
Este curso será un punto de inflexión para quienes estén listos para salir de su zona de confort y expandir sus límites creativos. En el panorama creativo actual, en constante evolución, son los diseñadores audaces y bien preparados los que realmente destacan.
Este curso será un punto de inflexión para quienes estén listos para salir de su zona de confort y expandir sus límites creativos. En el panorama creativo actual, en constante evolución, son los diseñadores audaces y bien preparados los que realmente destacan.
Prepárese para el mundo real
16 ejercicios de CLASS
6 ejercicios de modelos de alta poligonización
-
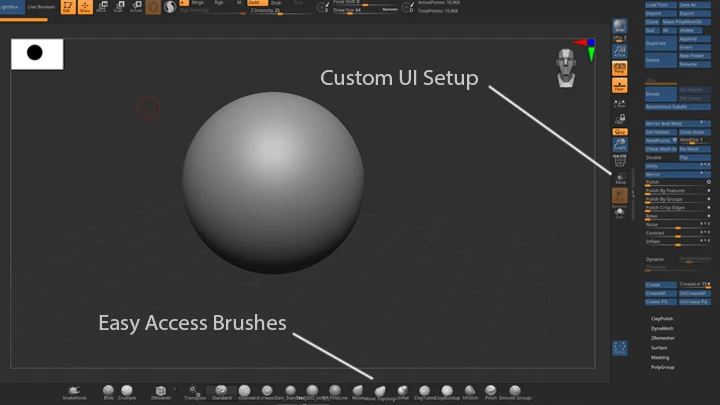
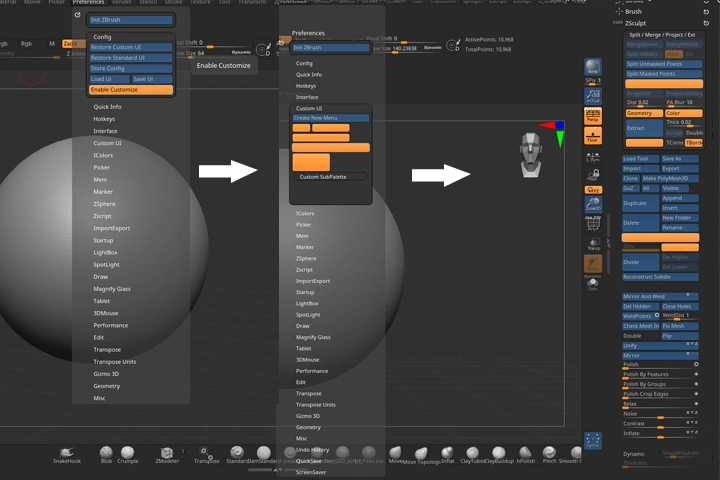 Interfaz de usuario de ZBrush
 -
 ZBrush
 -
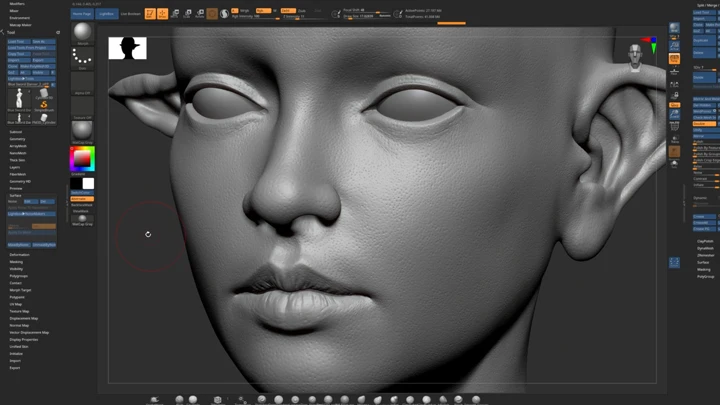
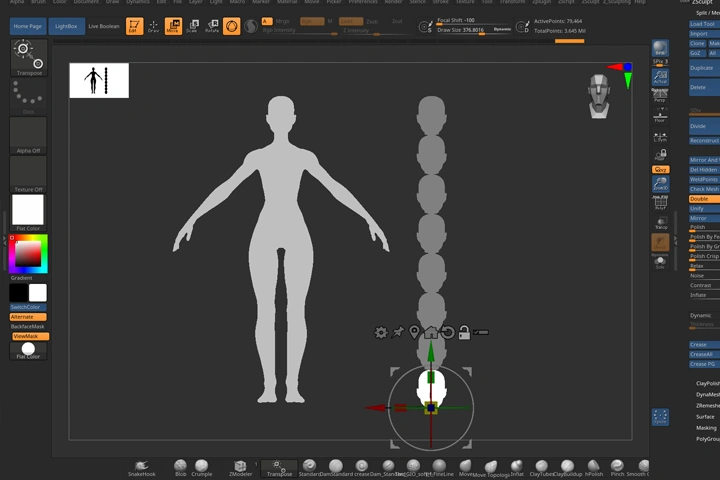 Proporciones anatómicas
 -
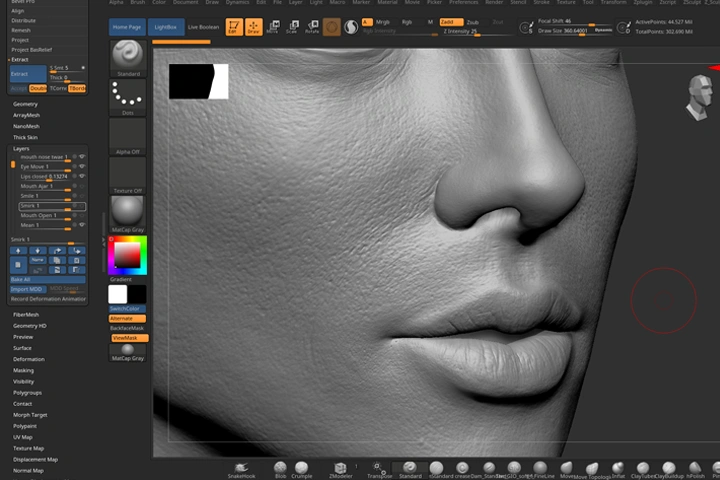 Detalles terciarios
 -
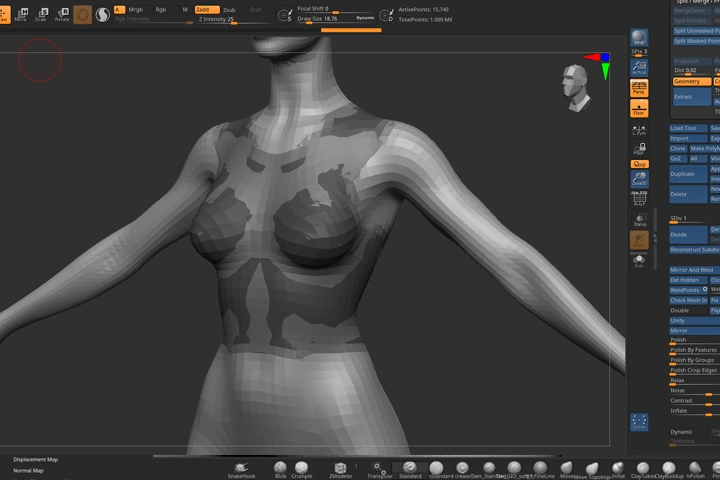 Bloqueo de ropa
 -
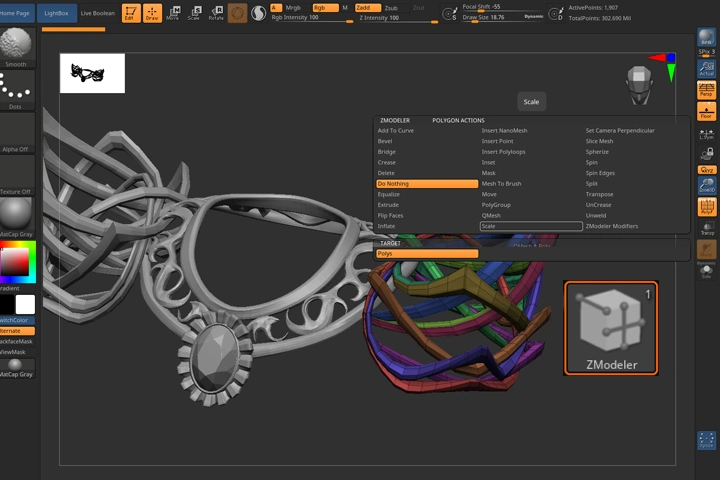 Zmodeler
3 ejercicios de modelos de baja poligonización
-
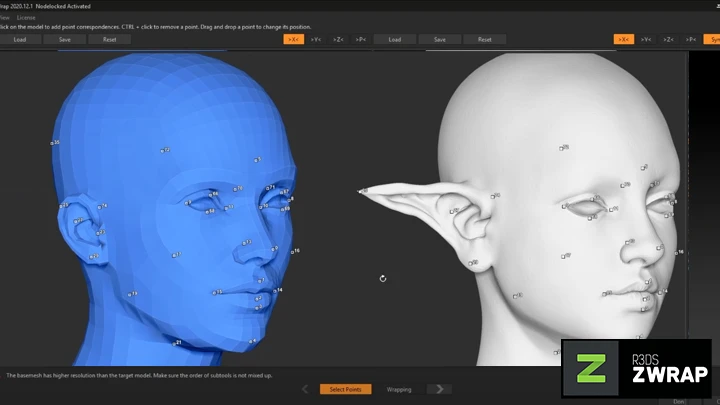
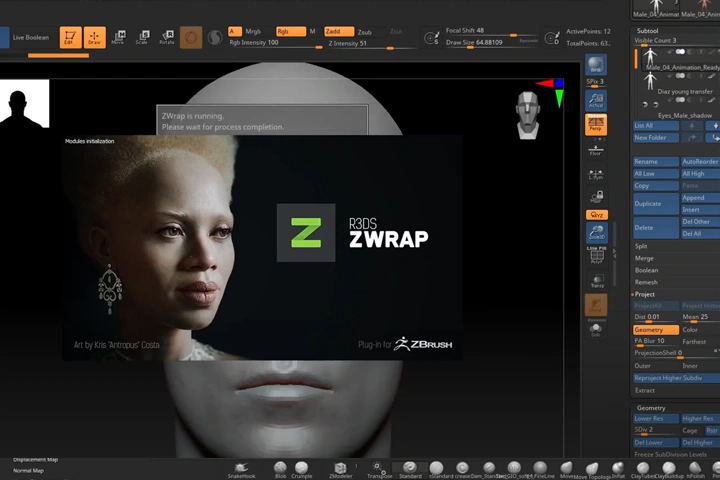 Zwrap
Zwrap -
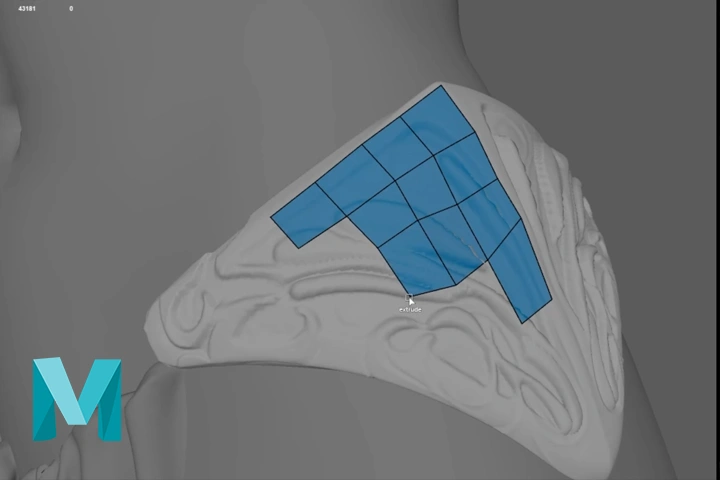 Retopología
 -
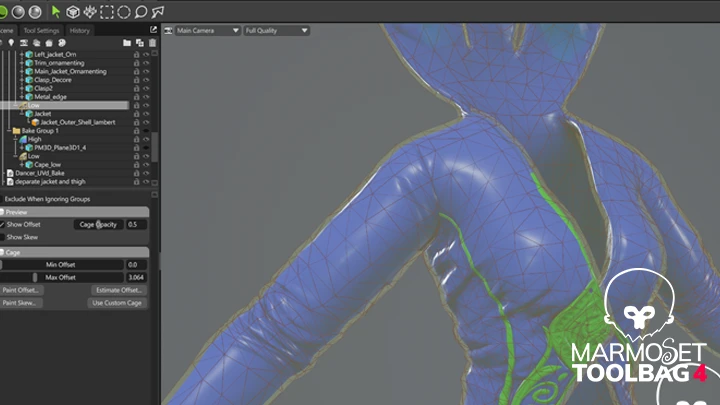
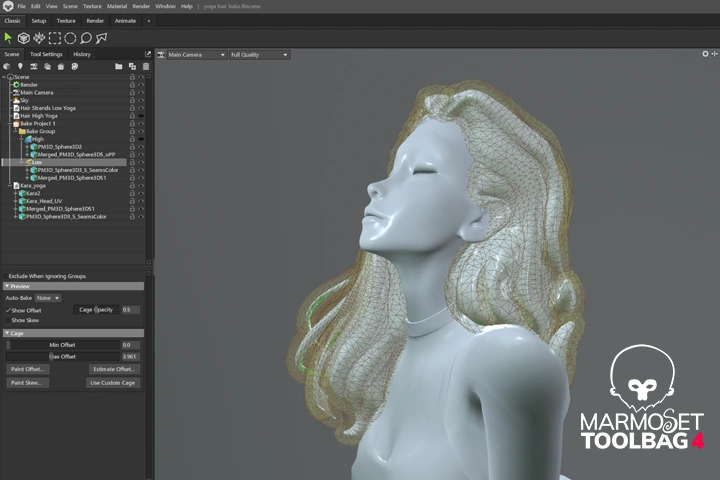 Hornada
4 ejercicios de Posado y peinados
-
 Transposición maestra
 -
 Tela Posado
 -
 Bloqueo de cabello en
 -
 Esculpir el cabello
3 ejercicios de Xgen, UE y Shader
-
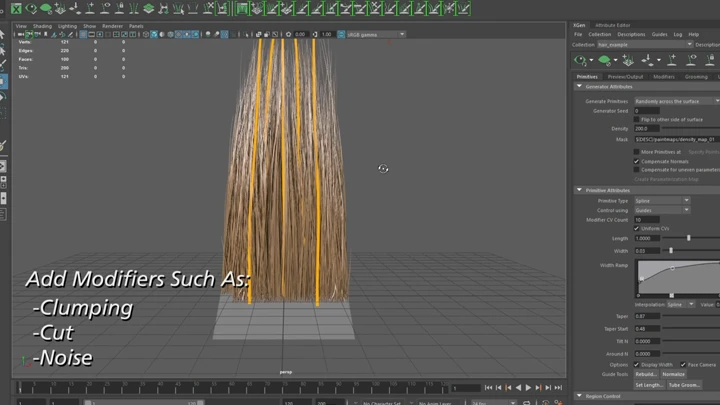
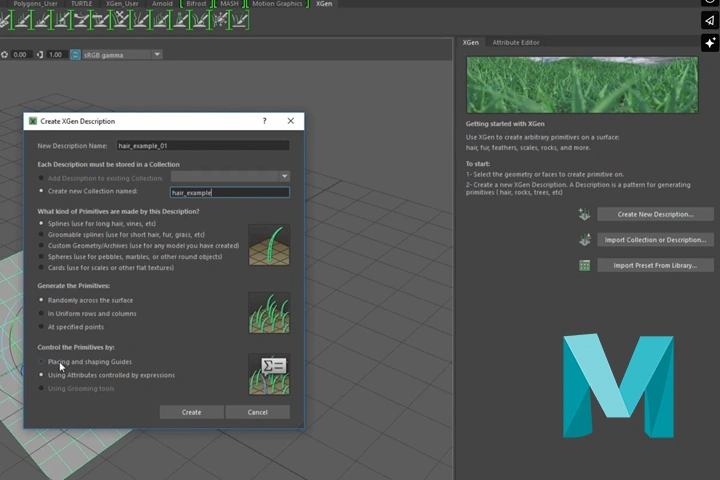 Xgen
Xgen -
 Introducción a Unreal
 -
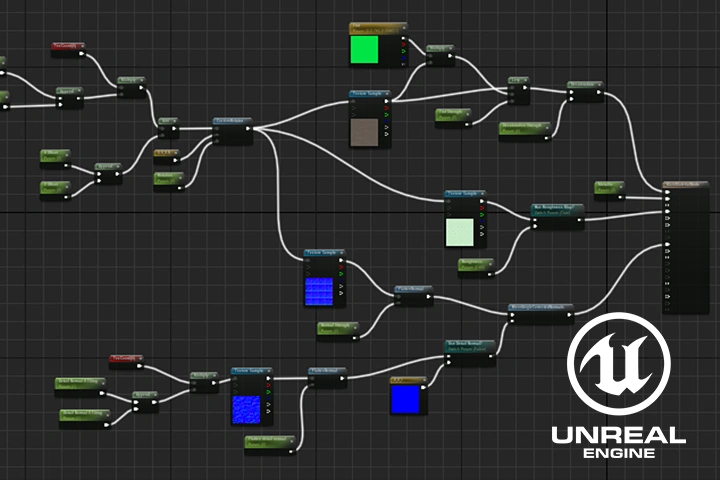 Creación de sombreadores
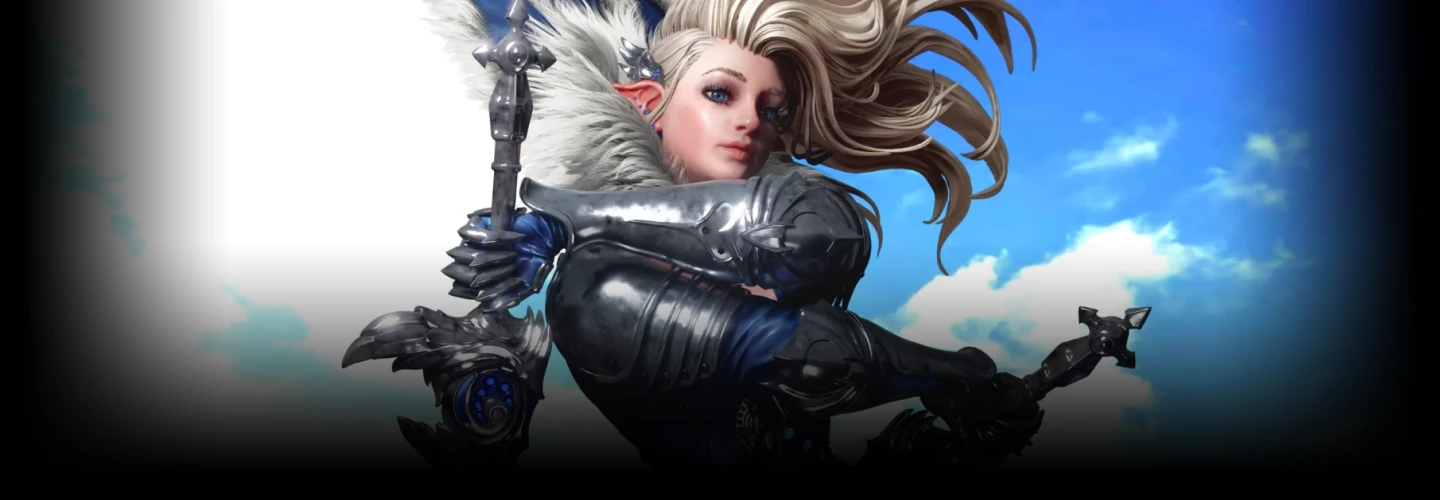
Ejemplo de producto final
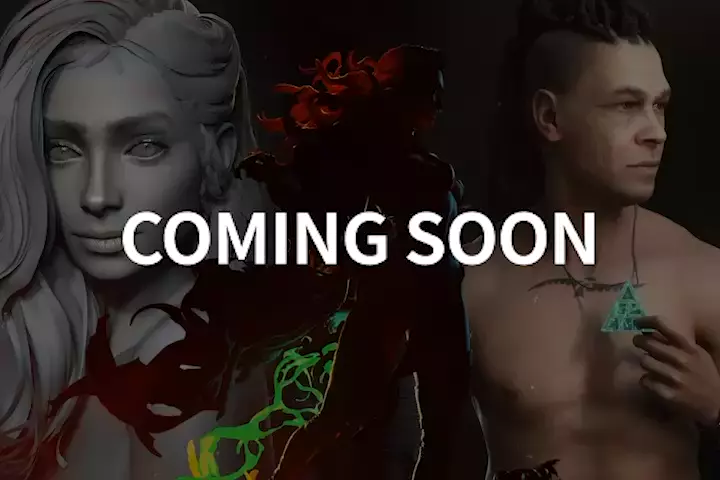
Figura imprimible en 3D del bailarín de espadas azul de Erak Note
*La imagen de arriba es una muestra para una mejor comprensión.
Destacado
Destacado de la CLASS
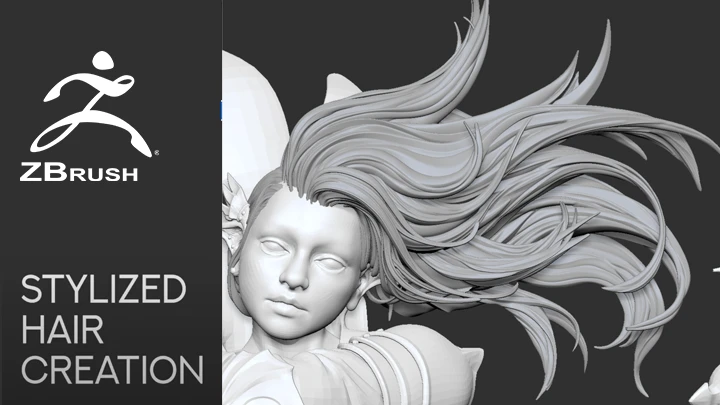
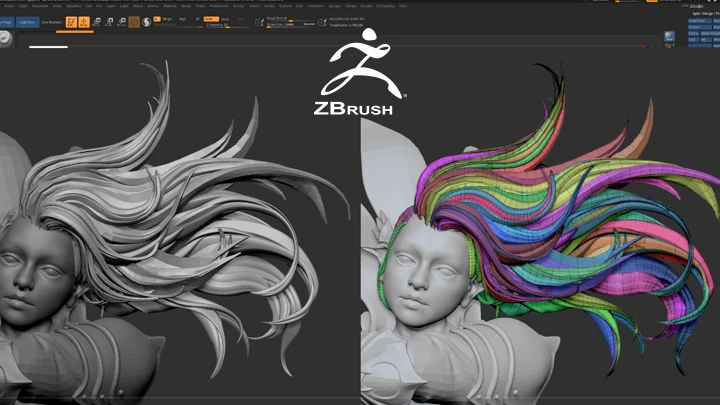
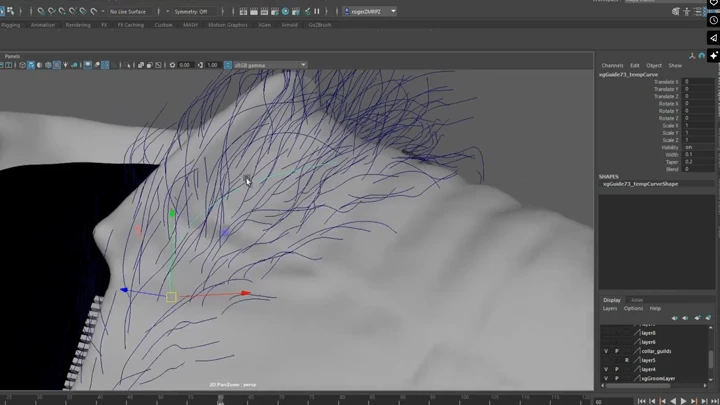
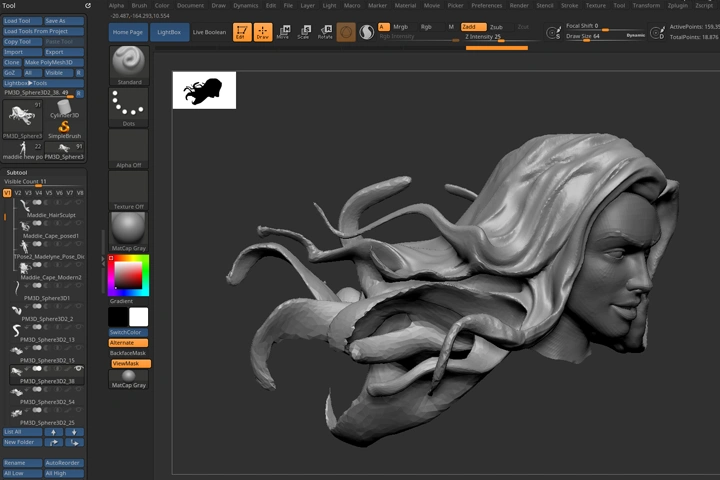
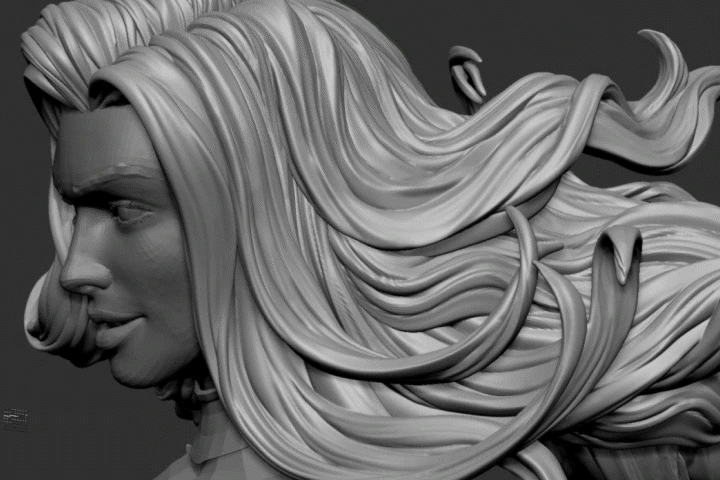
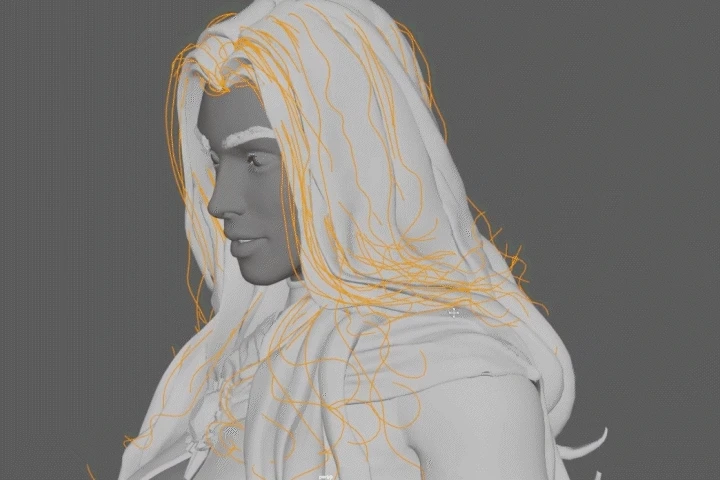
Esculpir el cabello requiere tiempo y planificación.
¿Cómo esculpes el cabello para emular su flujo y anatomía natural? Planifica tu enfoque para obtener mejores resultados. Usar una malla de bloqueo en la fase inicial y luego dibujar curvas para los pinceles IMM es clave para lograr este look. A continuación, vuelve a mallar y añade detalles manuales. Saber dónde empezar, terminar y reiniciar las líneas que terminan y replican el cabello individual y los grumos es clave.
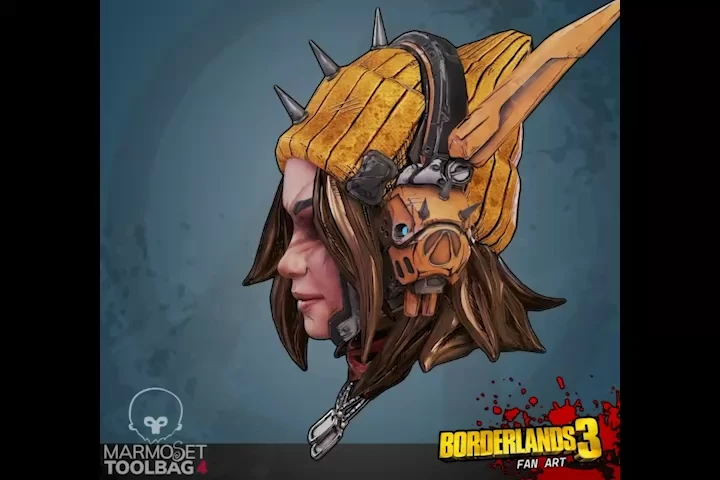
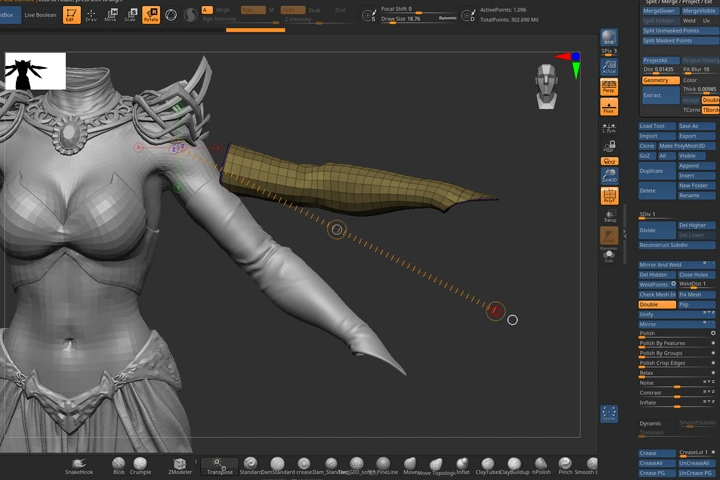
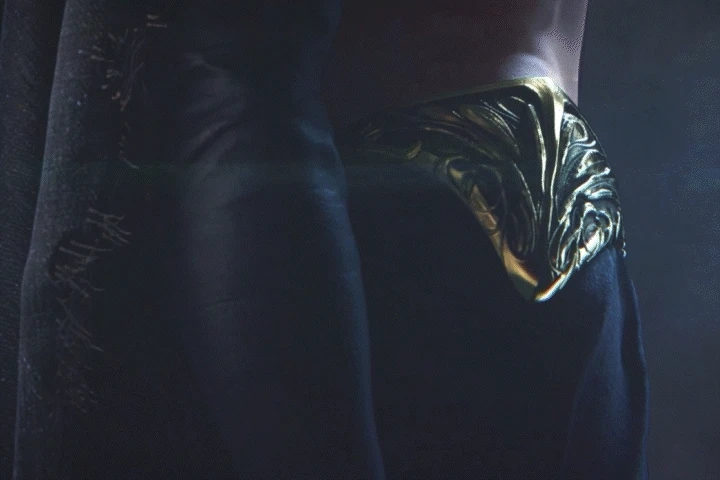
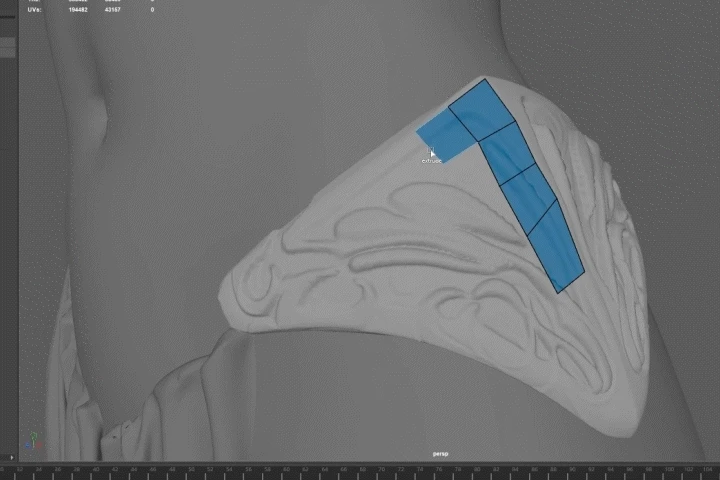
Modelado de armaduras y superficies duras
El modelado de superficies duras es una de esas habilidades que resultan intimidantes en ZBrush. ¿Cómo crear bordes perfectamente nítidos con una fluidez orgánica sin que se vean borrosos ni inconsistentes? ¿Cómo mantener la geometría limpia y, al mismo tiempo, obtener detalles de alta resolución? Planificar, estudiar nuestra referencia y usar Zmodeler nos ayudará a set una base sólida para crear la armadura, las armas y la ornamentación de nuestro concepto.
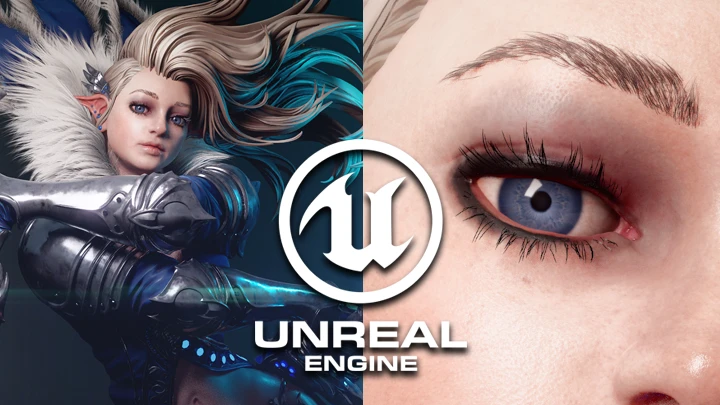
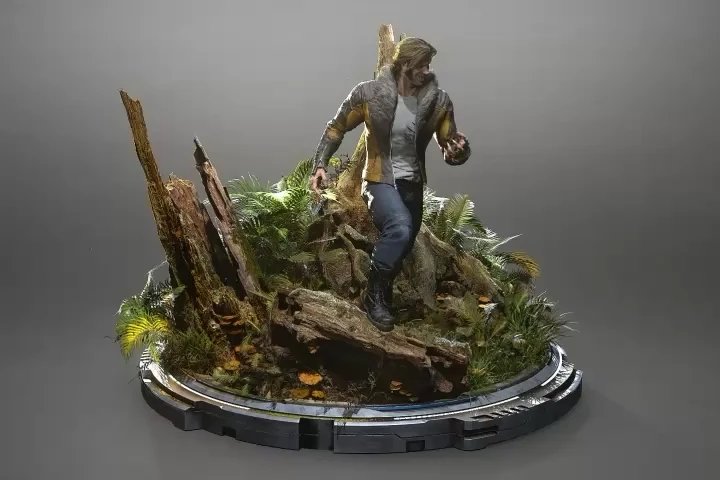
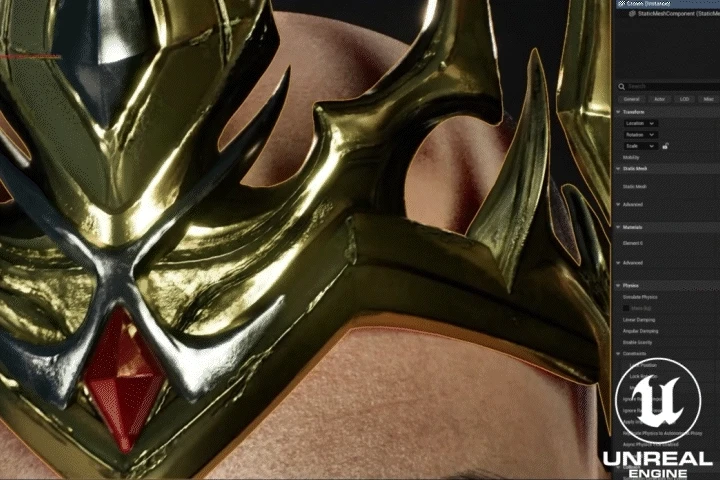
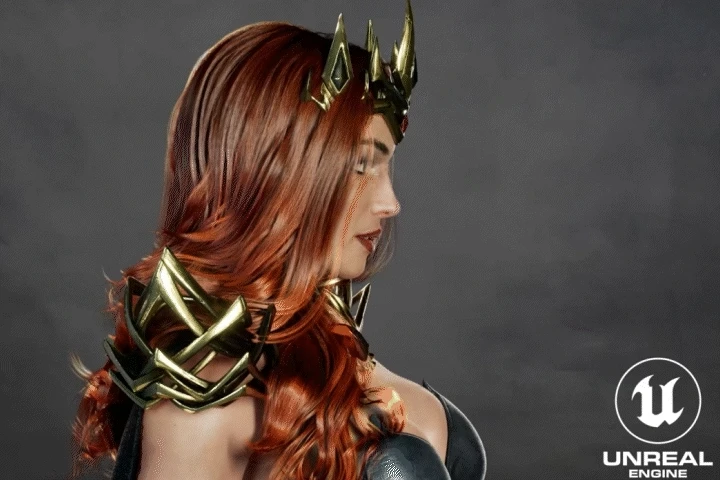
Resultados cinematográficos en tiempo real
Al configurar nuestra escena en Unreal y añadir las luces clave con nuestros nuevos shaders, nuestra creación 3D cobra vida. Gracias al poder de Unreal Engine y al trazado de rayos en tiempo real, los resultados hablan por sí solos.
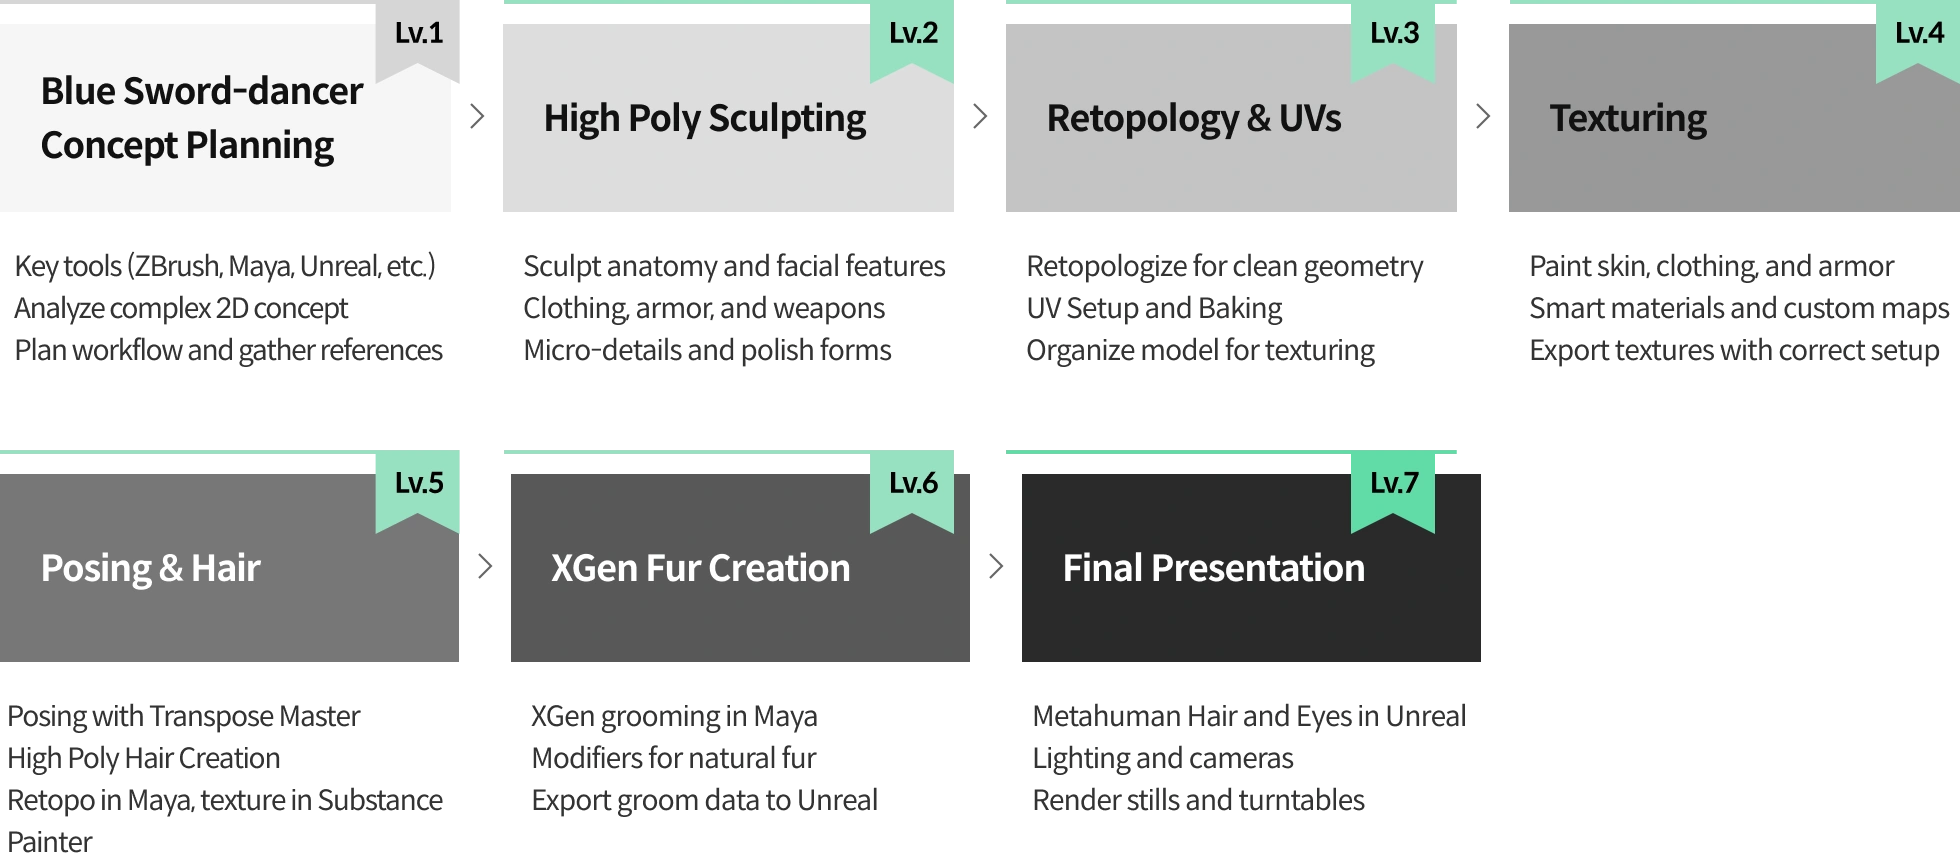
Roadmap
La enciclopedia completa sobre cómo convertir un concepto complejo 2D en una figura 3D semirrealista
Instructor
Artista 3D
Mucho3D
Hola amigos. Soy SoMuch3D, un veterano del arte digital con 20 años de experiencia. Si bien he trabajado en múltiples plataformas y disciplinas, la creación de personajes es mi pasión y en lo que siempre he destacado.
Durante los últimos 20 años, he tenido el privilegio de trabajar y colaborar con algunos de los artistas y desarrolladores más talentosos en algunas de las franquicias más populares de la cultura pop, los medios y los videojuegos. Empecé principalmente como animador, pero siempre disfruté de todo el proceso creativo de crear un personaje, desde el concepto hasta el fotograma clave final y la presentación. Para mí, la narración visual a través de un personaje es uno de los elementos más atractivos e impactantes del arte. Se puede transmitir la historia de una vida con una sola expresión. A lo largo del camino, adquirí diversas habilidades, técnicas y métodos para crear personajes con prácticamente todas las aplicaciones y herramientas que ofrece la industria.
Estoy definiendo y perfeccionando mi proceso y mi flujo de trabajo. Ha sido todo un viaje. A lo largo de este camino, he adquirido y desarrollado mis habilidades como artista y me gustaría compartirlas con ustedes. ¿Qué son el arte y la experiencia sin compartir? Dicho esto, espero no solo compartir mi proceso, sino también colaborar con ustedes durante este curso. Este curso está diseñado para brindarles un punto de partida sólido para comenzar a crear un personaje de inmediato. Además, incluiré algunos recursos para facilitar el proceso. Ahora, tomemos un concepto épico y demosle el tratamiento 3D que merece.
Artista 3D, SoMuch3D
[Actual]
Artista principal de personajes como Loric Studios
[Anterior]
Artista de personajes sénior en Final Strike Games
Director creativo / Artista 3D principal en FuelFX
Responsable de medios digitales y animación en Baker Hughes
Artista ambiental en TimeGate Studios
Artista de personajes/animador en Pi Studios
Proyectos y premios
Títulos enviados:
- Call of Duty Black Ops
- Bomberman (Xbox Live)
- Bonk: Al borde de la extinción
- Banda de rock Beatles
- Banda de rock 2
- Wolfenstein 2008
- Aliens: Marines Coloniales
- La rueda del tiempo (Temporada 1)
- Almas perdidas (Steam)
Detalles de la CLASS
Aprenderás
-
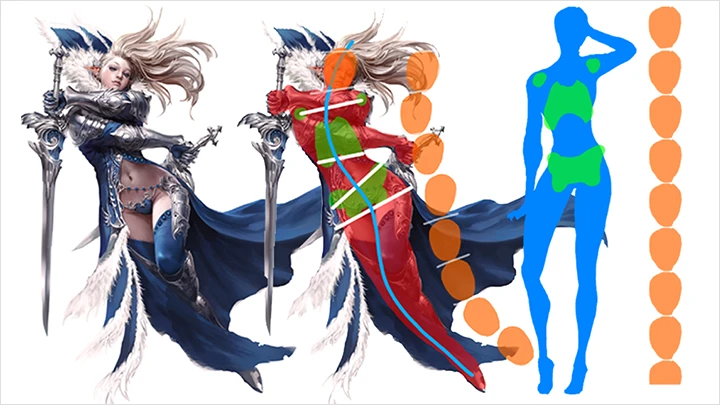
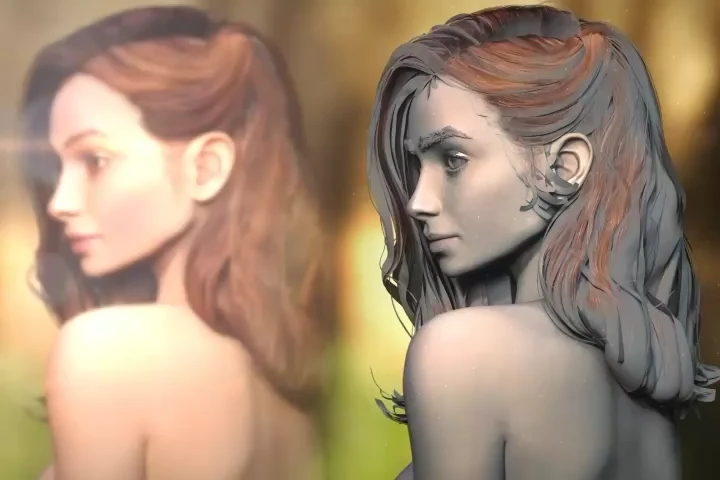
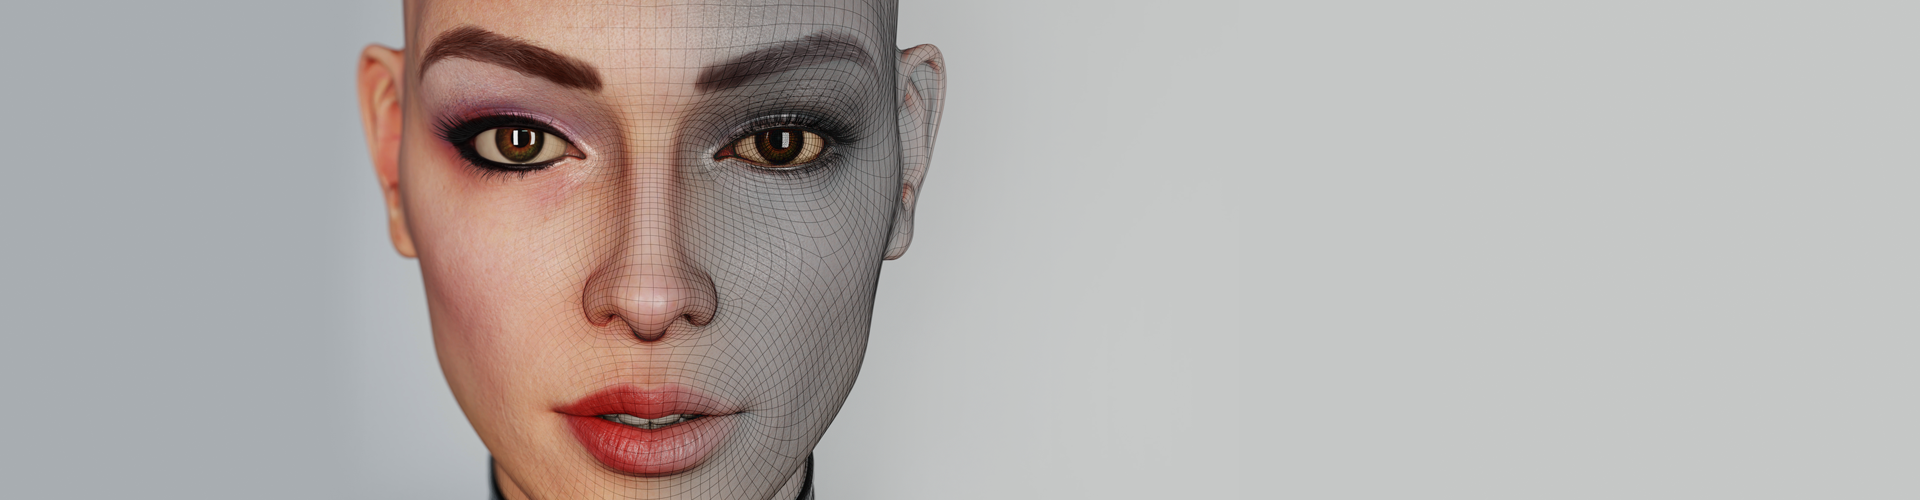
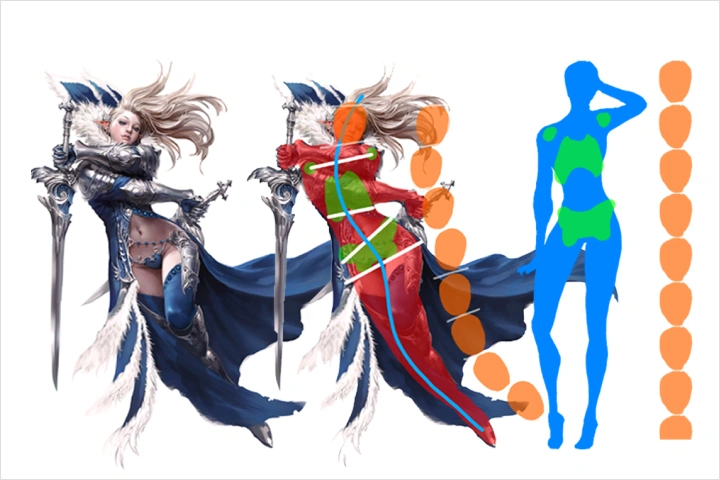 Entendiendo y diseccionando nuestro concepto / Anatomía estilizada del personajeObservar, identificar y planificar nuestro proyecto es la clave del éxito. No dedicaremos ni un solo minuto a la ejecución de este proyecto sin tener una idea o un método de ejecución. Entendemos que, a pesar de nuestro concepto estilizado, seguimos respetando los fundamentos de la anatomía humana. Podemos tomarnos libertades para adaptar un concepto 2D a 3D, pero nos mantendremos fieles a su esencia y al diseño inicial.
 -
 Creación del modelo de alta resoluciónModelaremos y esculpiremos nuestro personaje completo, desde el modelado orgánico hasta el modelado de superficies duras. Usaremos Zmodeler para aprovechar al máximo ZBrush y crear la mayor parte del modelo en alta resolución. Practicaremos los fundamentos de la geometría limpia para obtener los mejores resultados y crearemos el esculpido del cabello en alta resolución.
 -
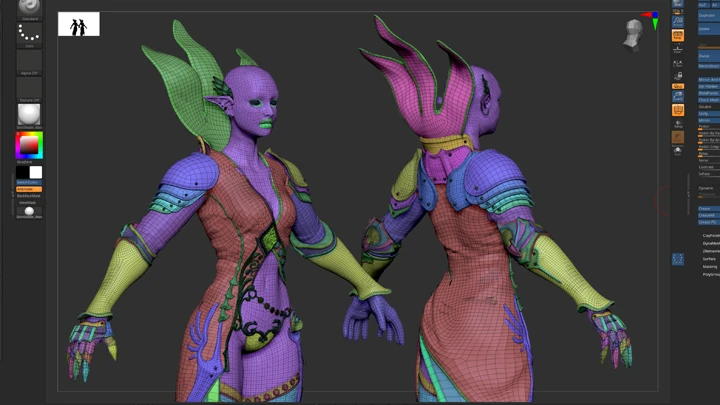
 Creación del modelo de baja resoluciónAquí es donde aplicamos nuestras disciplinadas habilidades para crear geometría de flujo de bordes ideal para animación o publicación. Aplicamos el Z-Wrap a nuestro modelo de baja resolución con topología y UV perfectos. También crearemos el modelo de baja poligonización para el resto del modelo usando dibujo cuádruple en Maya. A continuación, aplicaremos el mapeo UV al personaje.
-
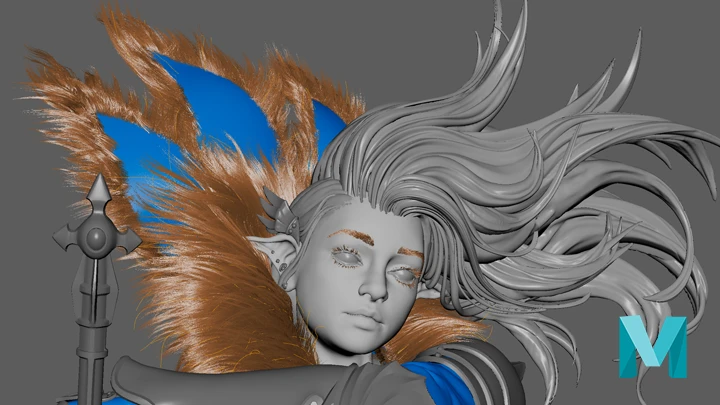
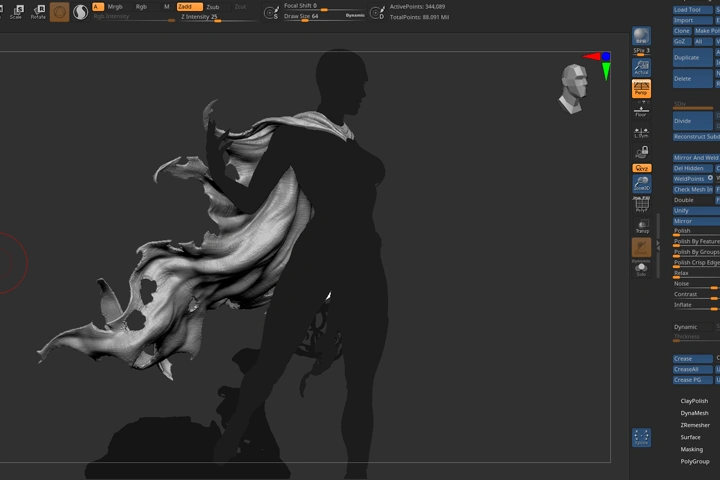
 Posado, Trabajo Xgen y Creación de PrendasCon nuestro nuevo modelo de baja resolución, posaremos a nuestro personaje. Usando la geometría posada, introduciremos Xgen en el proyecto para crear el pelaje. Finalmente, crearemos la mitad inferior de la capa/prenda, que fluye dinámicamente.
 -
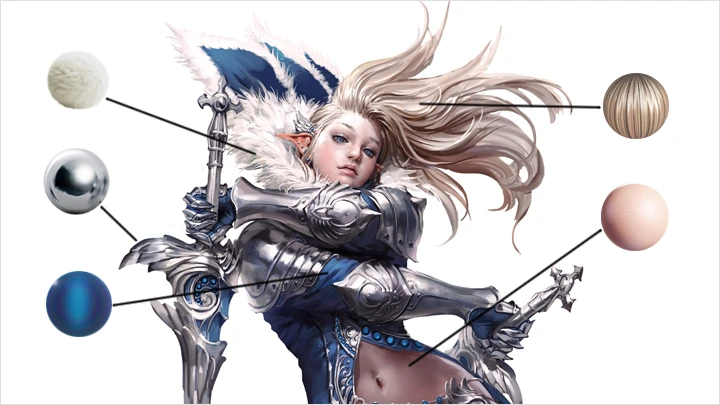
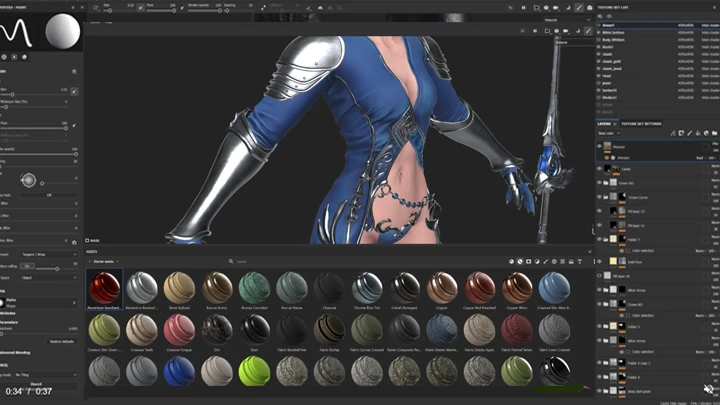
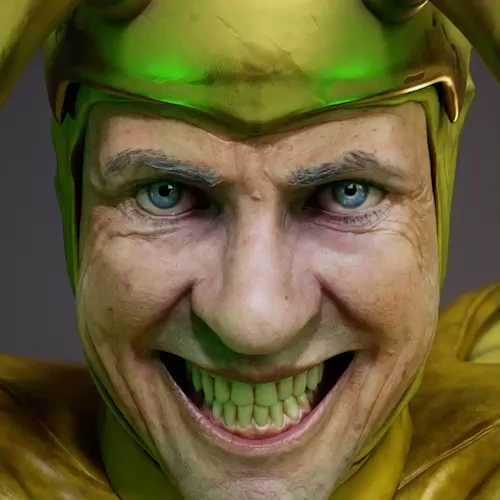
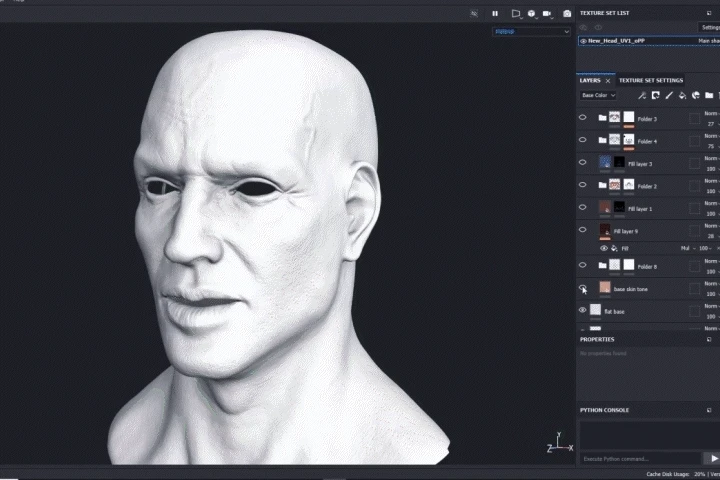 Creando las texturas para nuestro personajeTras hornear nuestras texturas a nuestra geometría de baja resolución, es hora de usar Substance Painter. Aquí, tomaremos toda la información de nuestro concepto y capturaremos los colores y las texturas de los materiales que percibimos.
 -
 Presentando nuestro personaje en Unreal EngineFinalmente, trasladaremos todos nuestros modelos y texturas a Unreal. Aquí, crearemos todos los shaders, set la escena y la Iluminación , y presentaremos nuestro trabajo en tiempo real con raytracing.
- Unlimited Access
- Best Price
Buy now, get unlimited access.
07/06 (Mon) (UTC-7) Special offer ends soon.
This special offer ends soon.
Buy now and save!
Entrevista con
Artista 3D, SoMuch3D

Pregunta.01
¿Por qué elegiste este tema específico?
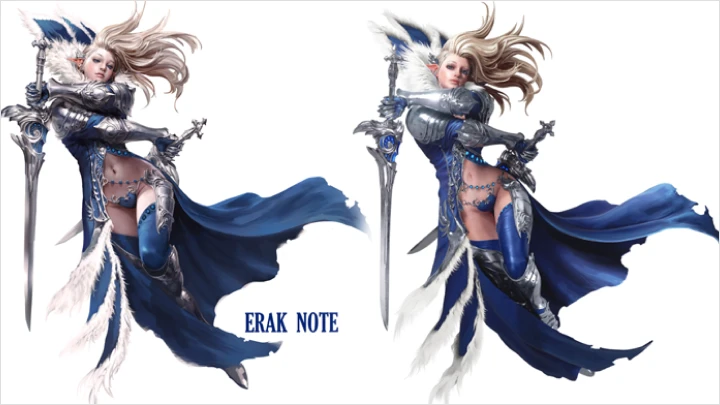
Como aficionado al arte, siempre busco inspiración y referencias para mi próximo trabajo personal. No solo como un reto, sino como una forma de mostrar respeto y homenajear a algunos de los artistas que admiro. Dicho esto, vi la oportunidad perfecta para tomar un rico concepto 2D de un artista increíble e interpretarlo en 3D. Quería tomar una pieza que representara múltiples disciplinas y compartir al máximo mis técnicas y métodos en el proceso. Esto ofrece a cualquier persona con conocimientos intermedios y prácticos del proceso 3D una vía para adaptar arte conceptual épico como el de Erak Note.
Pregunta.02
¿Cuáles cree usted que son los rasgos más importantes para tener éxito en su industria?
En los últimos 20 años de trabajo como artista digital profesional he llegado a ver el cambio. El cambio en la industria, el cambio en las tendencias de consumo, los cambios en la tecnología, uniforme los cambios en mi Perspectiva es lo que realmente hacemos como creativos y desarrolladores. Sin embargo, con el tiempo he visto ciertas constantes y variables que permanecen. Pasión, ética de trabajo, mentalidad abierta, habilidades para resolver problemas y la insaciable necesidad de ser el mejor o mejor que tus habilidades actual . Todos los que he conocido que duraron o prosperaron en esta industria tenían todos o la mayoría de estos rasgos. El talento no lo es todo. Es una certeza que tendrás que ser apasionado por tu viaje, tendrás que trabajar más duro que nadie, y eso no garantiza el éxito. Tendrás que adaptarte, aprender nuevas habilidades y aprender a resolver los muchos problemas o dilemas creativos y técnicos que encontrarás mientras te desafías a ti mismo para ser el mejor. Puedo decir con confianza que una persona inteligente y dispuesta a aprender nuevas habilidades para resolver problemas, siempre tendrá un lugar en un equipo. Además, estate abierto a las críticas. Aceptar y aceptar la retroalimentación es importante y es el camino hacia la mejora. Finalmente, acepta que nunca estarás satisfecho con tus habilidades o destrezas actual . Por muy bueno que seas, aún puedes mejorar. Tienes que profundizar, mirar dentro de ti, analizar tu trabajo con detenimiento y esforzarte por mejorar. En esta industria no hay lugar para aficionados. Esto debe ser tu motivación y tu pasión.
Pregunta 03
¿Hay algo más que le gustaría compartir con sus estudiantes?
El camino para convertirse en un artista 3D exitoso es difícil, sin importar la industria en la que te dediques. No es para aficionados ni artistas ocasionales. Sin embargo, creo que cualquier sacrificio que valga la pena para ser excepcional, merece el esfuerzo. No hay un camino set y el camino de cada persona puede ser diferente, pero requiere una comprensión temprana que todo artista o desarrollador debe conocer. Este simple hecho: en cualquier momento, hay miles de personas buscando los mismos trabajos y con la esperanza de tener una carrera exitosa como artistas 3D. Piénsalo. ¿Qué estás dispuesto a hacer para ser el que triunfe? ¿Qué harás para ser excepcional en lo que haces? Sé mentalmente fuerte, cree en ti mismo y siempre trabaja para mejorar. Comparte tu trabajo, sé siempre receptivo a los comentarios y estate dispuesto a empezar de cero. Te garantizo que tu trabajo mejorará con la repetición y la práctica. ¡Ahora sal y sé excepcional! ;-)
Programas requeridos
Este curso utilizará PureRef, ZBrush.2022, Zwrap.2022, Maya.2022, Marmoset 5, Substance Painter.9.1, Unreal 5.5
Compre e instale estos programa(s) para disfrutar de una experiencia de capítulo optimizada.
*Estos programas y/o materiales no se proporcionarán con el capítulo.