[Course]illustrator,dojen Details
Intro
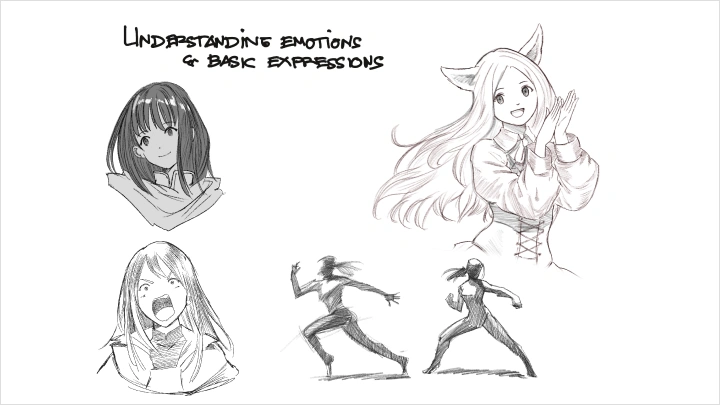
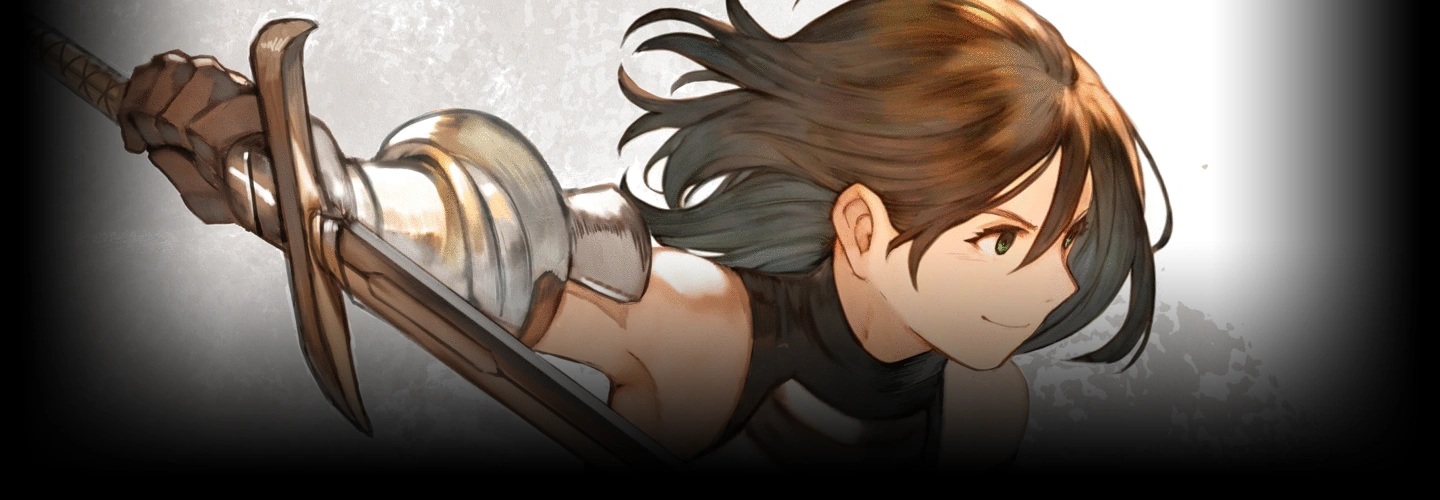
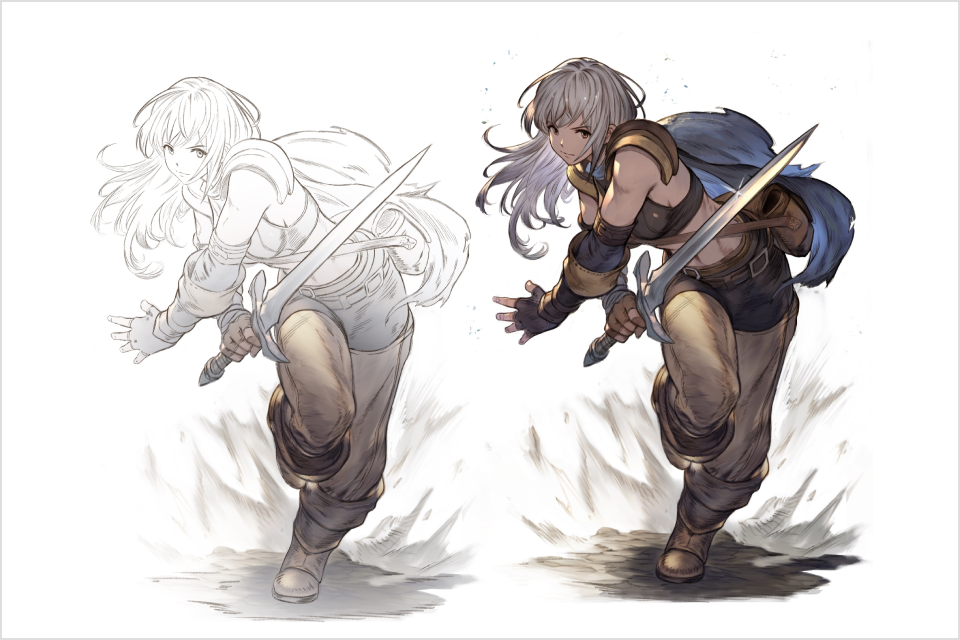
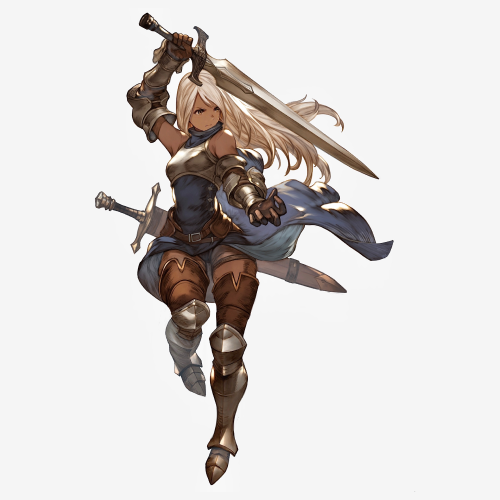
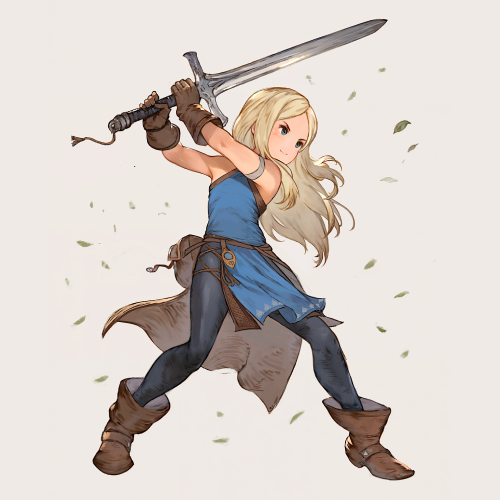
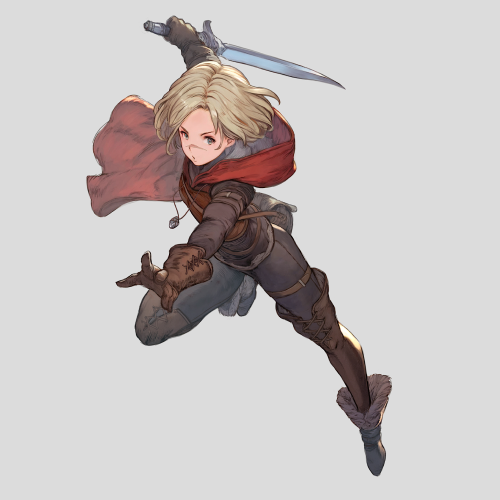
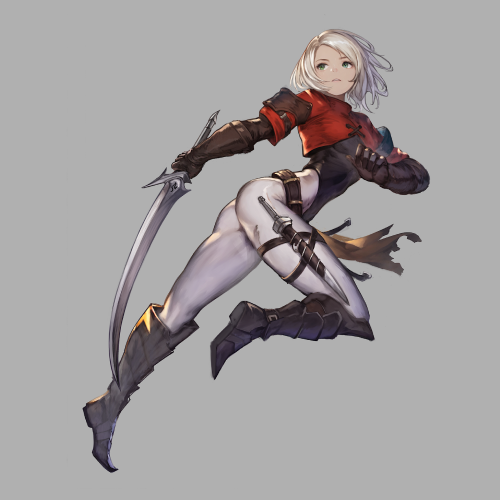
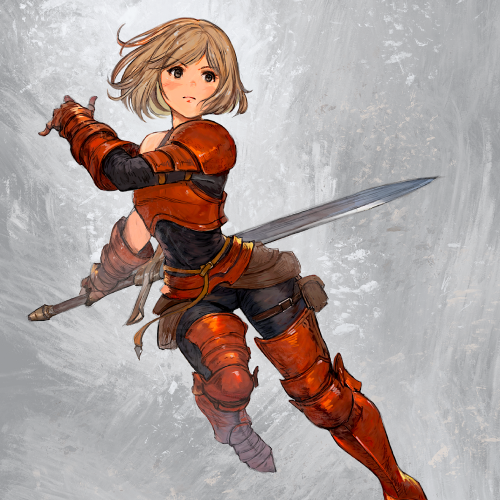
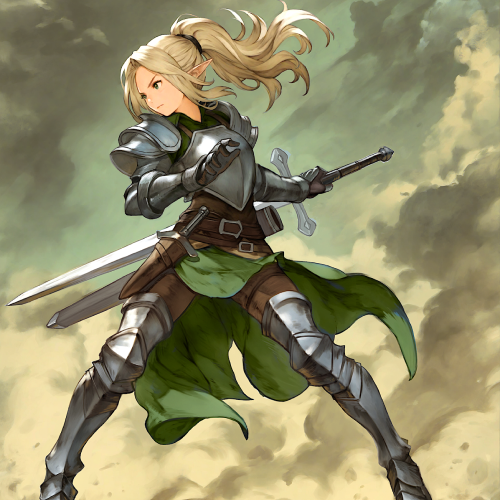
Capturing Speed, Energy, and Emotions in Your Characters.
Dojen, with over a decade of experience in the game industry, shares the techniques that have transformed his career. Instead of rigid formulas, you'll dive into a practical workflow that encourages unfamiliar approaches and creative problem-solving.
Once you start fixating on “drawing perfectly,” you move further away from creating characters that are original, dynamic, and emotionally compelling.
This class focuses on painting with intuition, using movement, composition, and emotion to create characters that feel alive. Discover Dojen’s innovative approaches to mastering expressive faces, dynamic poses, and impactful composition. You’ll explore the power of silhouettes, refine your lighting and shading, and develop a workflow that balances creativity with efficiency.
Whether you are a beginner or an artist refining your skills, this class will help you embrace imperfection as a tool for growth, push creative boundaries, and create characters with authenticity and depth.
Class Preview
Still Not Sure?
Check Out Dojen's Class Preview!
Chapter 12.
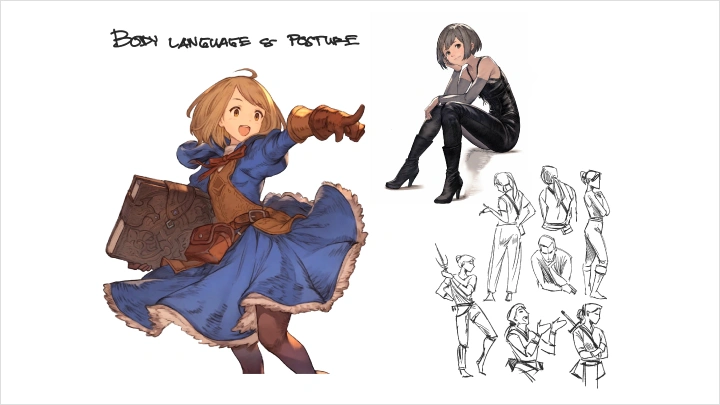
Body Language and Posture Transfer
1. Manipulating form, color, and context
2.Transforming static figures into storytellers
Class Perks
Special Gift from Dojen
-
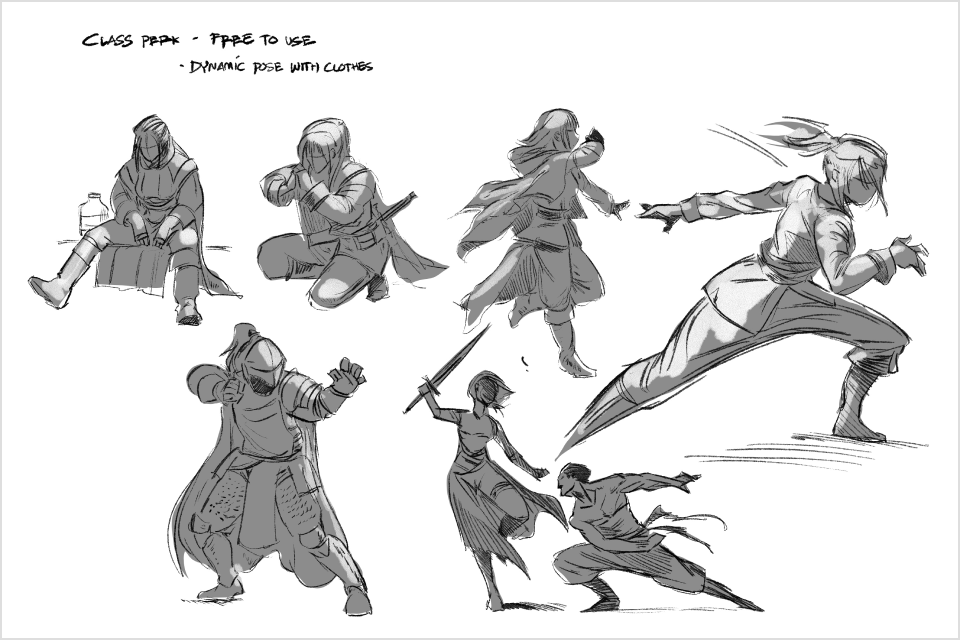 Dynamic Poses Silhouette Cheat Sheet- PDF featuring a variety of action-packed and expressive poses
- Helps improve gesture drawing and create characters with energy and movement -
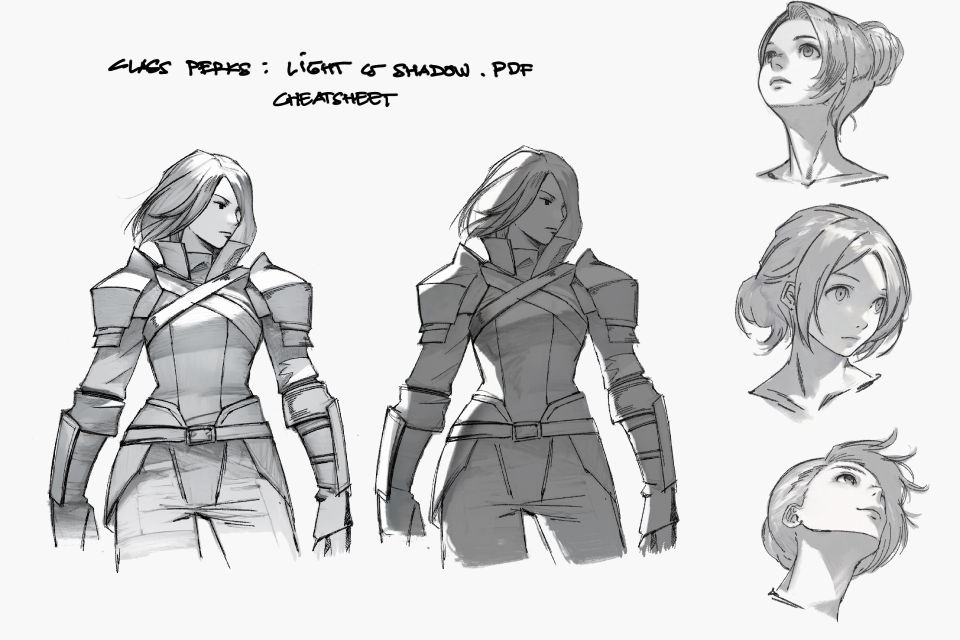 Light and Shadow Cheat Sheet- PDF guide simplifying the complexities of lighting in art
 -
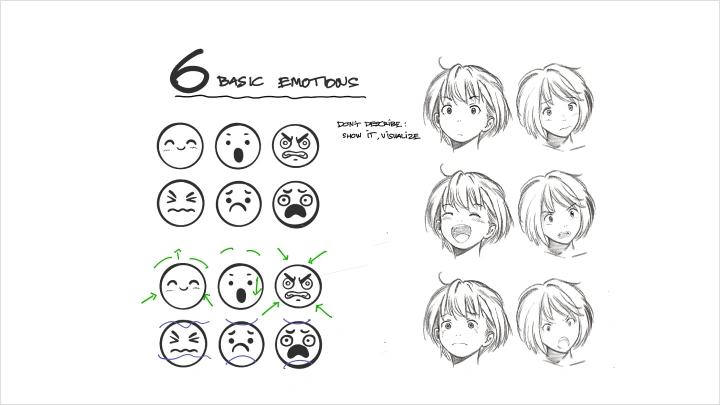
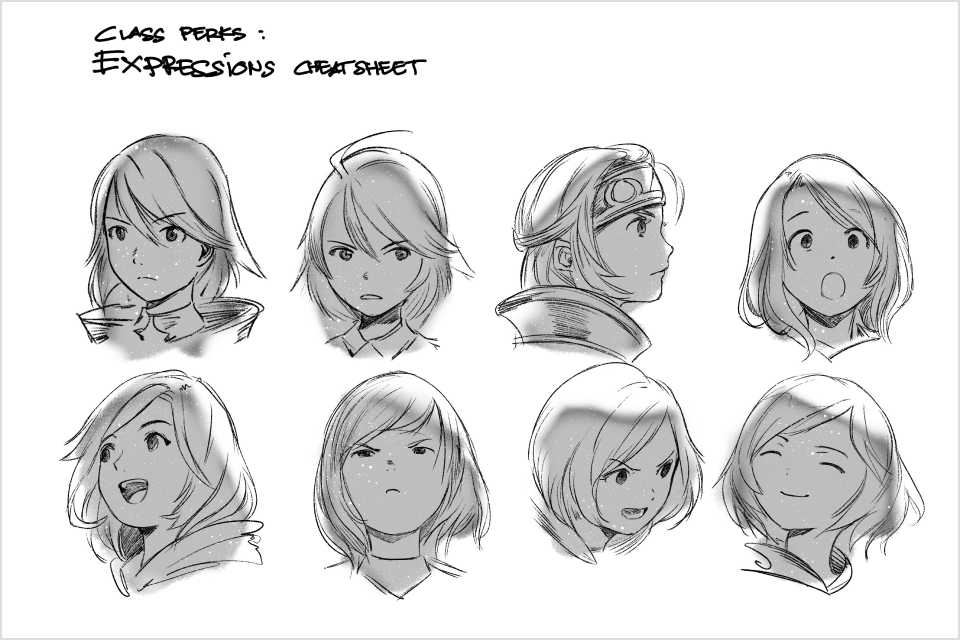 Expressions Cheat Sheet- Collection of carefully crafted facial expressions for natural, appealing emotions
- Instant reference for drawing engaging and lifelike character faces -
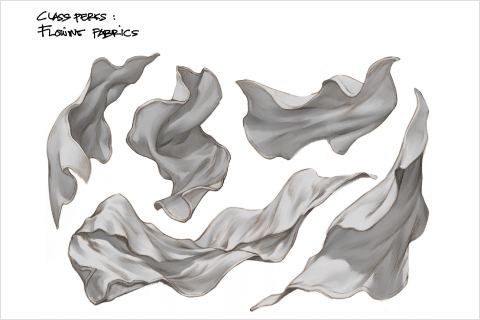 Flowing Fabrics Cheat Sheet- Reference file featuring fabric in motion
- Helps artists depict folds, weight, and movement with accuracy
-
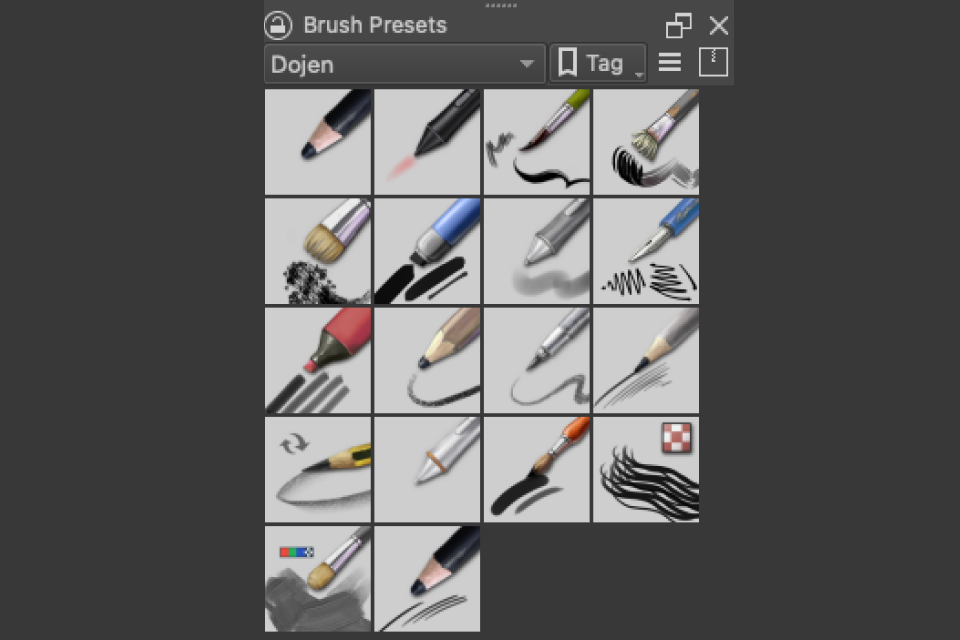 15+ Artist's Pick Krita Brushes- 15+ Krita brushes picked by the Artist
- Enhances workflow with versatile digital painting tools -
 2 Additional High Resolution Artworks- 2 detailed, high-resolution artwork examples showcasing class techniques
- Study brushwork, color application, and composition in detail -
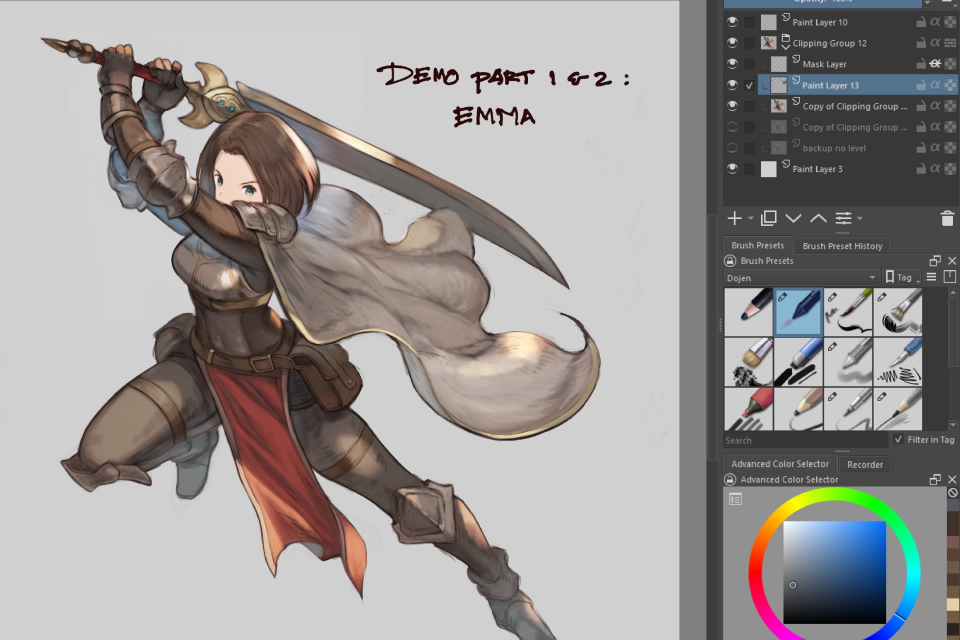
 Working Files for All Class Artworks- Layered working files from class demonstrations for hands-on study
- Analyze workflow, brush settings, and professional digital painting techniques -
 Full Length Artwork Timelapse- Complete time-lapse video showing a step-by-step progression
- Demonstrates key techniques from rough sketch to final polish
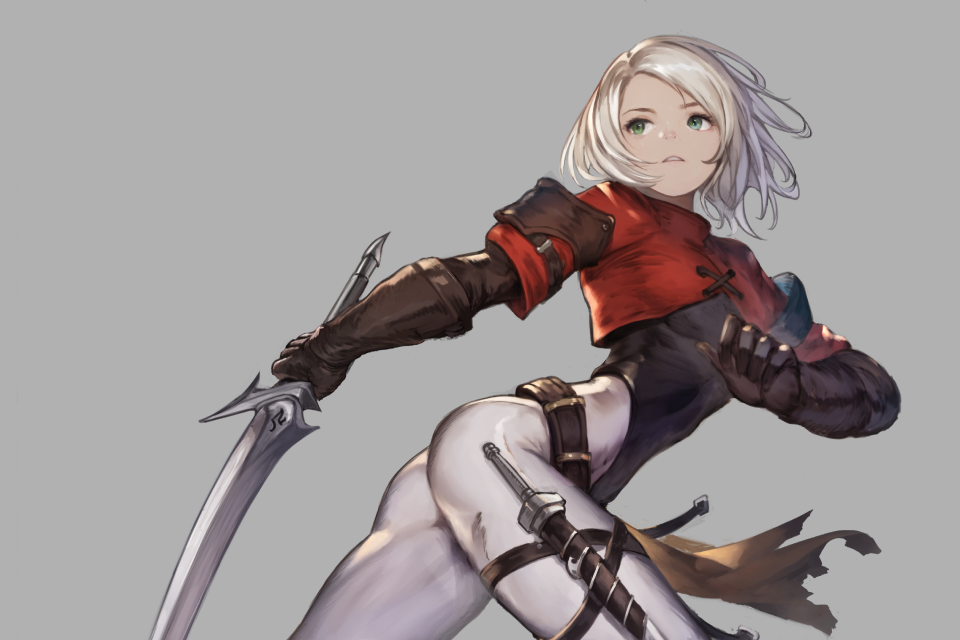
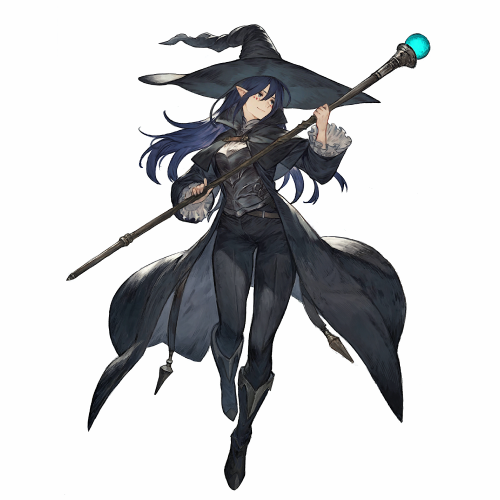
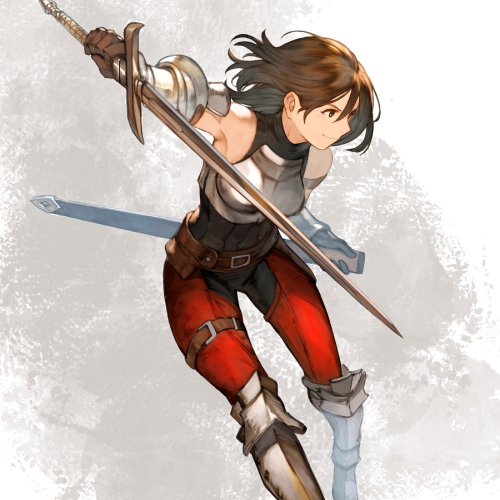
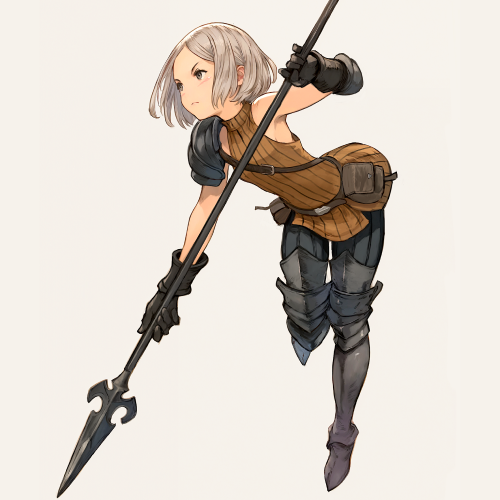
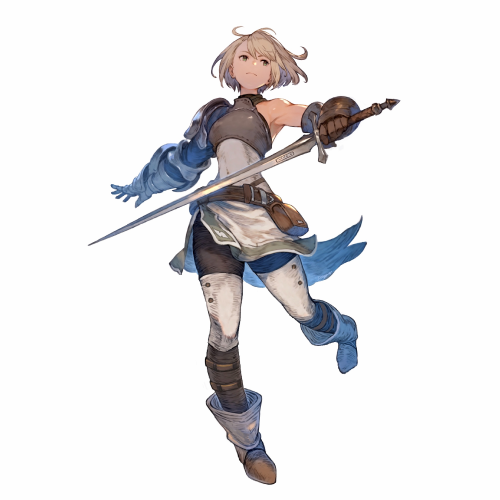
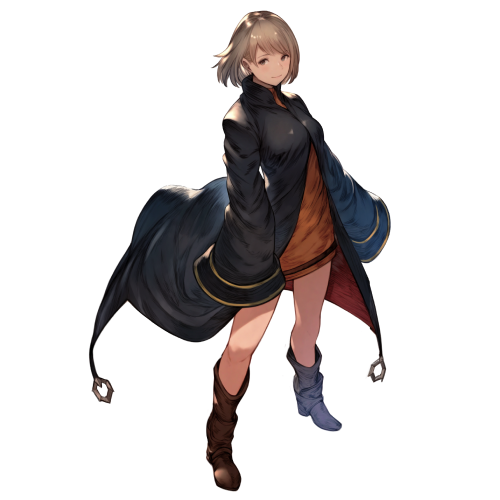
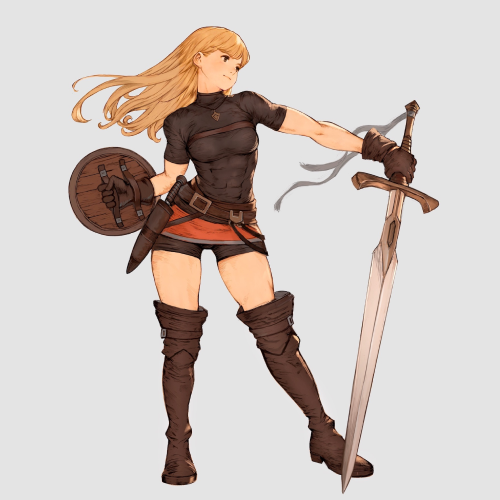
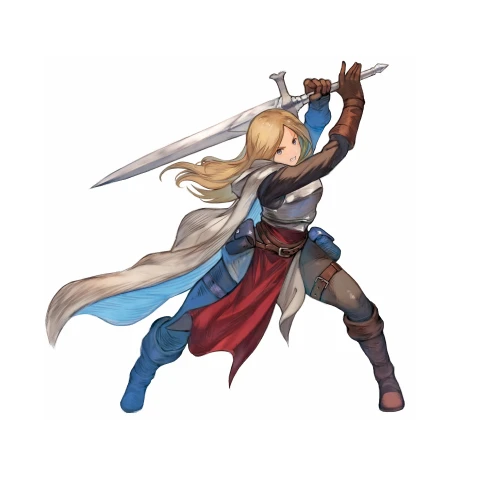
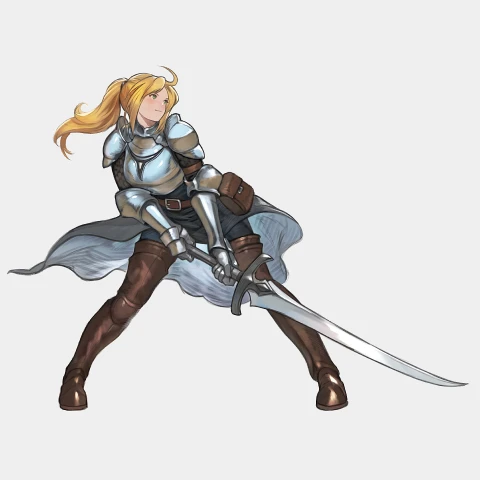
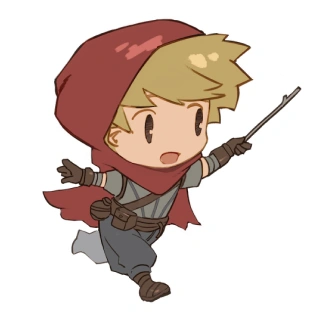
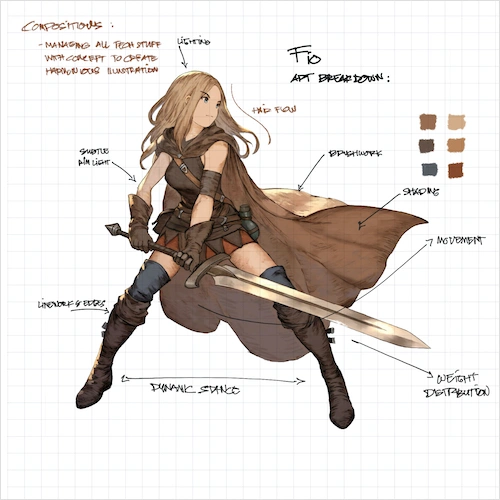
Expert Illustrator Dojen's Portfolio

Why Take This Class?
Don’t settle for stiff, lifeless characters that fail to connect with your audience.
This class teaches you how to create characters that feel real by focusing on movement, personality, and storytelling. Instead of getting stuck on technical perfection, you will learn to trust your instincts, experiment freely, and develop a workflow that encourages both structure and creativity.
Dojen shares practical industry techniques gained from years of working in fantasy art, TTRPGs, and game design. You will refine your ability to capture emotion through facial expressions, poses, and rendering while learning efficient digital painting methods that allow you to iterate and improve. If you want to create characters with depth, impact, and a strong artistic voice, this class will give you the skills and mindset to make it happen.

18 Class Exercises
-
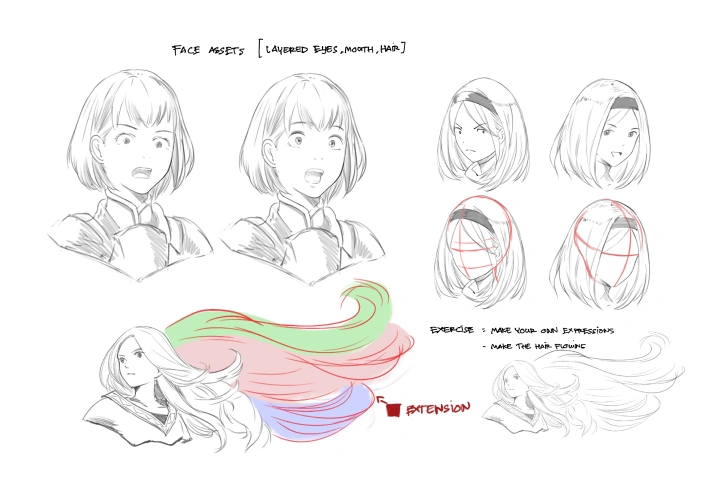 Face & Hair Assets
 -
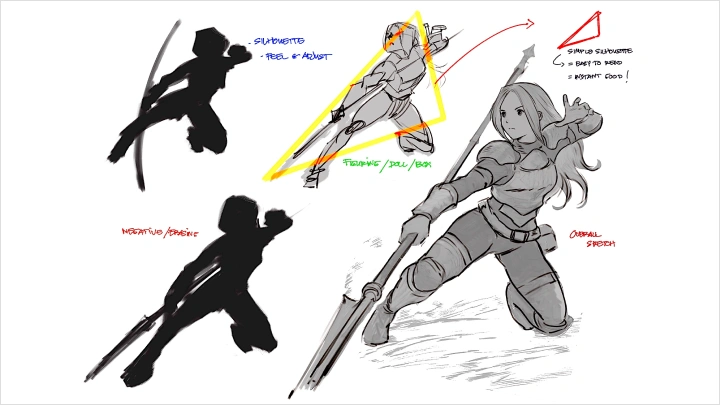
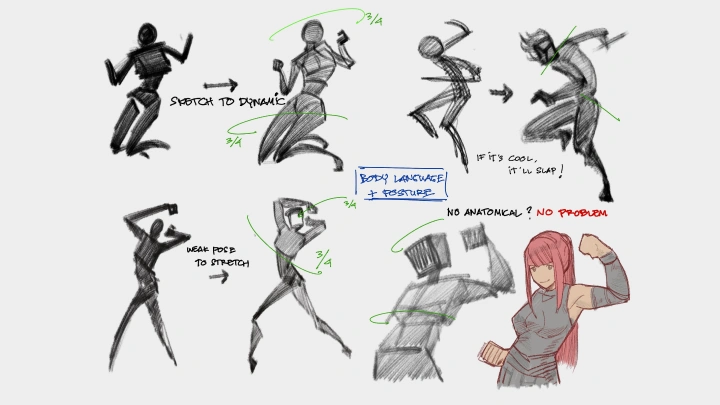
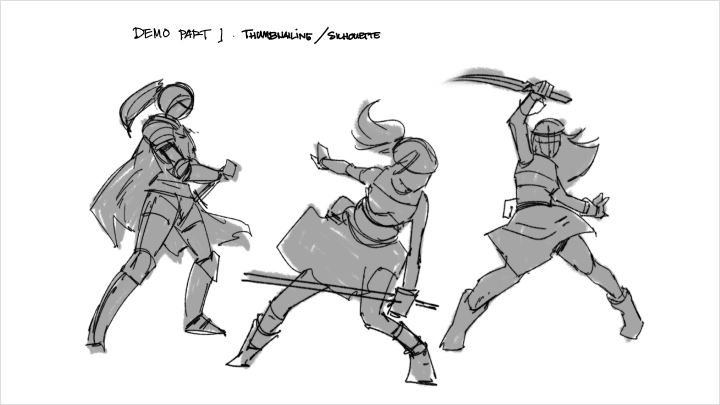
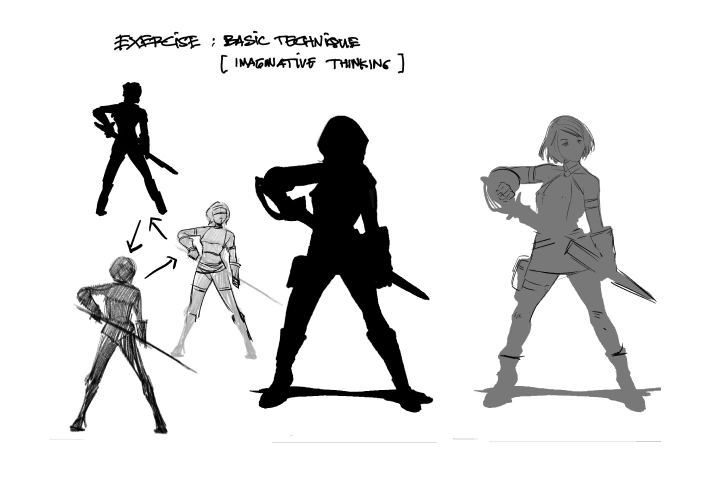
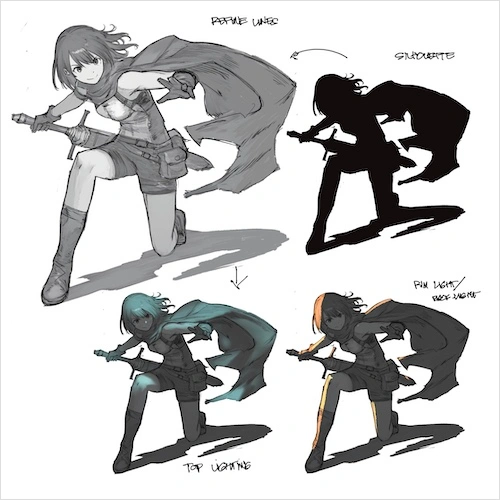
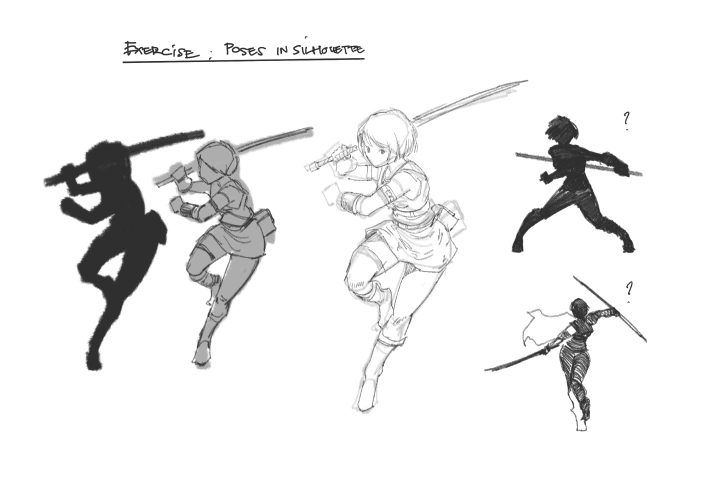 Poses in Silhouette
 -
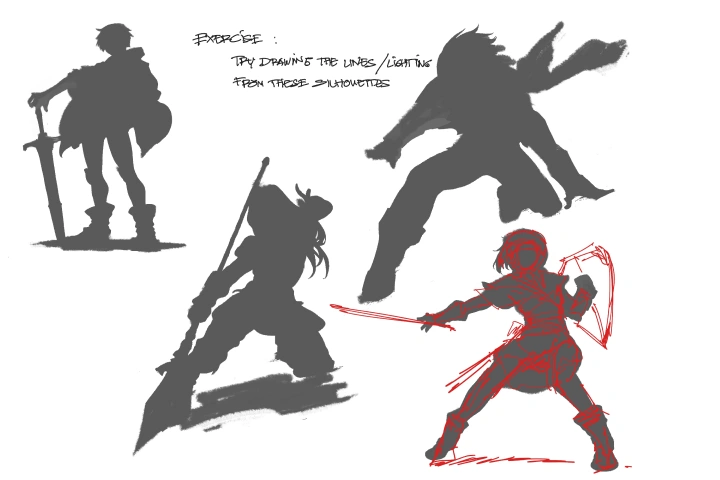 Silhouette Samples of Dynamic Poses
 -
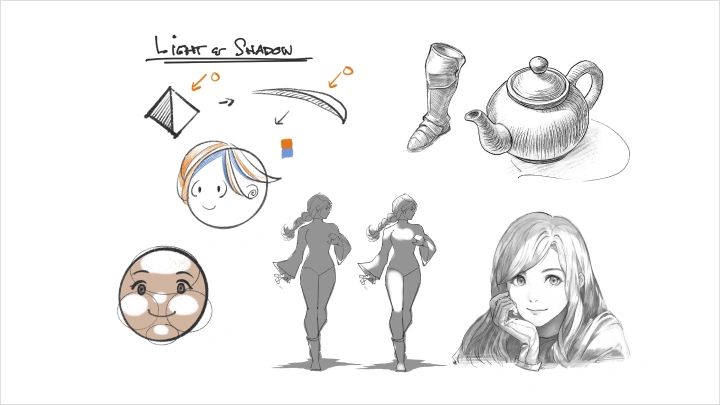
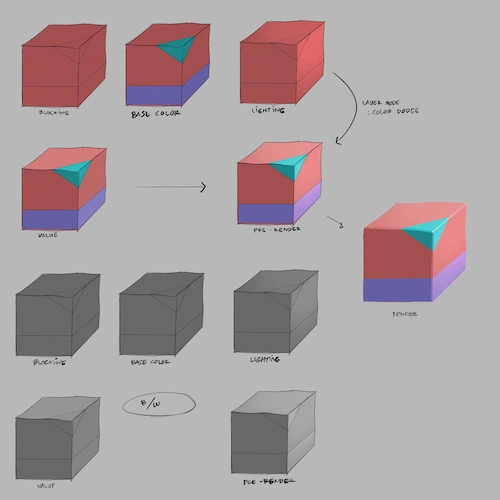
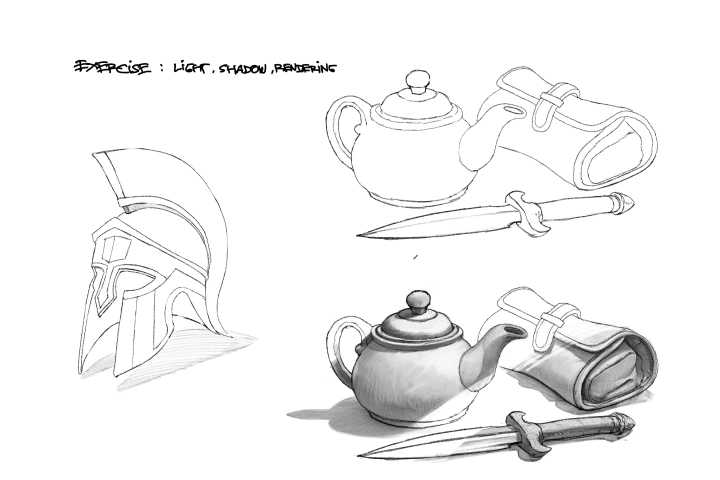 Sample Objects: Sphere, Teapot, and Multiple Objects Reacting to Light and Shadows
 -
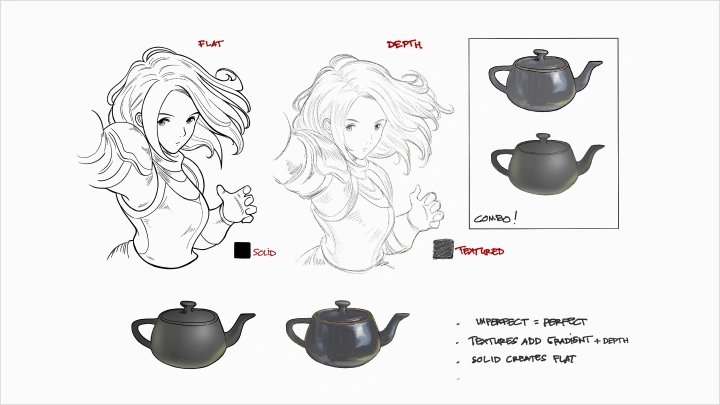
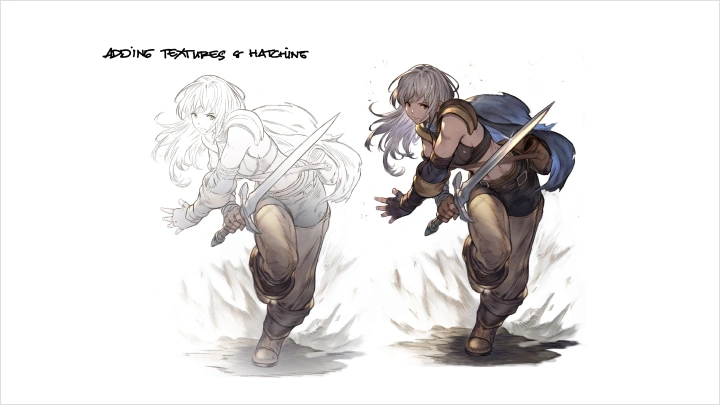
 Comparison of Common Beginner Mistakes: Flat Outline vs Textured Outline
-
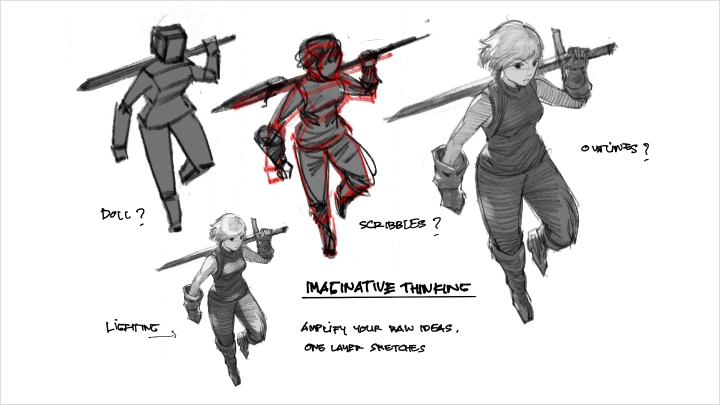
 One-Layer Sketches
 -
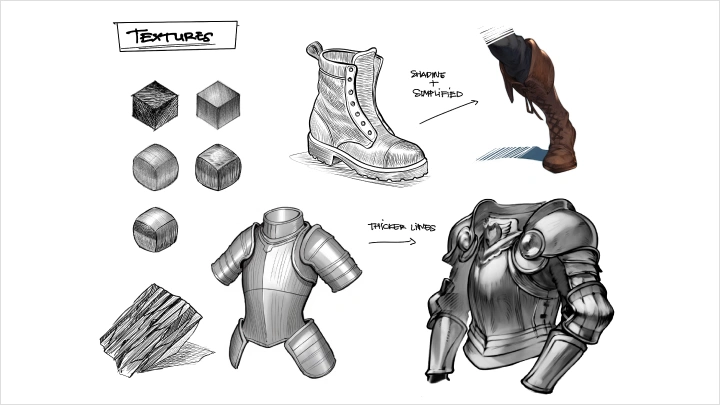
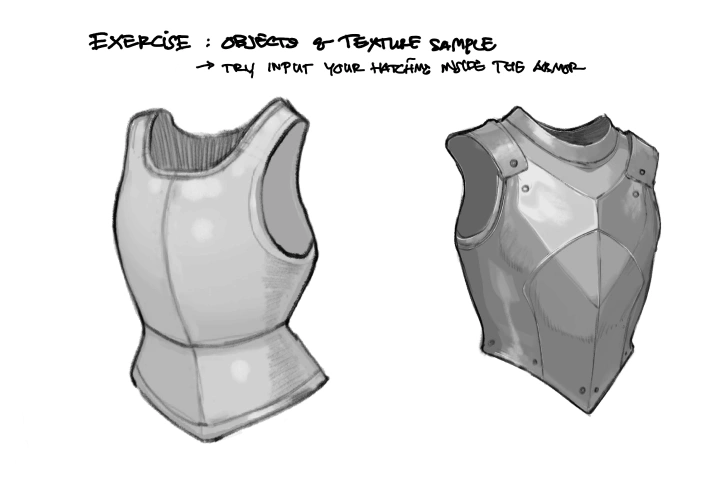 Objects and Texture Samples
 -
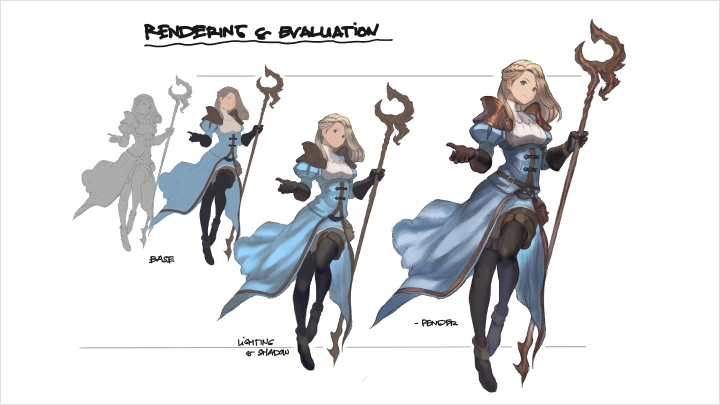
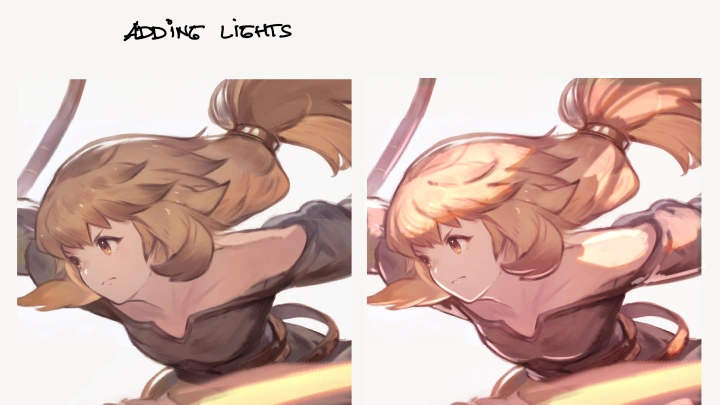
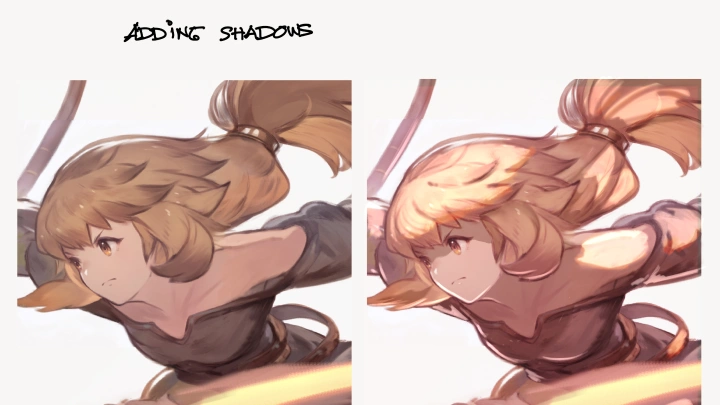
 Objects, Textured, Rendered Samples
 -
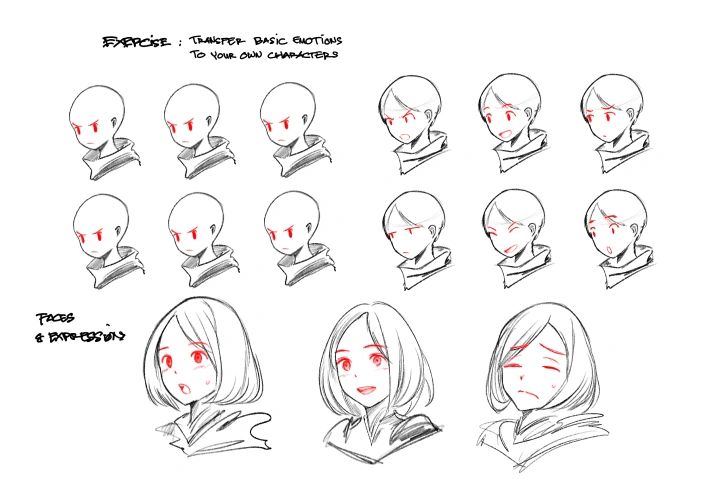 Faces and Head Angles
 -
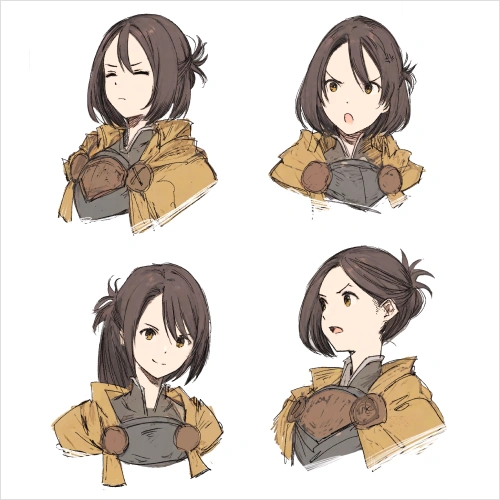
 Face and Expressions
-
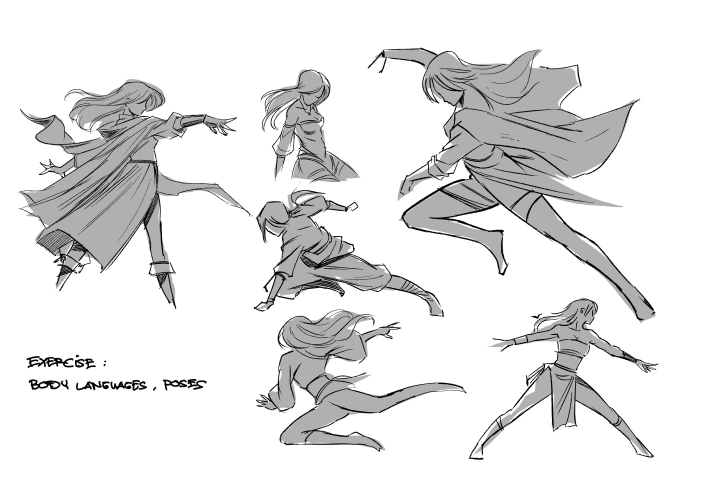 Poses
Poses -
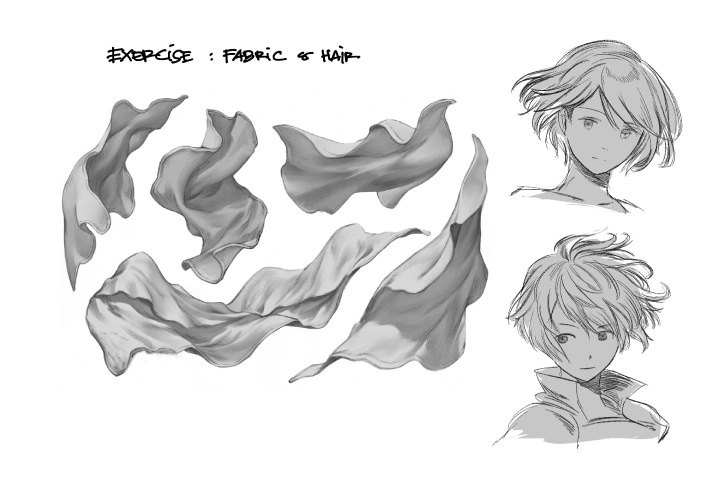 Fabric and Hair
 -
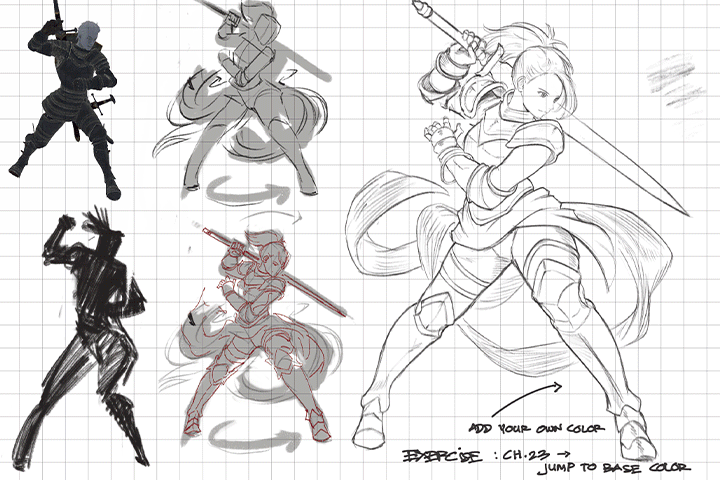
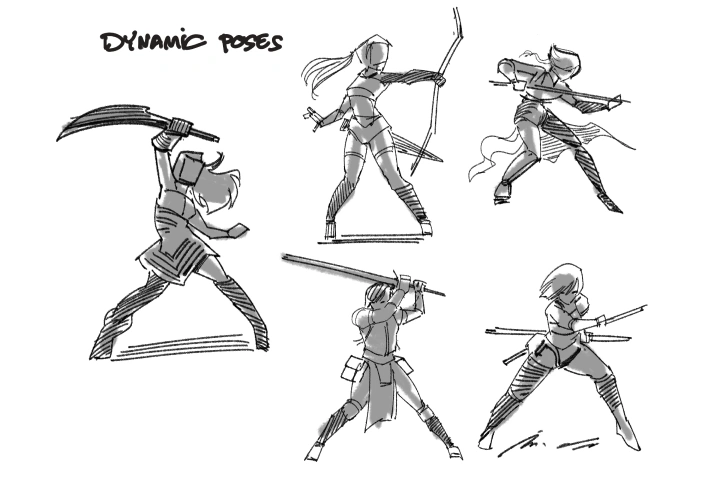 Some of Unused Dynamic Poses
 -
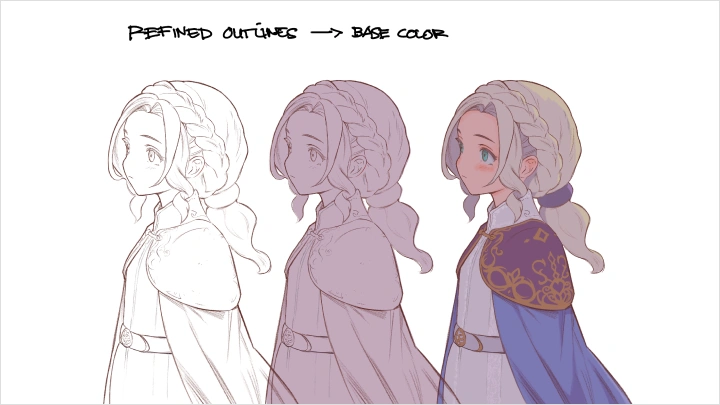
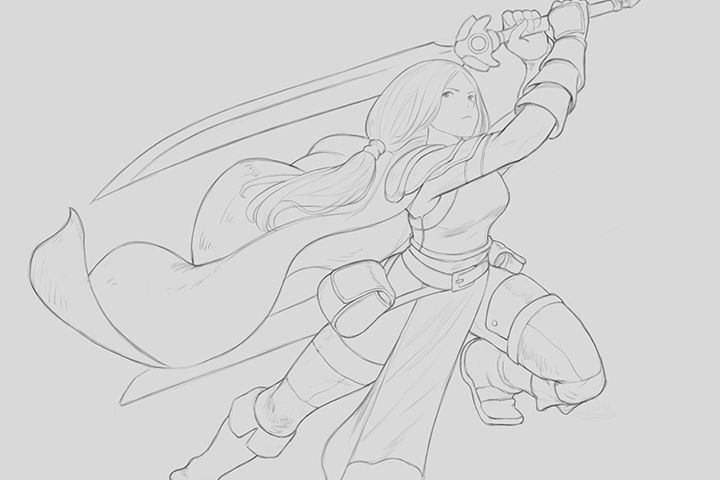
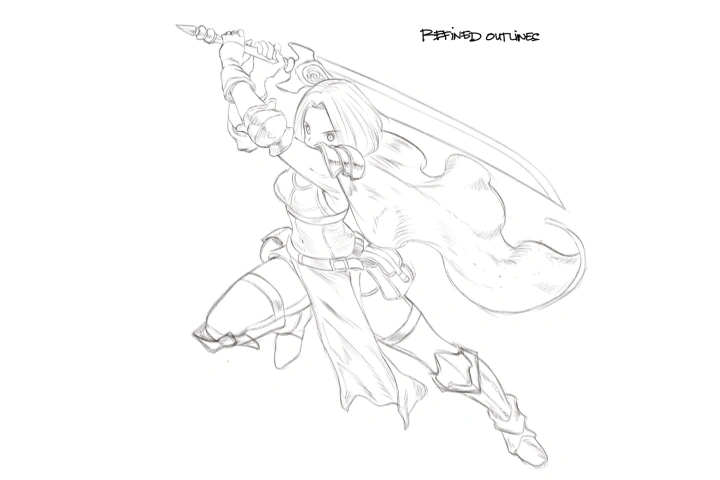 Refined Outlines for the Base
 -
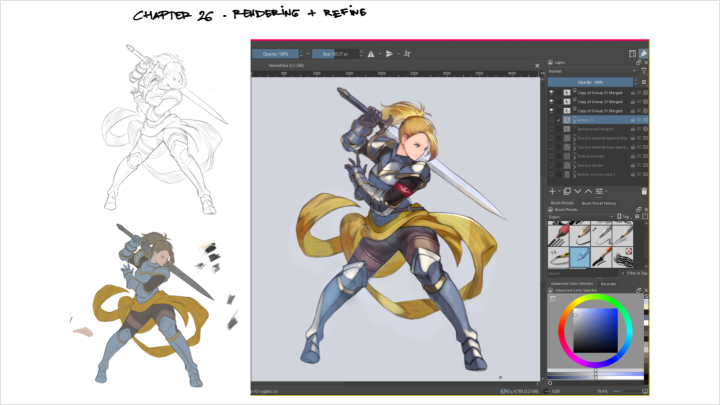
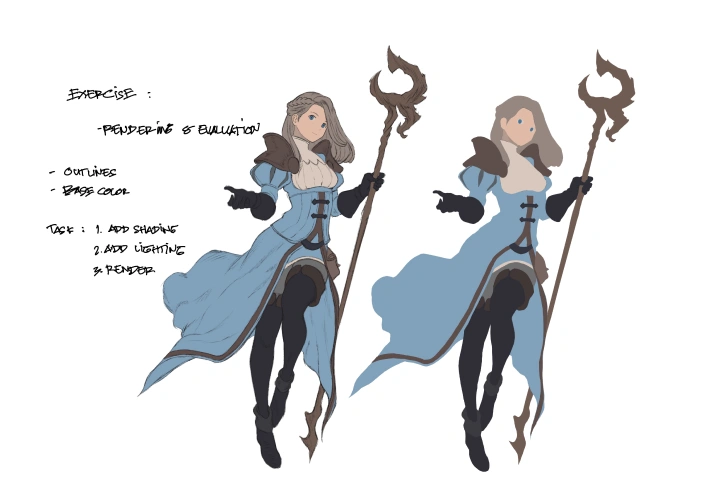
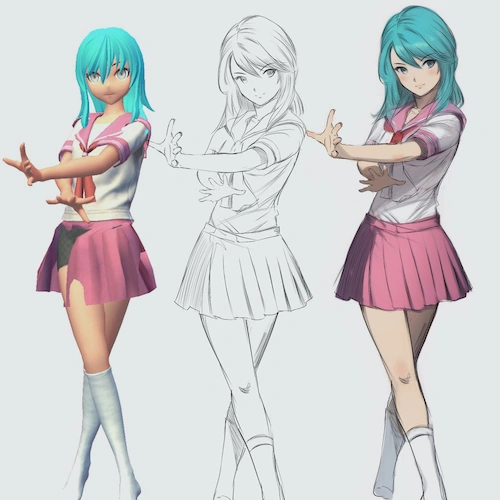
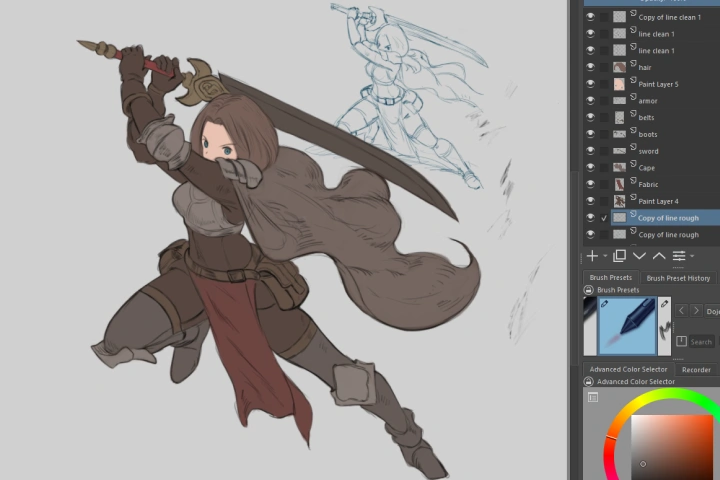 A Complete PSD Character Design
-
 Finalizing Your First Character
 -
 Base Colors for Your Character
 -
 Finalizing Your Second Character
*Above are sample images for a better understanding
Final Products
-
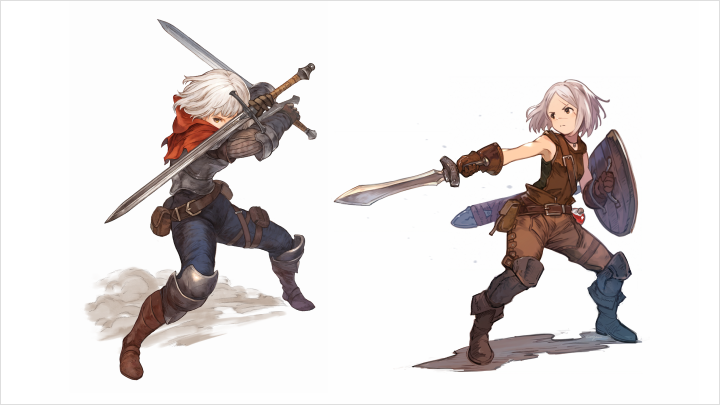
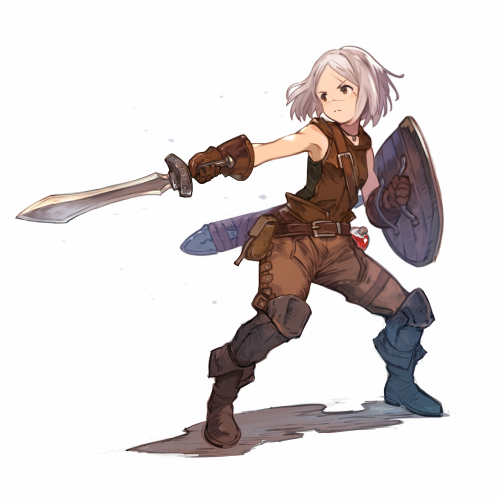
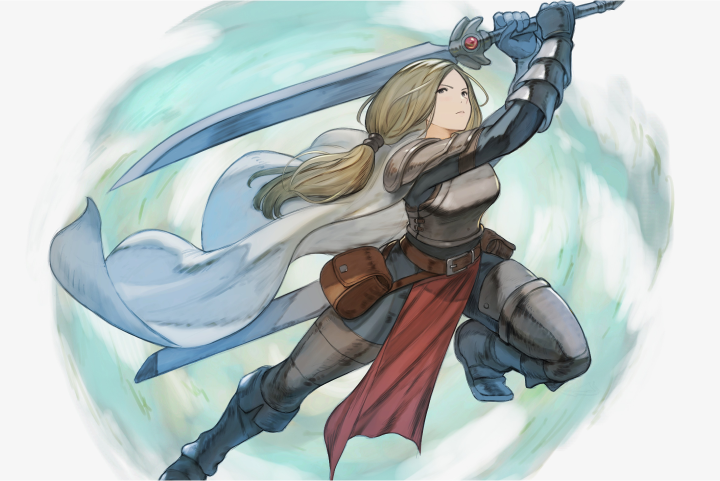
 Character Illustration (1)
 -
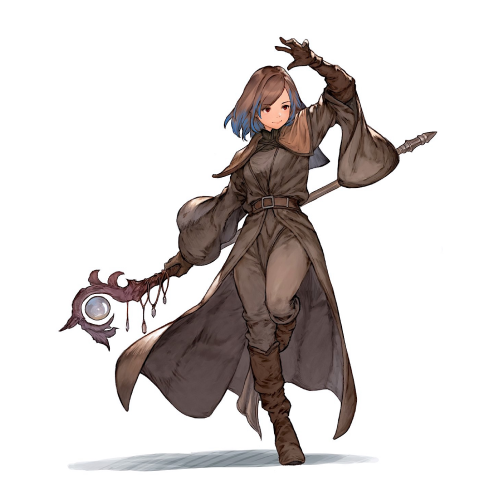
 Character Illustration (2)
Instructor
Illustrator
Dojen
Hello! I'm Dojen, and I’ve been freelancing since 2010. I started my career working with BPG Werks [DTV Shredder], where I created industrial vehicle concepts, character designs, storyboards, and animations for movies. Back then, I had to adapt to working with diverse teams and styles, which taught me a lot about flexibility and collaboration.
In early 2017, I decided to go solo as a freelance illustrator, focusing on 2D art and character design. Since then, I’ve been specializing in fantasy art, game-related projects, and commissions, which I’ve been passionately working on. I’d like to share my experience and insights from my journey so far!

Illustrator, Dojen
[Current]
Freelance Illustrator
[Previous]
Concept Designer at BPG Werks, DTV Shredder
Illustrator at Cosmic COG LLC
Projects & Awards
[Early Works]
BPG Werks
- Segway (Concept Art)
- Megabots (Concept Art)
- Nitro Circus (Design, Illustration)
- Monster Energy (Design, Placement)
- Dubai Expo 2020 (Concept Art)
White Stripe Consulting
- Twentieth Century Fox (Concept Art, Storyboard)
- Amazon AWS (3D Animation)
[Late Works]
Freelance
- Reality-Entertainment (Concept, Previsualization, 3D Animation)
- Fatal Core
- The DM Lair
- Skyfall Games
- VGM Studios
Highlights
Class Highlights
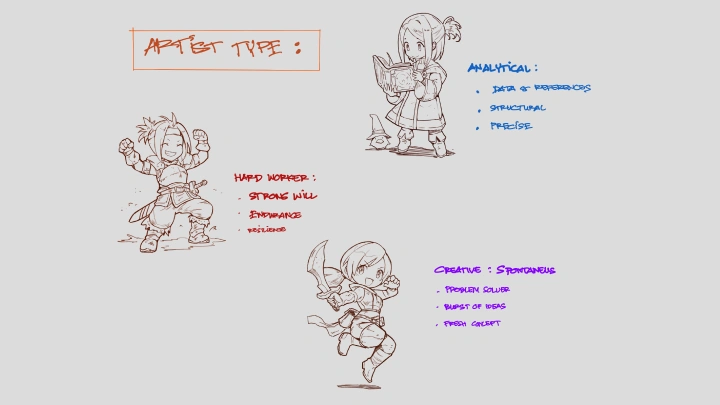
Developing an Artistic Instinct and Aesthetic Sensibility
Develop a strong eye for visuals that align with the intended mood and message. Learn how to foster a strong artistic instinct that feels natural and true to yourself. Understand how subtle details impact the overall harmony of an artwork.
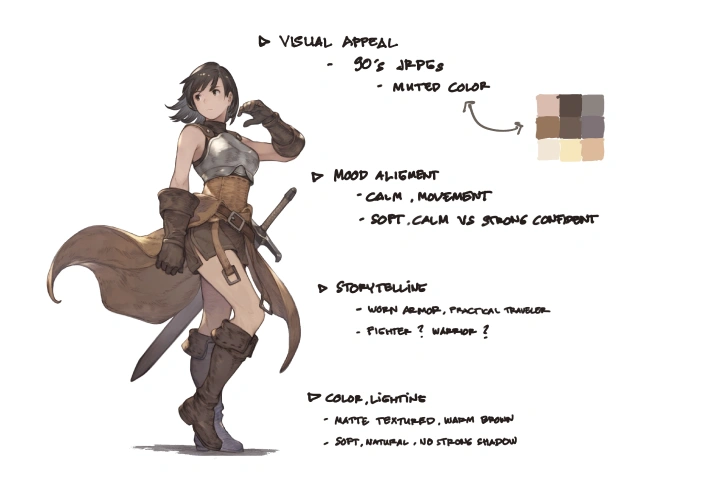
Overall Composition and Visual Balance
Imperfection plays a key role in achieving visual balance, guiding focus, and creating a sense of harmony. This class explores how to structure compositions that feel intentional yet dynamic. Discover techniques to make your artwork more engaging without relying on rigid perfection.

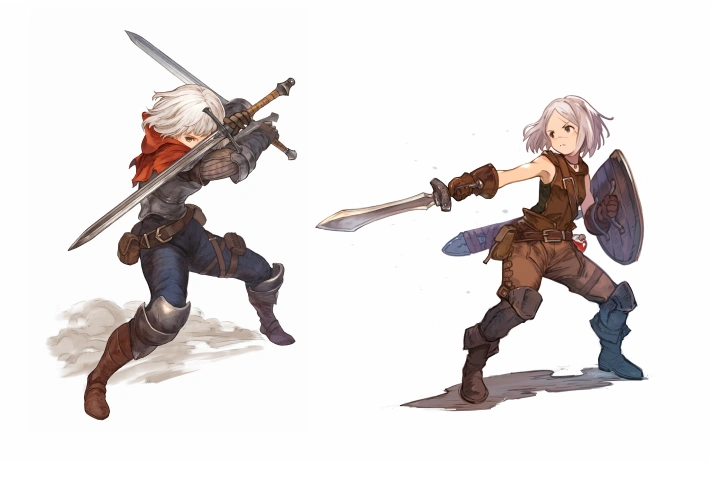
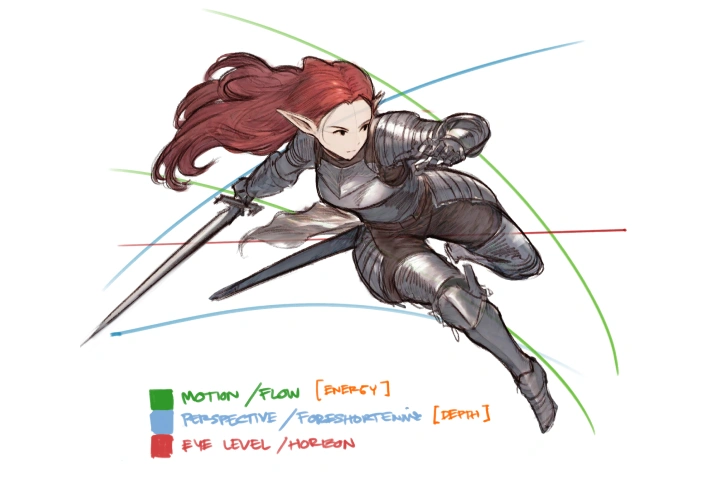
Capturing Movement in Your Characters
Motion adds life to static images, making characters and scenes feel more dynamic. Learn how to suggest movement through pose, flow, and rhythm in composition. Develop techniques to create expressive and energetic artwork.
Class Details
You'll Learn
-
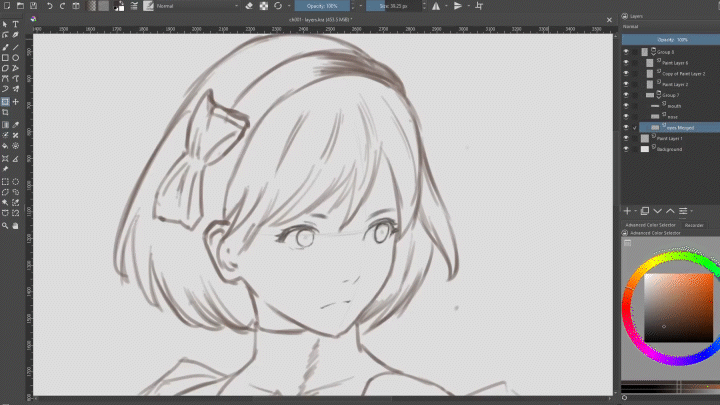
 The Simplicity of Default Brush and LayersGrasp the essential techniques such as layers, brushes, and layer modes. Gain confidence in navigating digital art software with a straightforward, effective approach.
 -
 Conveying Emotion Through ArtLearn to create expressive faces, dynamic poses, and distinct personalities that make characters feel alive. Discover how emotion shapes the impact of your illustrations and influences the audience’s perception.
 -
 Illustrating Movement and DynamismDevelop techniques for depicting motion, from flowing lines to action poses and implied movement.
-
 Composition, Color Theory, and LightingComposition determines element placement, guiding focus and storytelling. Color theory enhances emotional depth and visual harmony. Lighting adds depth and atmosphere, bringing your artwork to life.
 -
 Key Aspects of Expressive RenderingExplore shading, lighting, texture, color, and detailing to create visually compelling artwork. Focus on clarity and intention in your rendering process, understanding what you want to achieve and how to execute it effectively.
 -
 Survival Skills for ArtistsLearn how to find clients, stay inspired through experimentation and breaks, and effectively promote yourself in the industry.
- Unlimited Access
- Best Price
Buy now, get unlimited access.
07/27 (Mon) (UTC-7) Special offer ends soon.
This special offer ends soon.
Buy now and save!
Interview with
Illustrator, Dojen

Question.01
Could you please share how you started your journey in the industry?
I started by sharing my work in online groups and communities that matched the themes I was passionate about. From there, I began receiving commissions and private projects, especially for fantasy, TTRPG, novels, and games.
Question.02
What do you think is the most important trait(s) to success in your industry?
By focusing on simplicity, accessibility, and emotional connection, both art and games become more impactful. Always keep this in mind: success isn’t about overcomplication but about clarity and purpose.
Question.03
Is there anything else you would like to share with your students?
It's crucial to explore ideas that have yet to be touched. Dare to break away from existing patterns, draw inspiration from less obvious sources, and develop a unique perspective.
Required Programs
This course will use Krita, but students are welcome to use drawing software that suits their workflow.
Please purchase and install these program(s) for an optimized chapter experience.
*These programs and/or materials will not be provided with the chapter.