[Dictionary]drawingeducator,kouza Details
Intro
Class Intro
Drawing Educator, KOUZA
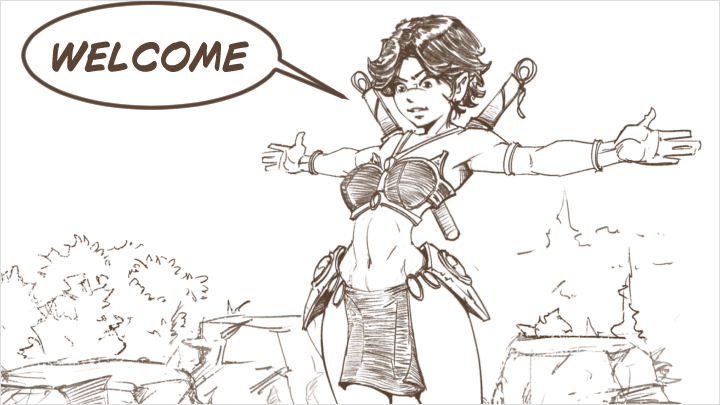
Approach anatomy & perspectives in a whole new light by adopting the 3-Step process and learn to illustrate dynamic figures!
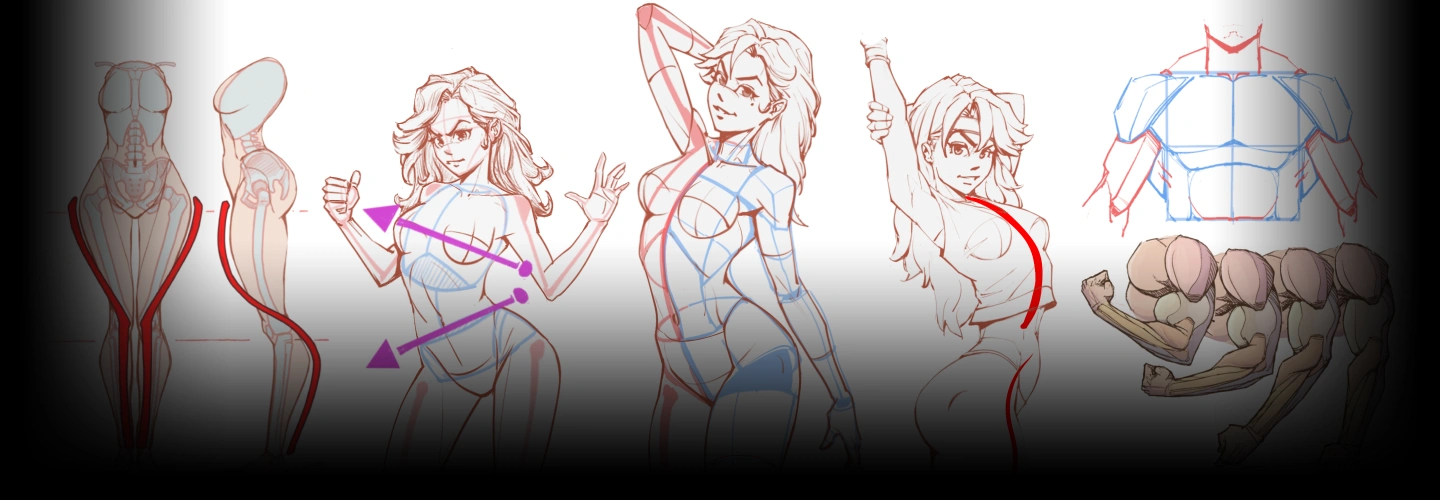
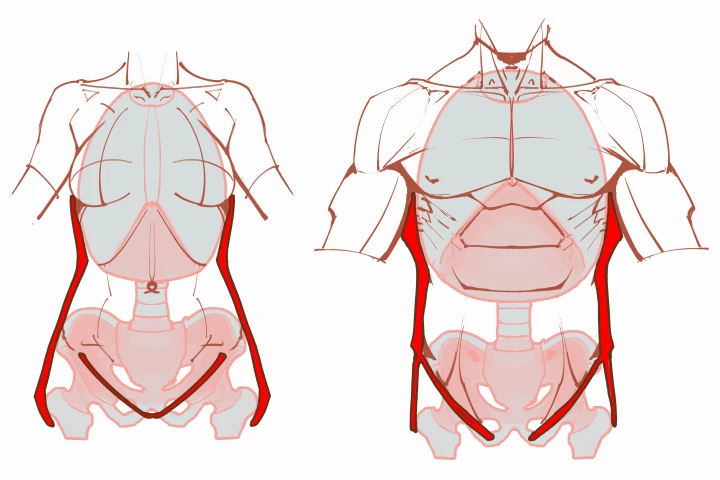
Anatomy Made Simple and Powerful
Figure drawing doesn’t have to feel rigid or intimidating. In this class, Kouza shares his original method, shaped by years of experimentation, discovery, and passion, to simplify anatomy into a clear and cohesive system.

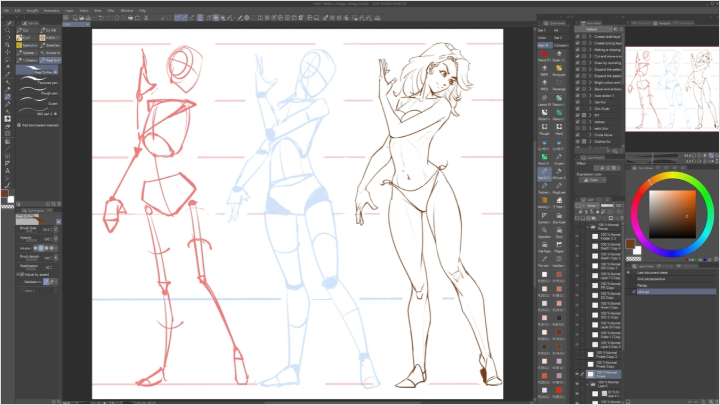
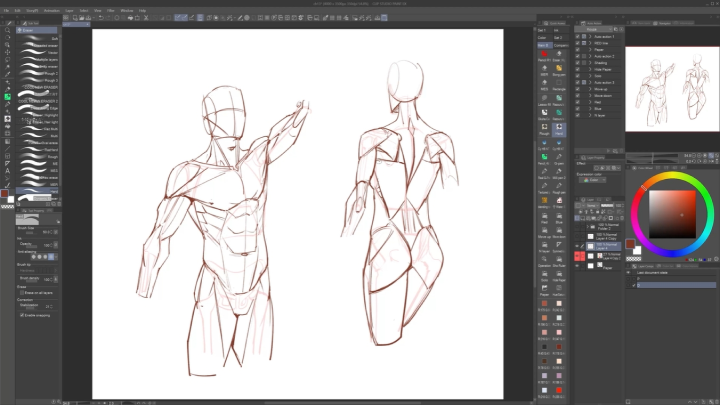
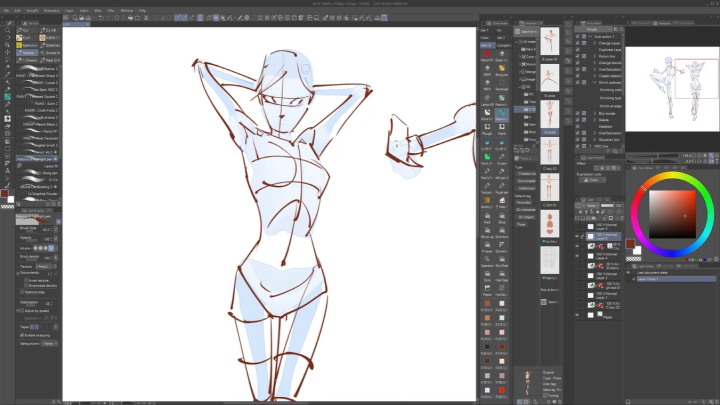
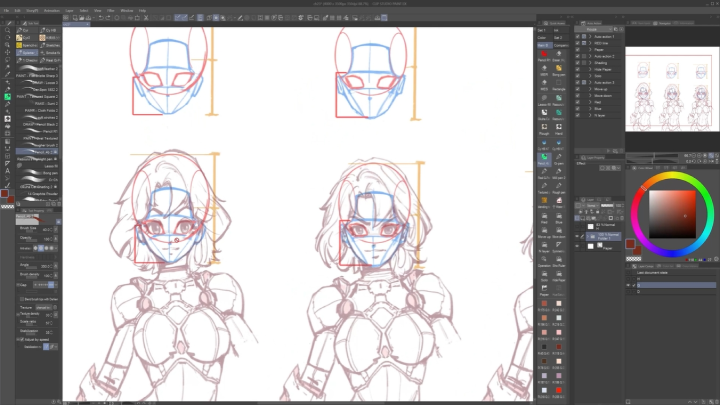
You’ll start with a simplified proportion system and build characters step by step: first a skeleton, then a mannequin, and finally fully detailed figures. From there, Kouza breaks anatomy into easy-to-grasp forms, showing how muscles connect and how to inject energy into your drawings with confident lines and gestures.
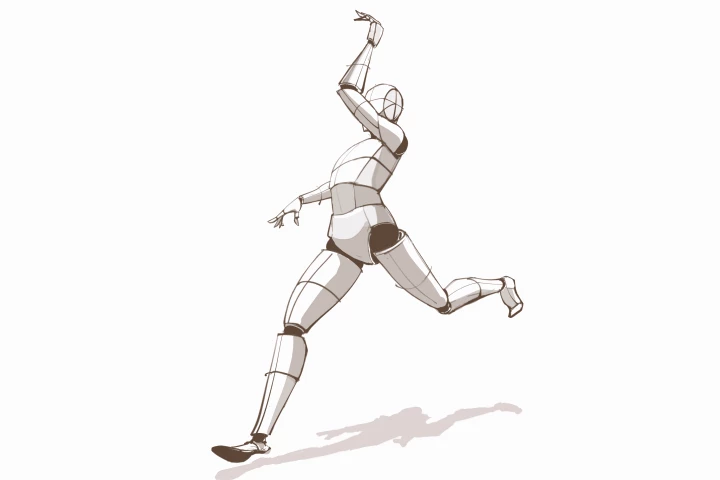
With the foundations in place, you’ll move on to posing. Explore standing, sitting, action, and multi-character scenes, all while sharpening your perspective skills. By the end, you won’t just understand anatomy, you’ll be able to create expressive, powerful characters that feel alive and ready for action.
With the foundations in place, you’ll move on to posing. Explore standing, sitting, action, and multi-character scenes, all while sharpening your perspective skills. By the end, you won’t just understand anatomy, you’ll be able to create expressive, powerful characters that feel alive and ready for action.
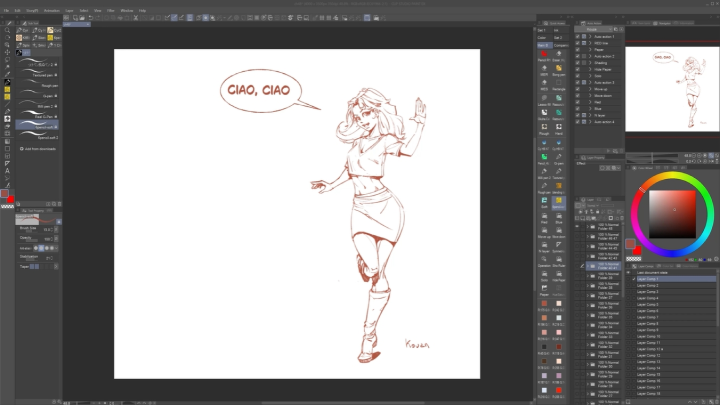
Class Preview
Still Not Sure?
Check Out KOUZA's Class Preview!
04. Simplified Dummy
- Build a dummy on top of the skeleton.
Class Perks
Special Gift from KOUZA
-
 Comprehensive Anatomy and Pose GuidesWorksheets
 -
 Poseable Models Ready for CSP3D Assets
 -
 Custom CSP Brushes for Fast ShadingBrush Pack
Class Material Details
-
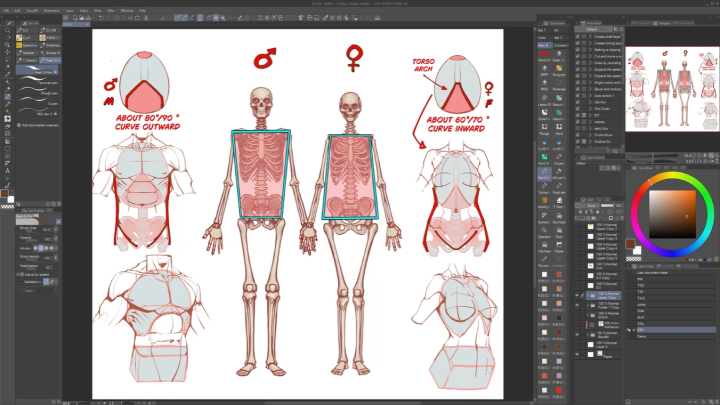
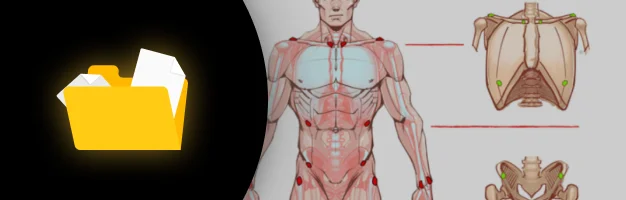 17 Worksheets for Hands-On Mastery- High-resolution female anatomy board (front view) for accurate proportion study
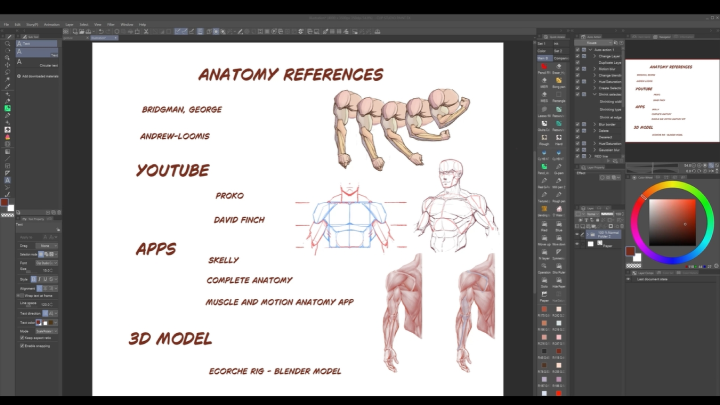
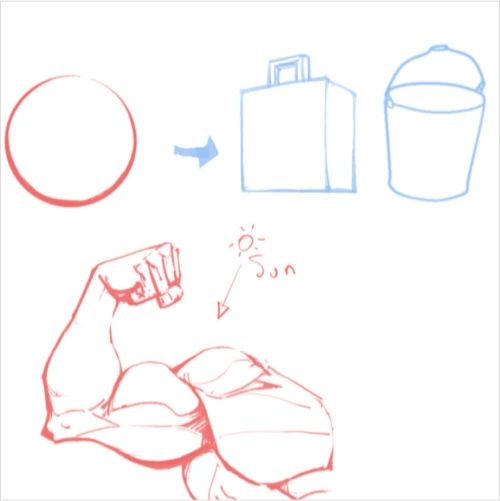
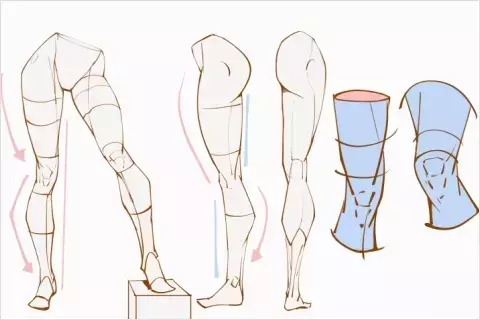
- High-resolution arm references in motion, showing muscle mechanics for flexion and extension
- Stylized skeleton and mannequin guide using a simplified proportion system to build strong foundations
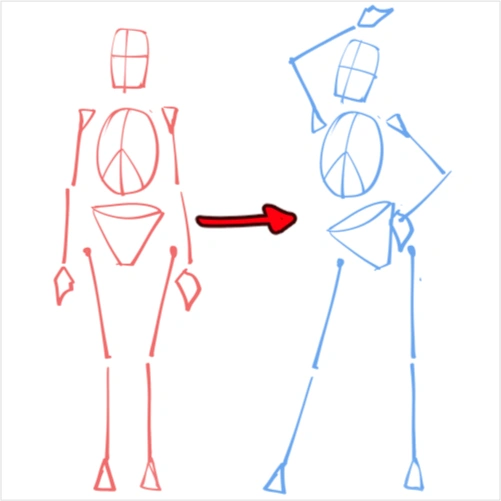
- Three-step process in high resolution: skeleton → mannequin → final drawing, for clear figure construction
- Four-step seated character study in high resolution: skeleton → mannequin → final drawing → costumed version
- Five-step seated character study in high resolution: skeleton → mannequin → final drawing → costumed version → polished finish
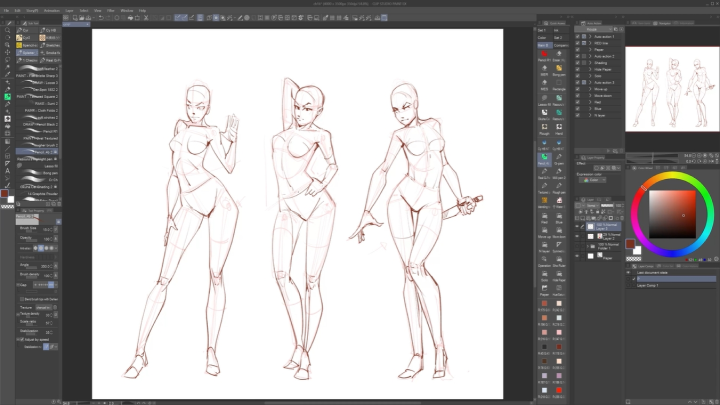
- Volume study of three detailed female mannequins in high resolution to practice depth and form
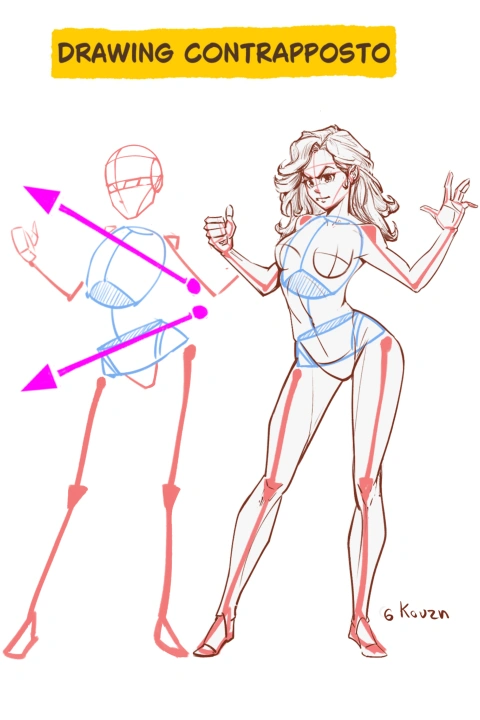
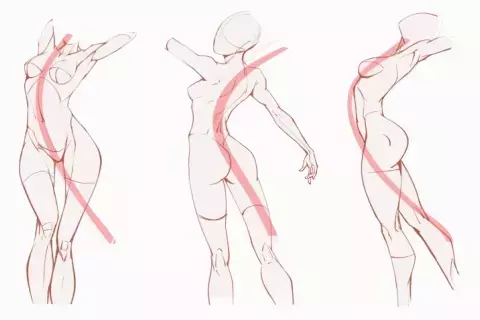
- High-resolution diagram of contrapposto stages to master natural standing poses
- Comparative contrapposto diagram in high resolution, showing differences from a static pose
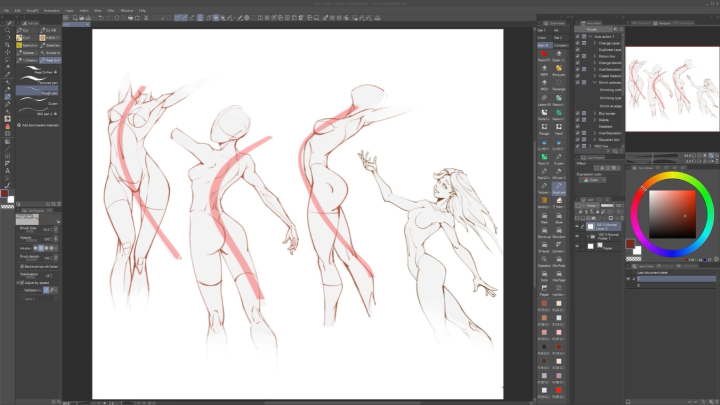
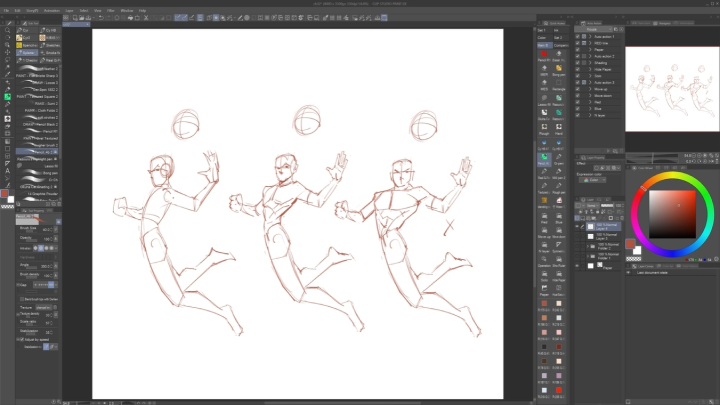
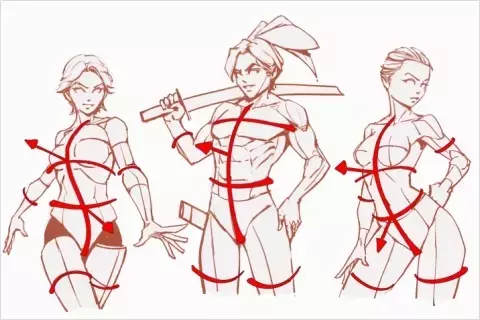
- Dynamic pose board with examples and drawing tips to bring movement and energy into figures
- Step-by-step process sheet to build figures from simplified skeletons into mannequins
- Seated pose studies presented in both skeleton and mannequin versions for structural practice
- High-resolution female body landmarks reference to strengthen accuracy in anatomy
- High-resolution male body landmarks reference for capturing masculine forms
- High-resolution male anatomy board (front view) for proportion and muscle study
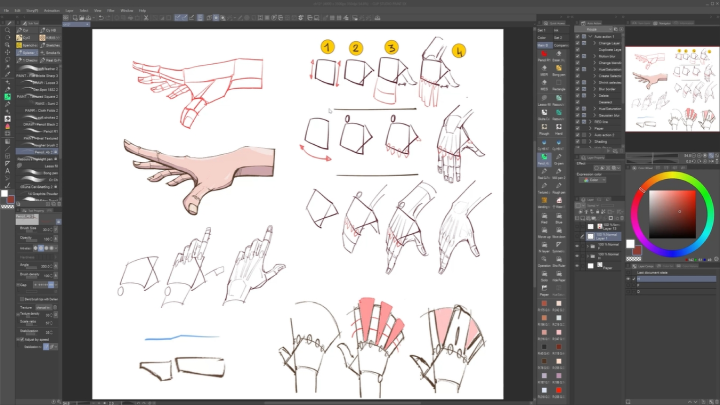
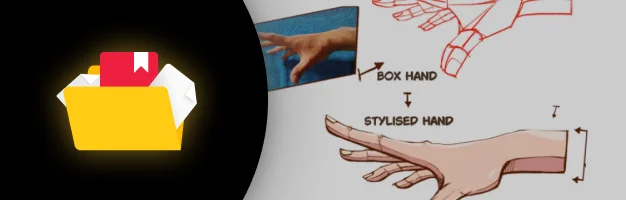
- Stylized hand-drawing tutorial in high resolution, created from photo references for practical practice
- High-resolution tutorial explaining elbow rotation mechanics for more natural arm poses -
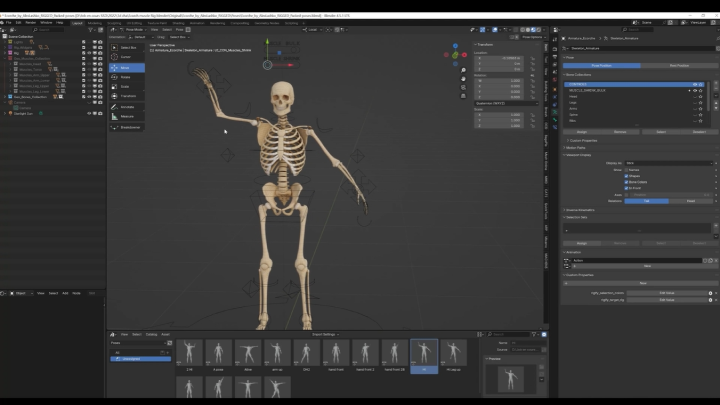
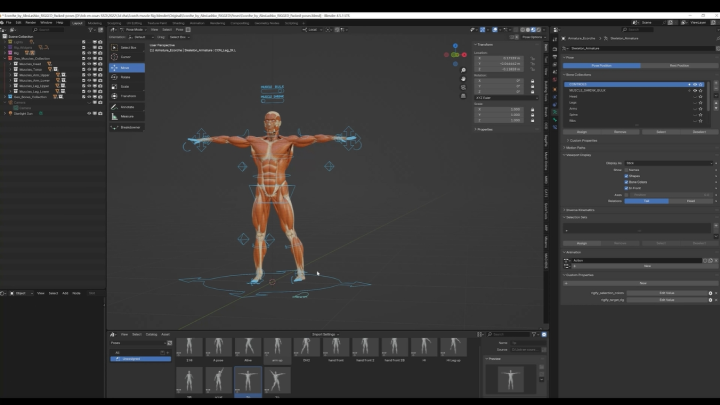
 3D Assets for Practical Practice- Poseable 3D models designed for CSP to explore anatomy and dynamic poses
- 3D cubic head model compatible with CSP for practicing stylization, angles, and head rotations
- 3D upper body model for anatomy studies and posing practice directly in CSP -
 Essential Brush Pack- A custom CSP brushes created by the instructor, designed to perform very fast and efficient shading, helping you speed up your workflow while maintaining polished results
Recommendation
Who should take this class?
Artists who are just starting out and want a simple yet concrete system for drawing characters. You’ll gain practical tools that let you sketch with confidence, without getting lost in complicated theory
Manga and comic artists who want to create dynamic action scenes without relying on reference every time. You’ll learn an efficient, beginner-friendly method to design expressive characters and powerful poses
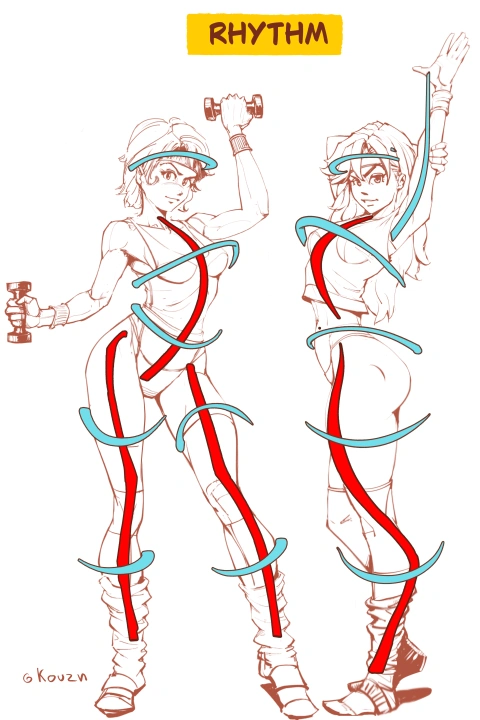
Learning artists with basic skills who are ready to advance into dynamic figure drawing. You’ll discover a clear and effective approach to adding energy, rhythm, and movement to your characters
Expert Drawing Educator KOUZA's Portfolio


Why Take This Class?
Many artists struggle with anatomy and posing, feeling overwhelmed by complex charts or discouraged when characters look stiff and unbalanced. Kouza understands this challenge and developed a method outside of traditional rules, creating a system that works in real practice. Kouza’s three-step process of skeleton, mannequin, and final figure gives you a clear path from a blank page to a confident, believable character.
This class removes the intimidation factor. Instead of trying to memorize every muscle, you’ll focus on simplified forms and practical exercises that make anatomy feel natural. Step by step, you’ll learn to place characters with ease, capture energy through gesture, and build poses that feel alive. By the end, you’ll have the tools to draw with confidence and bring your characters to life without second-guessing every line.

Get Ready for the Real-World
29 Class Exercises
Part 1. Build Your Dummy!
-
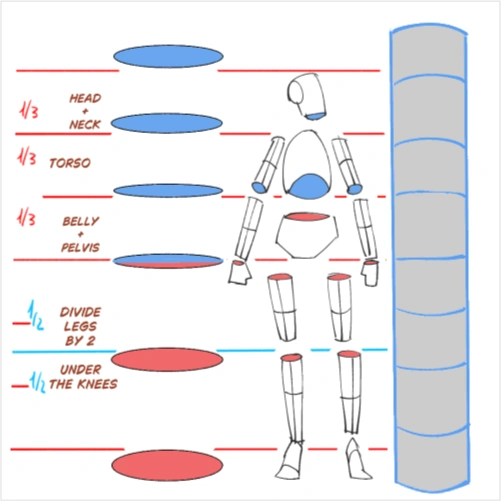
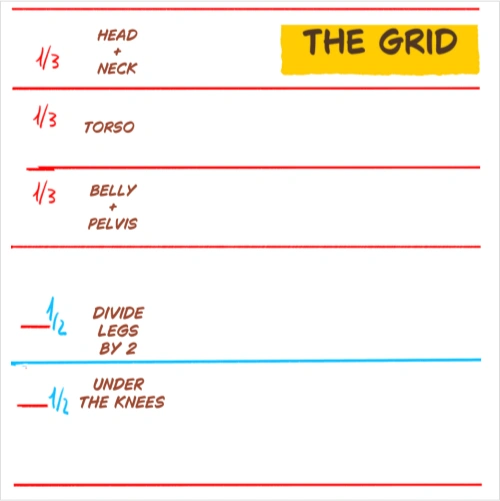 Simplified Proportion SystemCreate your own grid and follow the instructions to place your characters with simple perspective
 -
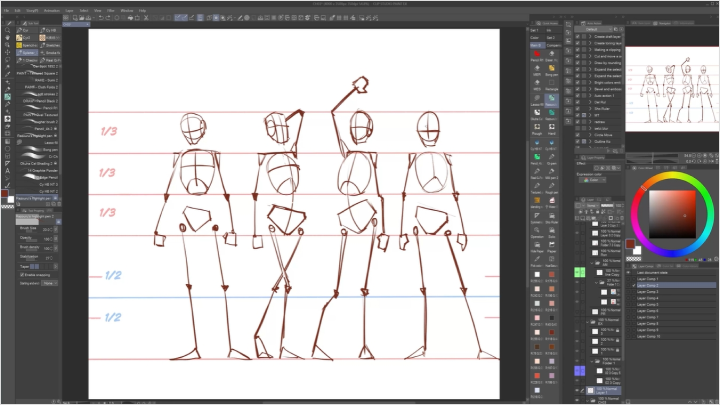
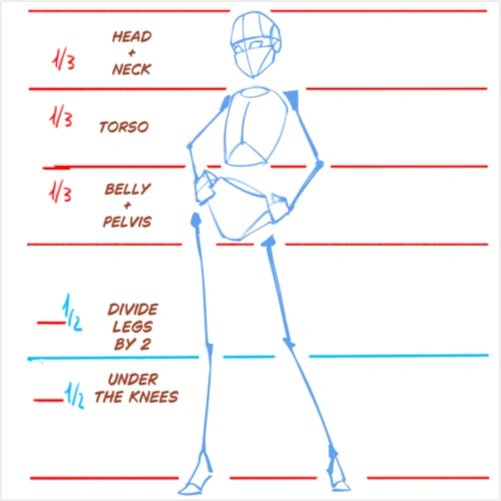 Simplified SkeletonUse egg shapes, cubes, and segments to build the level 1 skeleton inside the grid
 -
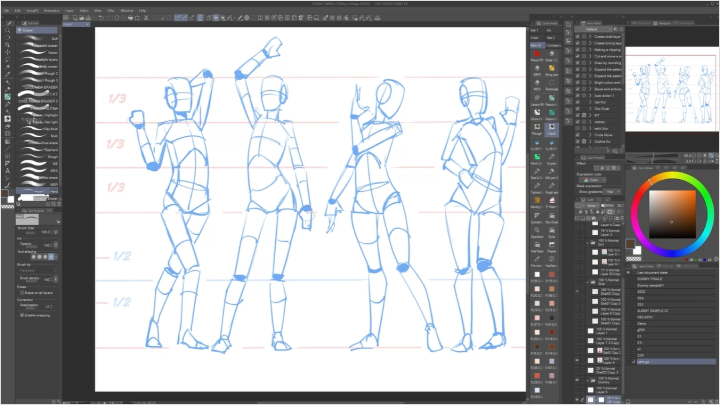
 Simplified DummyBuild your dummy with cubes and cylinders on top of the level 1 skeleton
 -
 Grid PerspectivePractice drawing the skeleton with simple shapes on a grid to train perspective
Part 2. Don't Let Anatomy Intimidate You
-
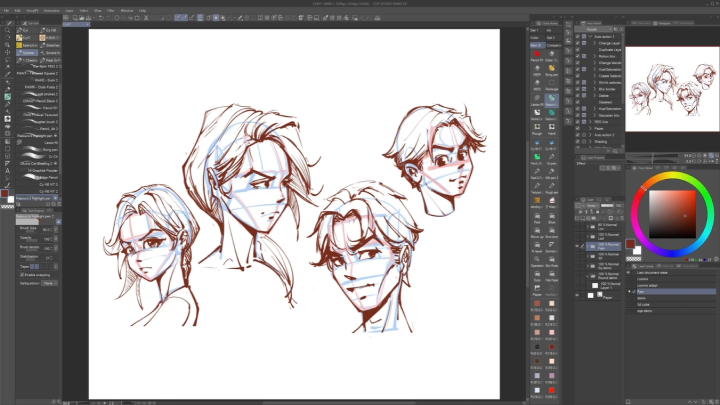
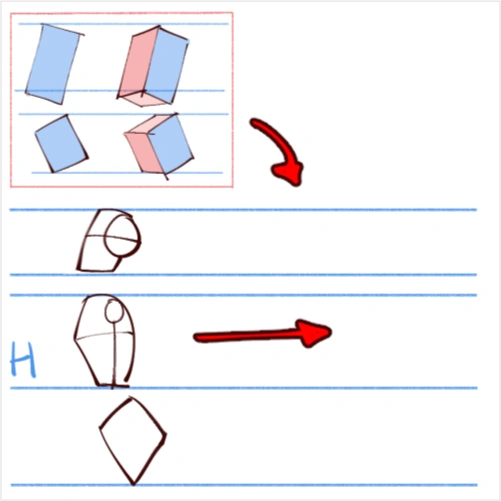
 Head (Front, Side, 3/4 View)Draw the basic head shape, then place the head on a cube to study angles
 -
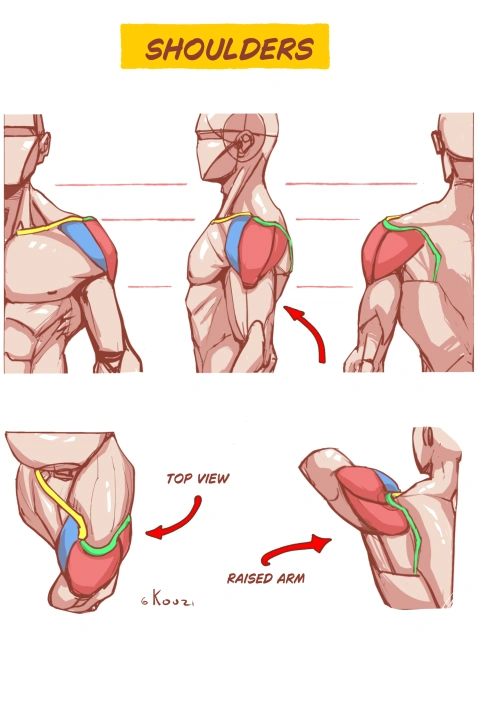
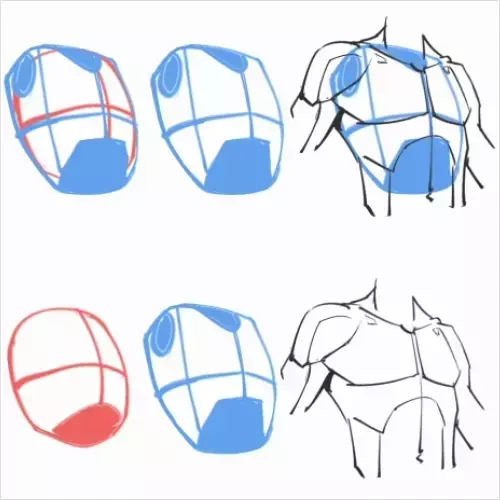 Torso (Front, Back, 3/4 View)Draw the torso with square and egg techniques for solid structure
 -
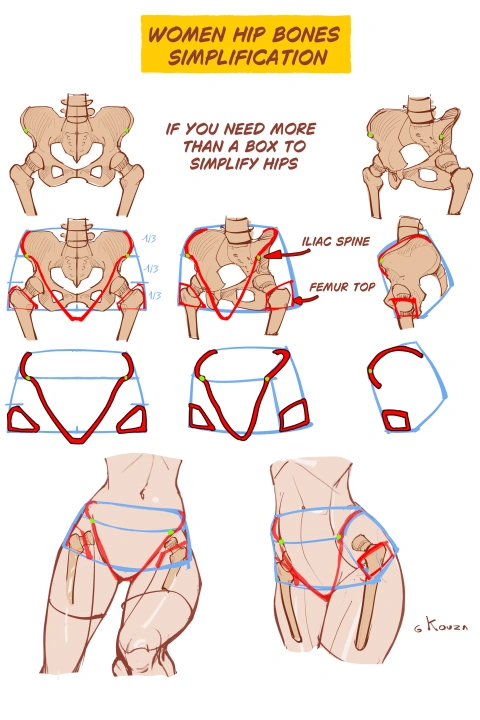
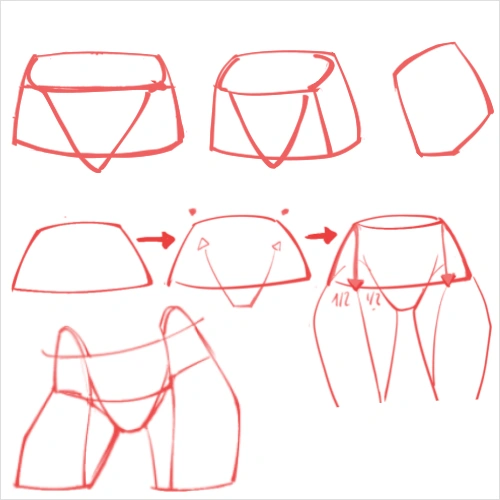 Pelvis (Front, Back, 3/4 View)Draw hips using box or bowl shapes to design strong foundations
-
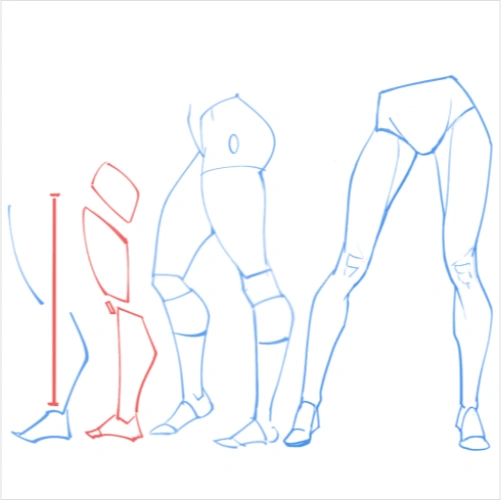 Legs (Front, Back, 3/4 View)Use curves and lines to represent the shape of the legs in different angles
 -
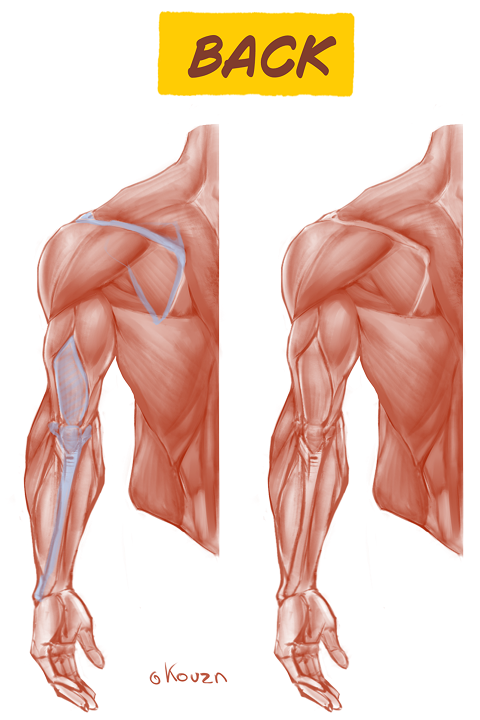
 ArmsBuild arms step by step using tubes and cylinders for flexibility
 -
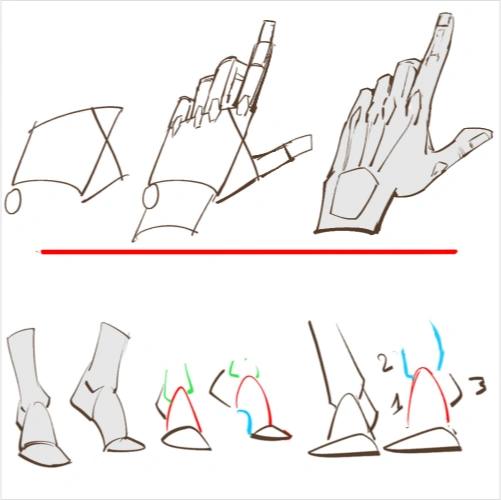 Hands and FeetDraw hands and feet with staged exercises: start from basic shapes, refine with secondary techniques, and place feet grounded on the floor with the division method
Part 3. Building a System for Gesture Drawing
-
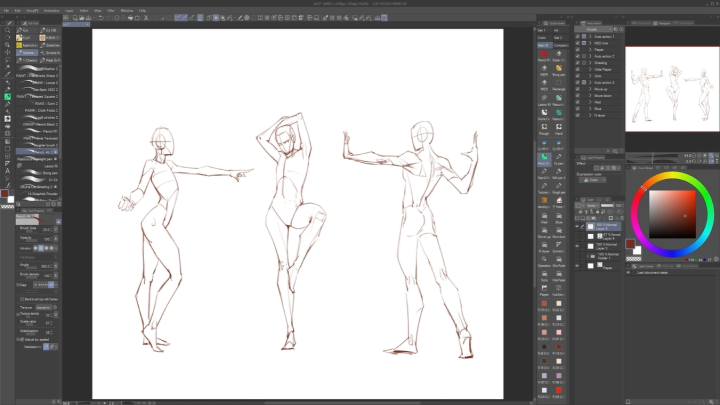
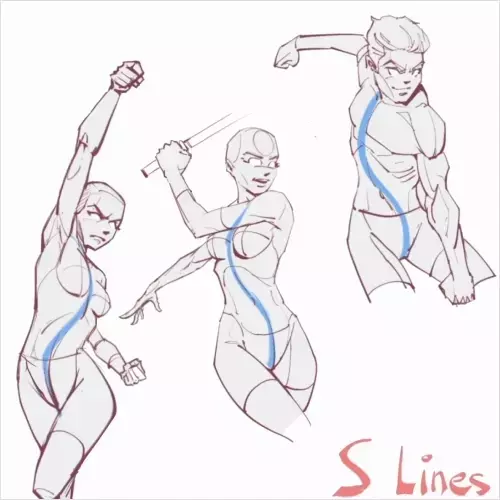 Gesture DrawingDraw with curves, straight lines, and S-shapes to capture gesture
 -
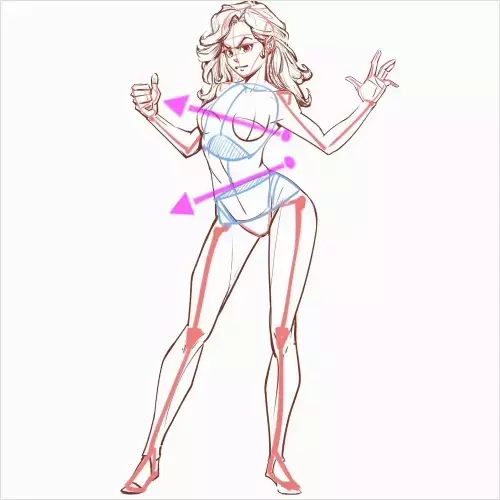 ContrappostoDraw torso and pelvis in C-shaped lines to master balance
 -
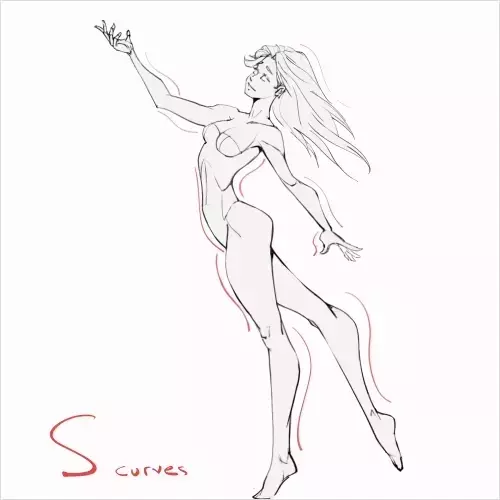 Line of beautyPractice S-shapes on body parts
 -
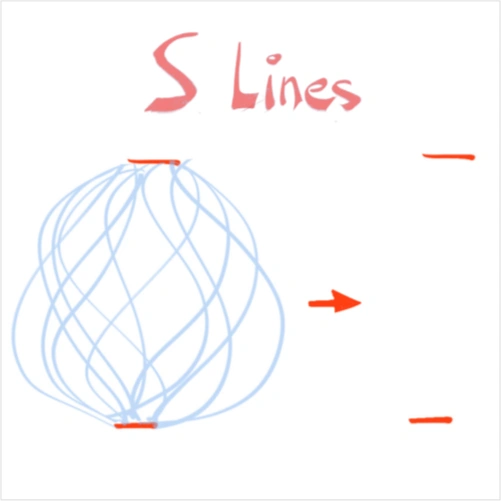 S-Line SecretRefine your body parts with the egg technique
 -
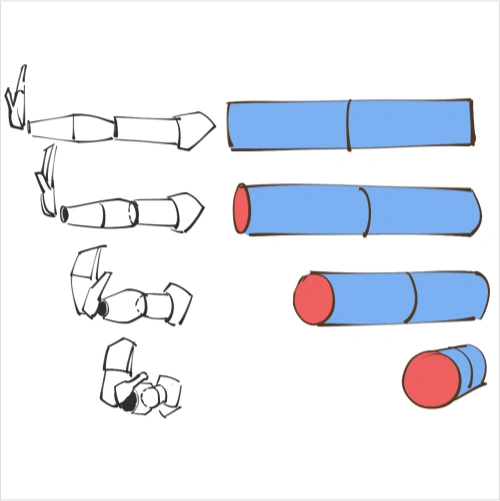 Foreshortening (Arms and Legs)Manipulate cylinders in 3D environment to practice foreshortened limbs
Part 4. 3D Models and Body Shapes
-
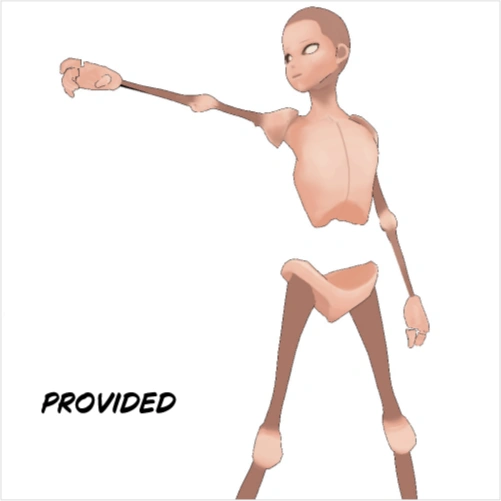 Draw on 3D ModelDraw directly on the provided 3D model to understand structure
 -
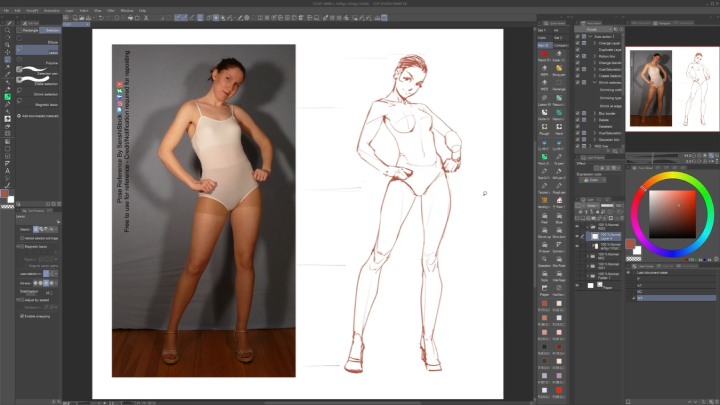
 Pose with ReferenceApply the three-step method on reference images: skeleton, dummy, final drawing
 -
 Pose without ReferenceStaged practice without reference to train your memory and imagination
-
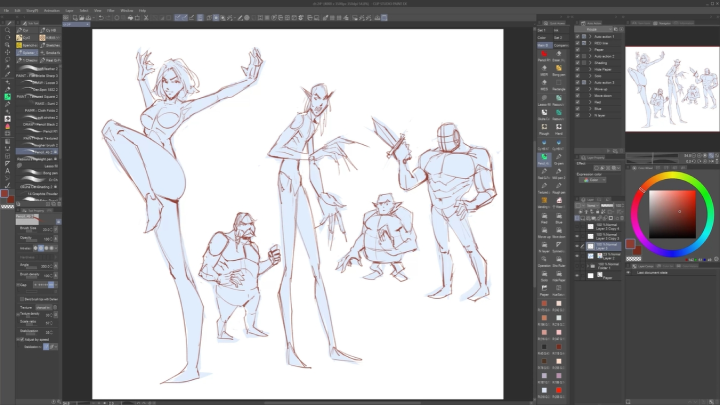
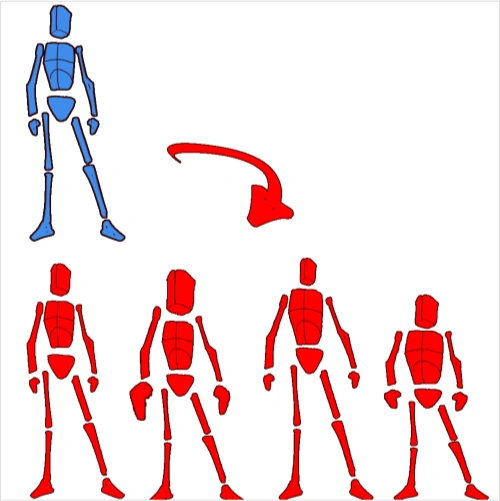 Body Shapes (Heavy, Skinny, Long, Short)Draw body variations to explore different proportions and silhouettes
 -
 Line ProjectionProject lines from side view to three-quarter view for accurate proportions
 -
 Line WeightMaster line thickness on simple forms to create depth and clarity
Part 5. From Basics to Action and Multi-Character Scenes
-
 Standing and Idle PosesUse simplified shapes to find natural standing poses
 -
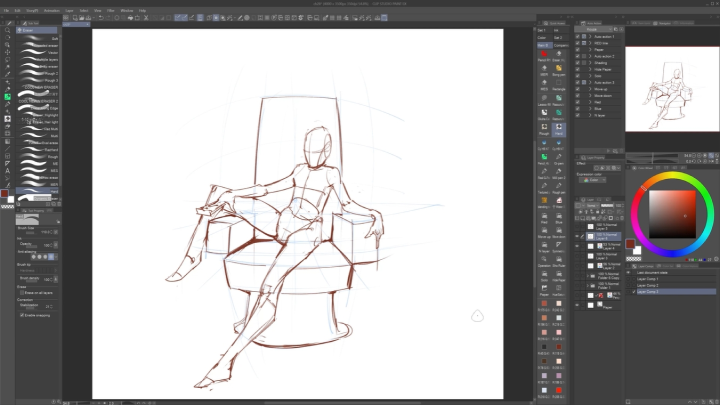
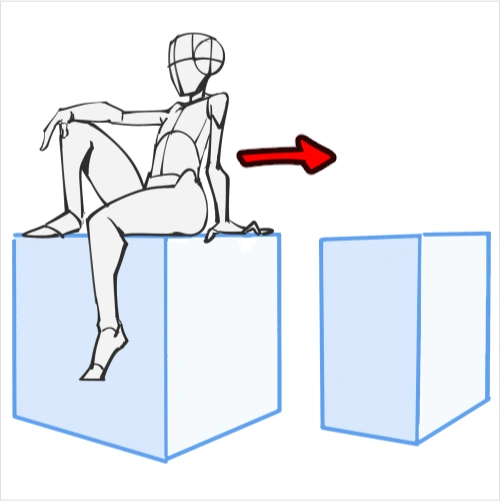 Sitting PosesDraw a cube in perspective, then place a skeleton sitting on it
 -
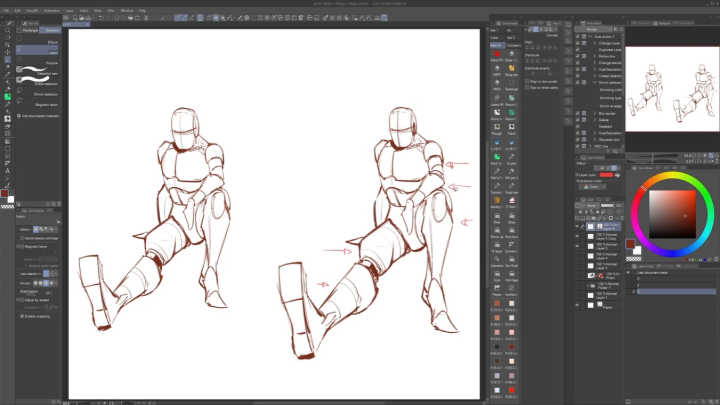
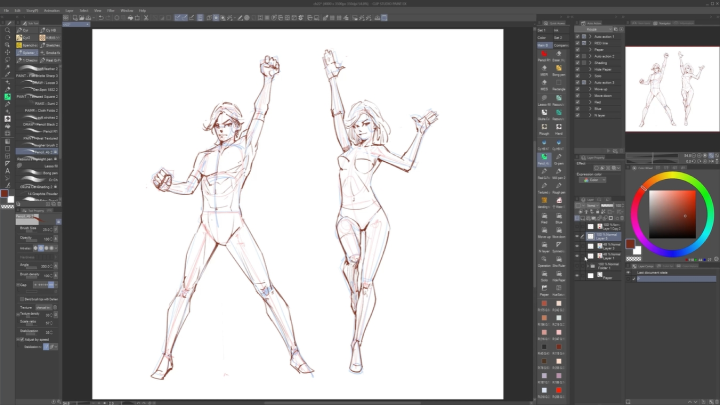
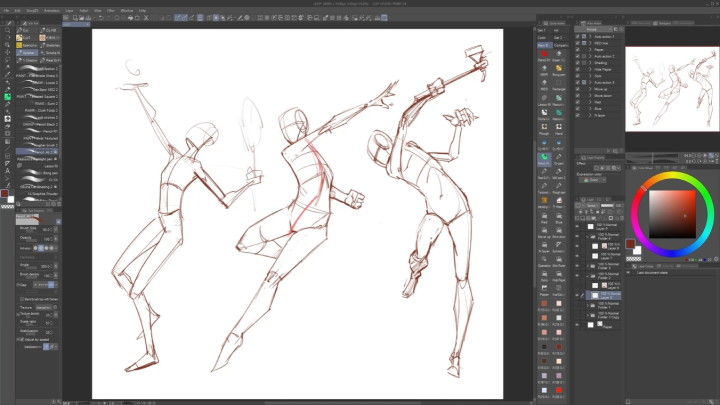
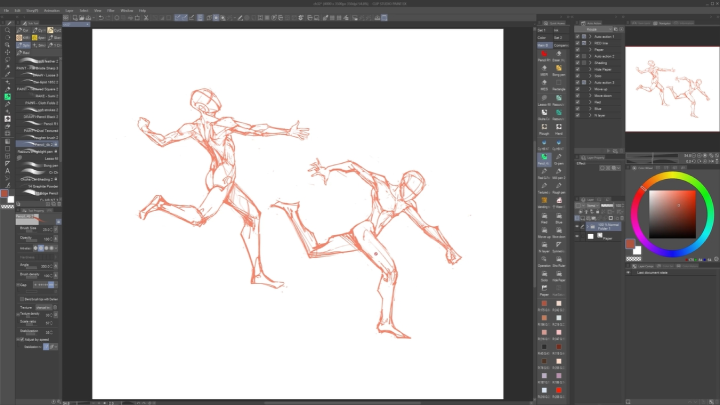
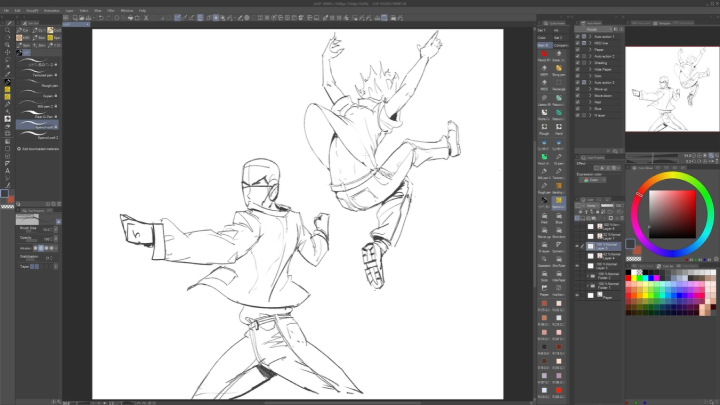
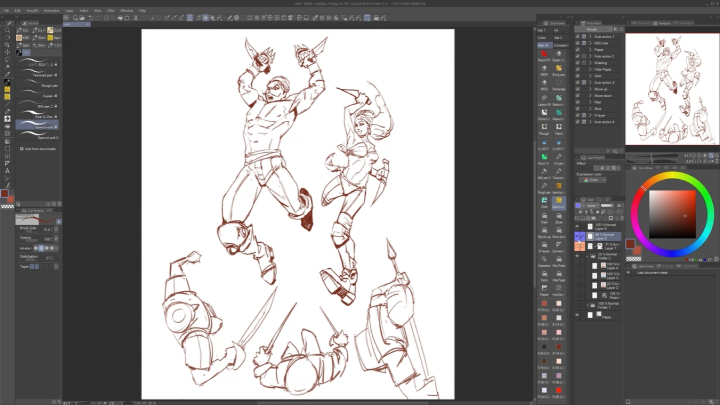
 Fighting PosesDraw sequences of basic scenes to create continuous action, consist of two images
 -
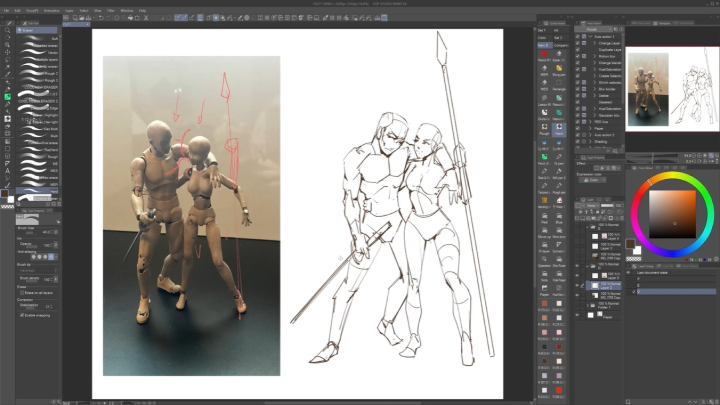
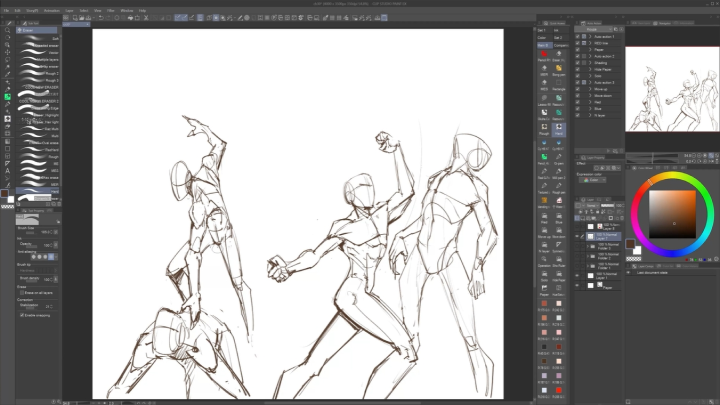
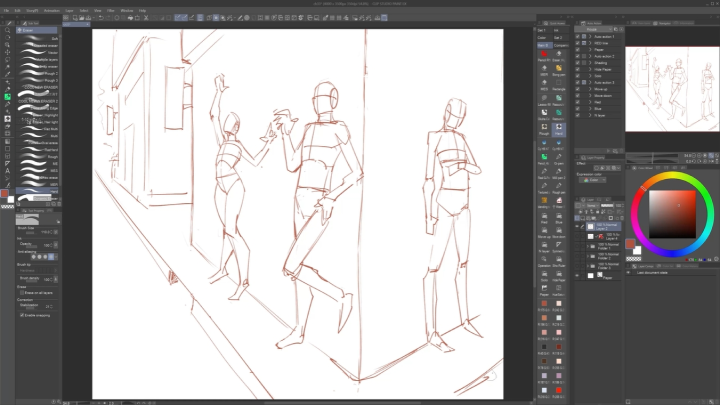
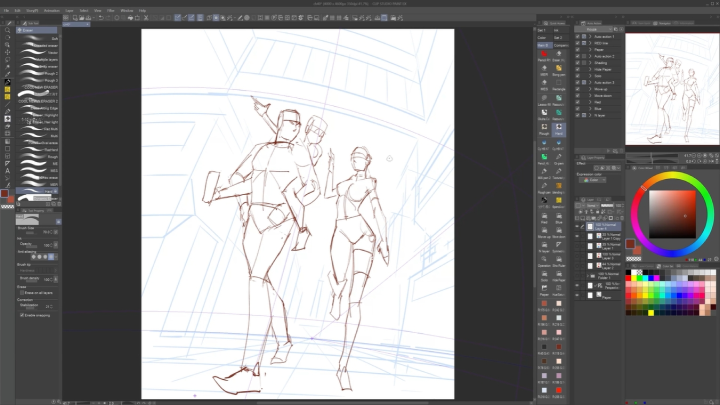
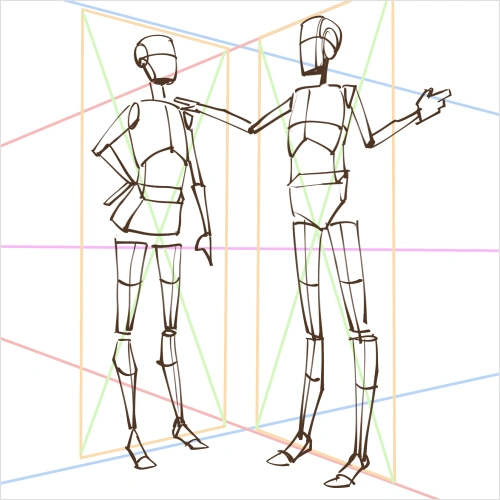 Multi-Character ScenesDraw rectangles in perspective and place multiple skeletons or dummies inside
Part 6. Perspective and Finally... Some Clothes!
-
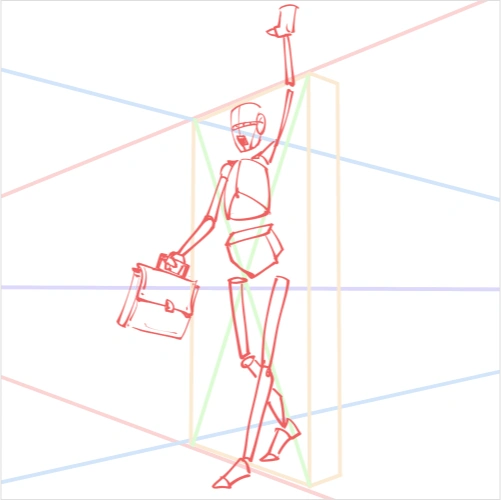 1- and 2-Point PerspectiveDraw rectangles in perspective and place skeletons or dummies inside
 -
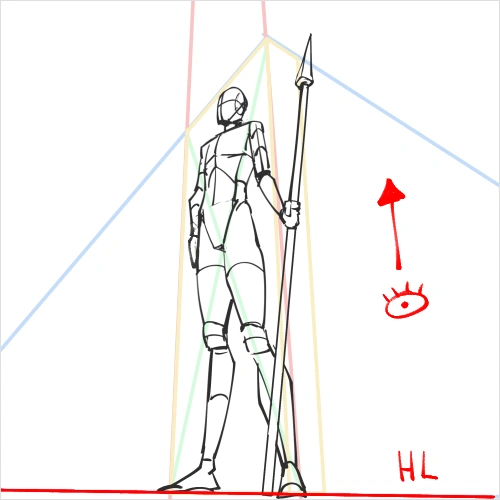 3-Point PerspectiveDraw rectangles with three perspective points, create low-angle and high-angle shots, and place skeletons inside
 -
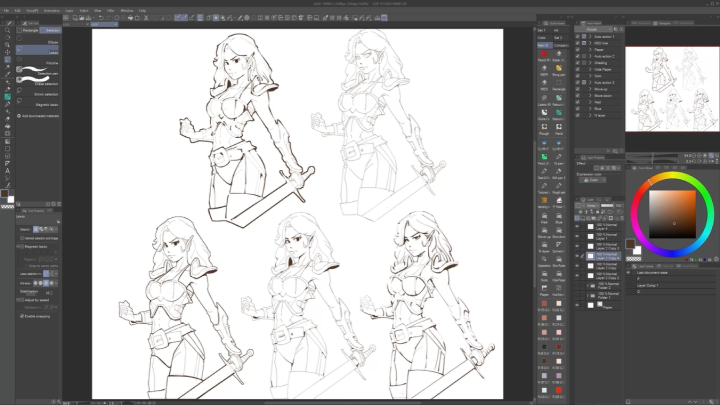
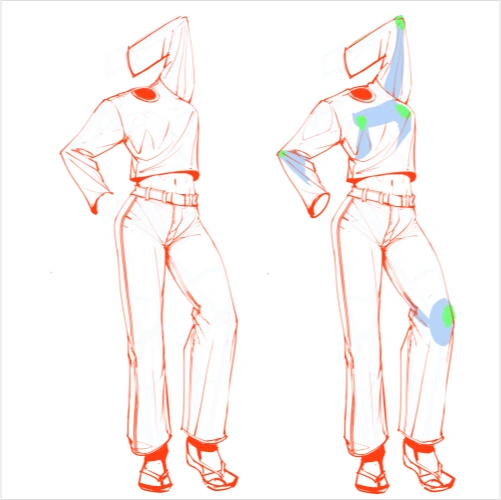 Basic Clothing (Tight on the Body)Find tension points on the body and draw fitted clothing that follows the form
 -
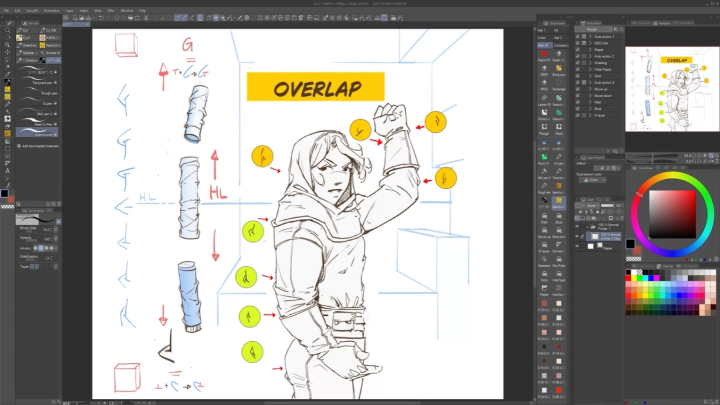
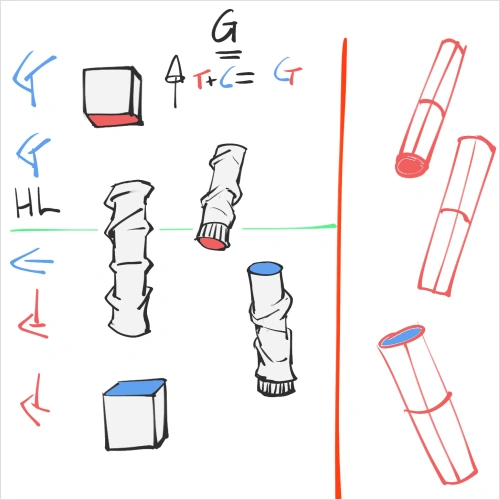 Clothing OverlapDraw G-shapes on cylinders to practice overlapping folds in fabric
*The above images are sample images for a better understanding.
Final Products
-
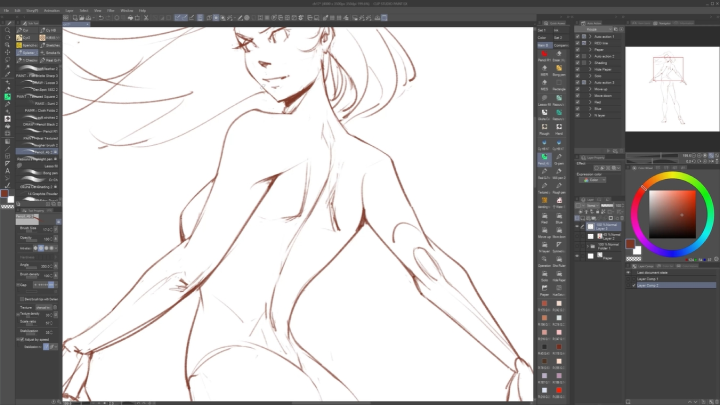
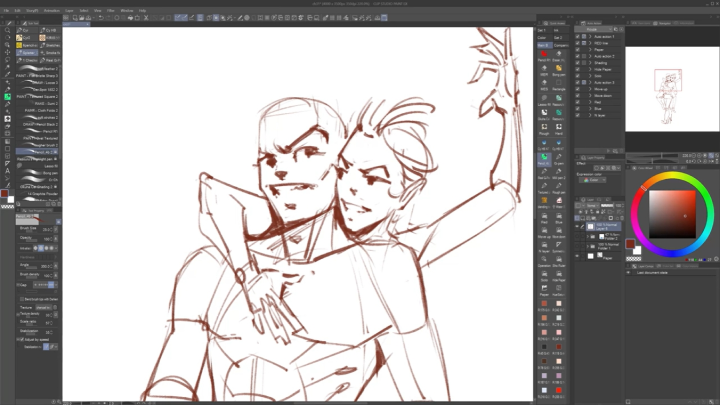
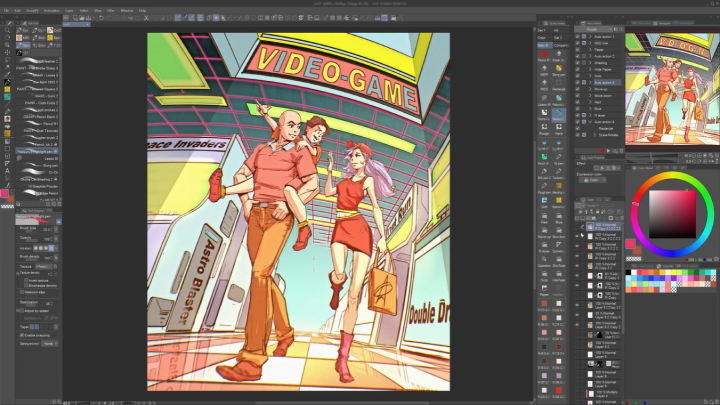
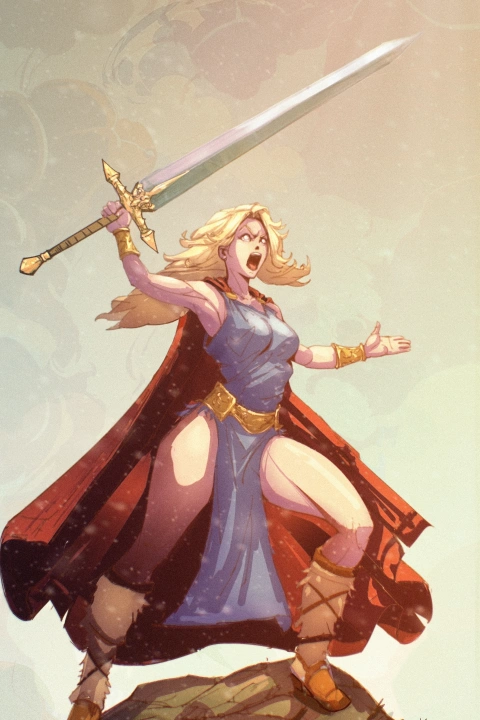
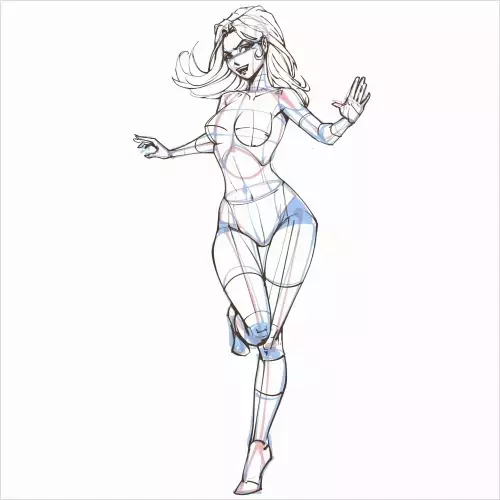
 Character Illustration
 -
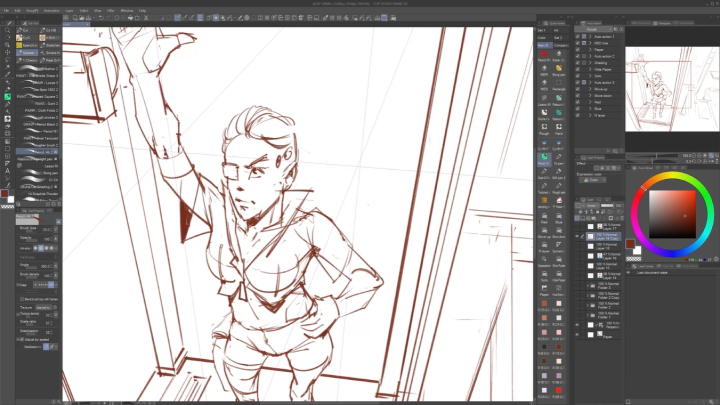
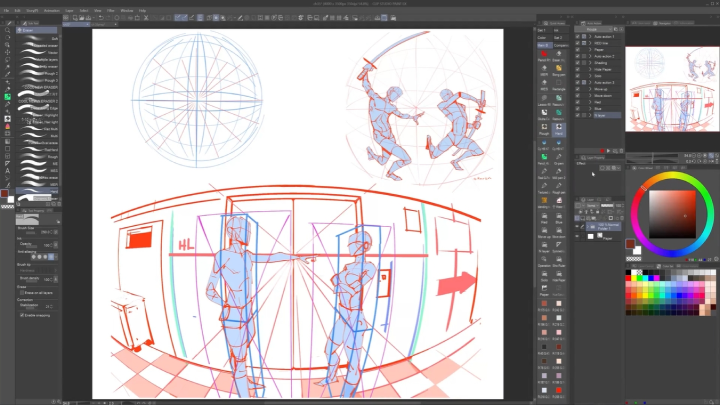
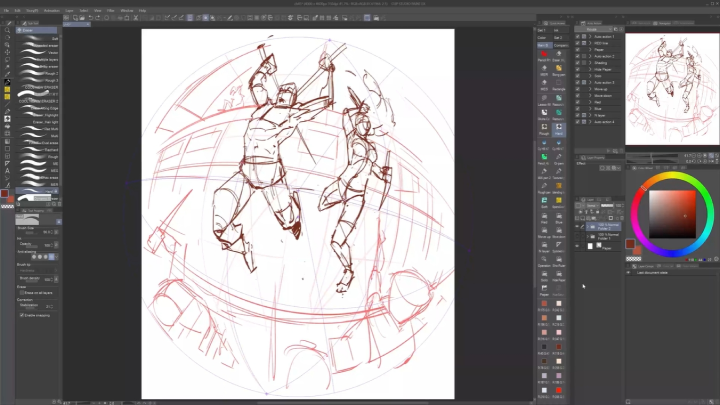
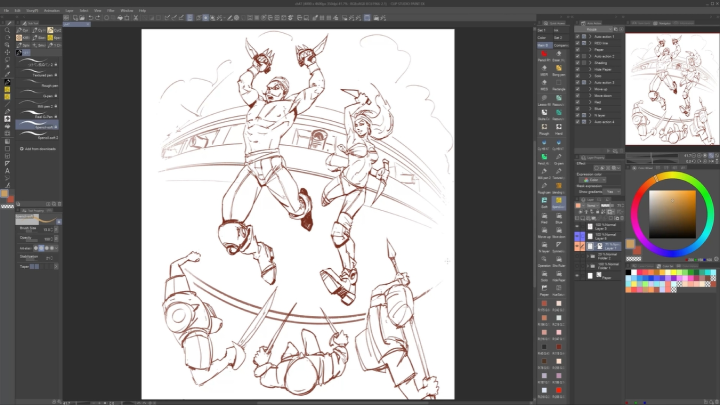
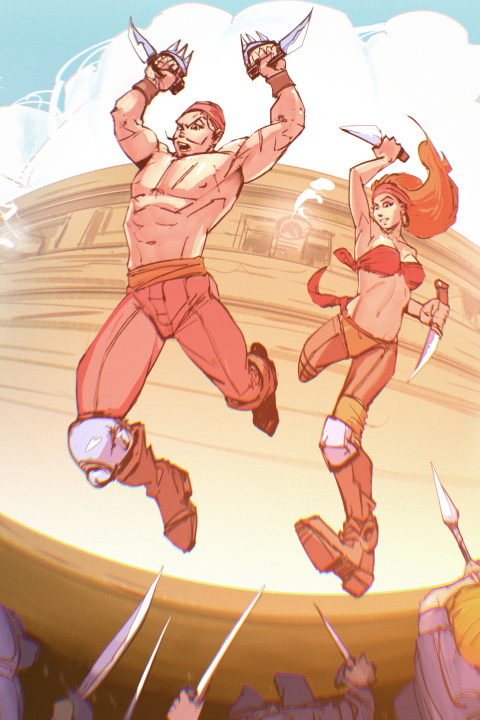
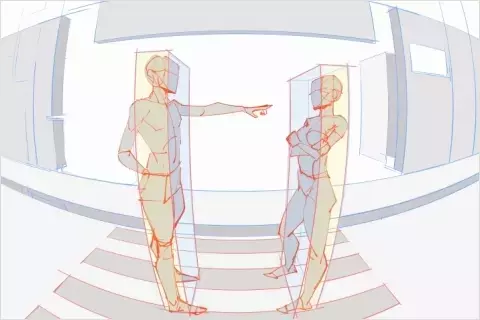
 Action Scene in a Fisheye Perspective
Instructor
Drawing Educator
KOUZA
Hi there, this is Kouza. I am a drawing educator who has always taken a self-taught approach to learning how to draw. Along the way, I’ve picked up useful tricks and developed my own techniques through exploration and experimentation. What truly interests me is following a path that moves away from strictly classical methods, while still respecting the fundamentals of drawing.
Through this class, I hope to impart what I’ve learned and share the methods that have guided my own artistic journey.


Drawing Educator, KOUZA
[Current]
Independent Artist and Educator
[Previous]
Top Seller for Unreal
Storyboard Artist
Highlights
Class Highlights
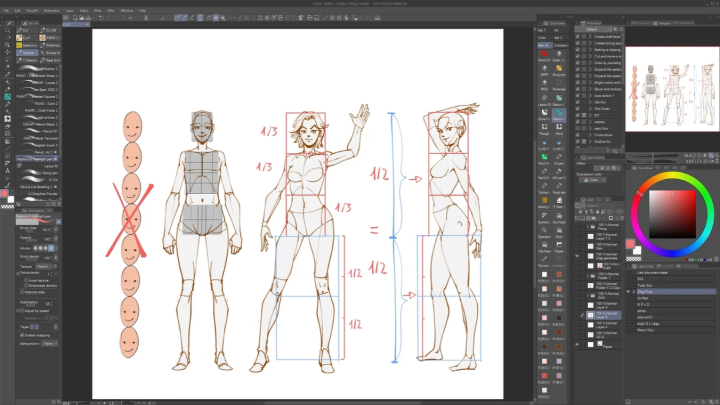
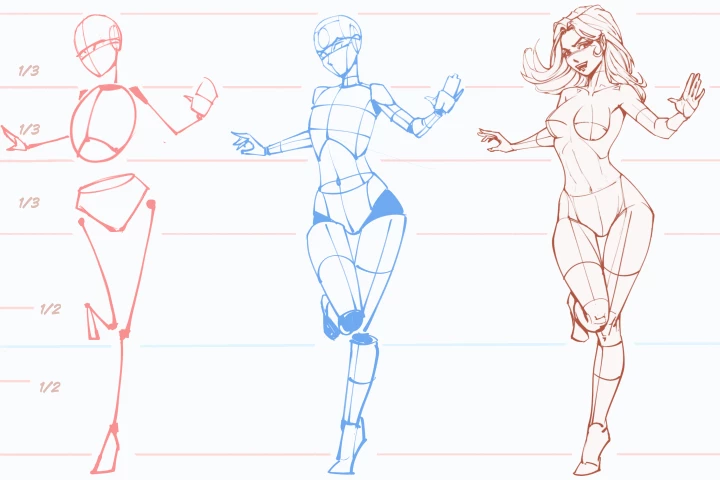
Unlock the Simplified 3-Step Proportion System
Adopt a streamlined 3-step proportion method that makes it easier to draw characters in a variety of poses and perspectives. This system helps you focus on creating dynamic, believable figures without being overwhelmed by complex traditional proportion rules.
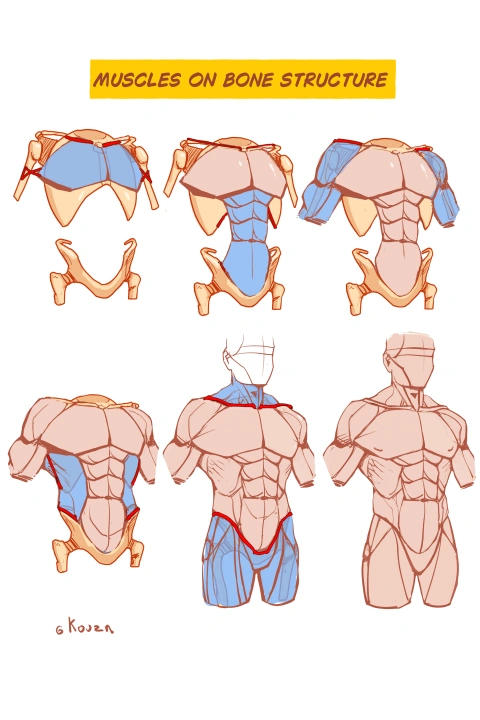
Master Simplified yet Powerful Anatomy
Anatomy explained through simple forms, so you can focus on what matters most. With Kouza’s tips and techniques, you’ll gain a clearer understanding of how muscles and structures work, making your drawings both accurate and expressive.
Set Characters in Challenging, Expressive Poses
Learn how to set up characters in challenging, energetic poses that bring your drawings to life. Designed for artists who want to move beyond static figure drawing, this class guides you step by step toward mastering confident and dynamic posing.
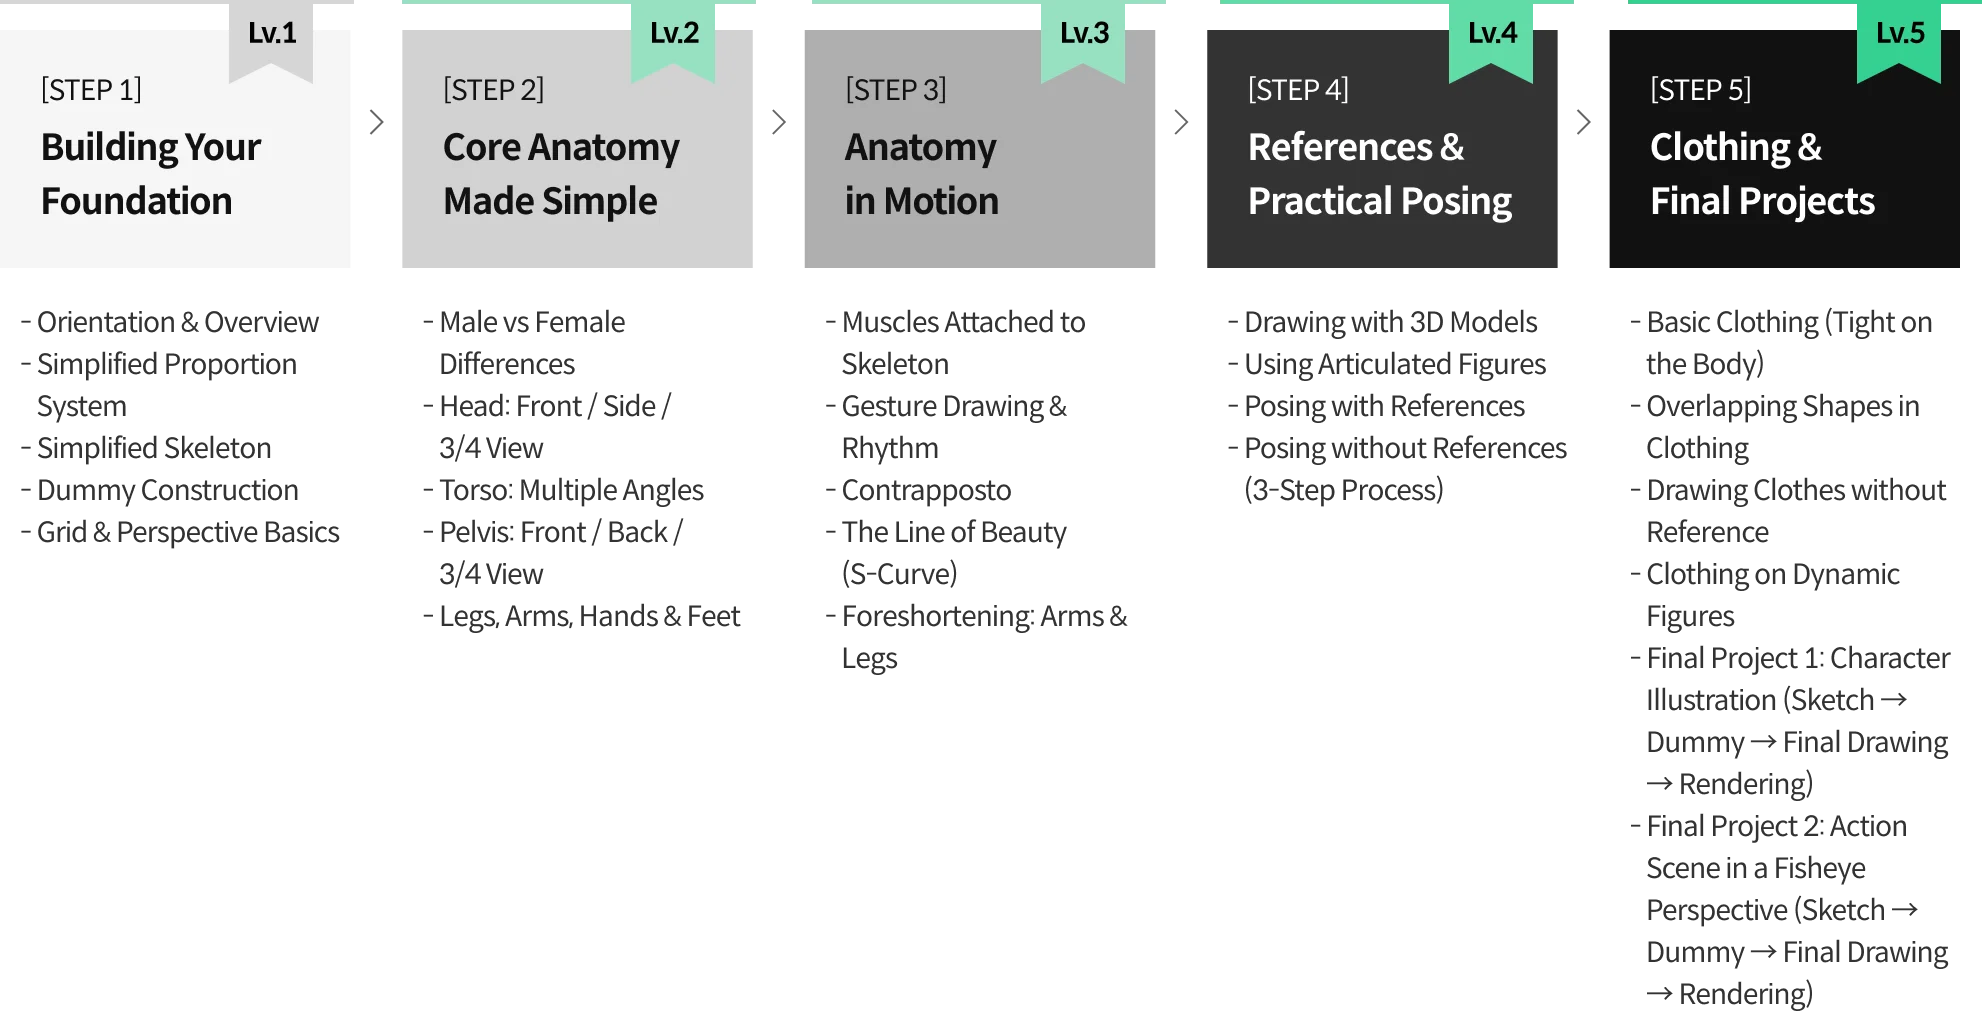
Roadmap
The Complete System of Simplified Anatomy and Dynamic Posing
Class Details
You'll Learn
-
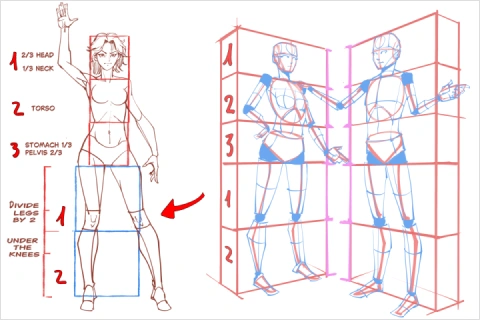 Simplified Proportion SystemDraw with confidence using a simplified proportion system
 -
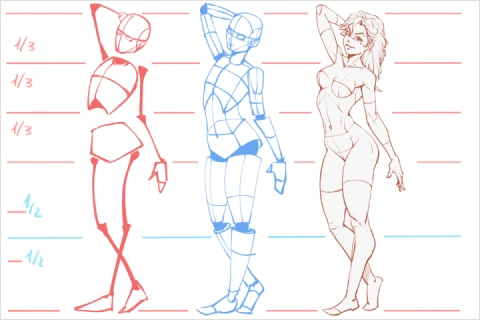 3-Step ProcessFollow a step-by-step method: begin with a simplified skeleton, build volume with a mannequin, and finish with details for complete characters
 -
 Effective AnatomyBuild muscles onto simple shapes to make anatomy easier to understand and apply
-
 Lines and Gesture DrawingEmphasize lines and gesture to capture energy and movement, practicing quick fluid poses for dynamic figure drawing
 -
 Pose Your CharactersBring your characters to life with expressive posing that shows both form and movement
 -
 Master PerspectiveUnderstand and apply 1-point, 2-point, 3-point, and fisheye perspective to give your figures strong depth and space
- Unlimited Access
- Best Price
Buy now, get unlimited access.
07/12 (Sun) (UTC-7) Special offer ends soon.
This special offer ends soon.
Buy now and save!
Interview with
Drawing Educator, KOUZA

Question.01
What are some "to-go" or "must-have" tools in your industry, and why?
To remain competitive as an artist today, it's essential to use professional drawing software like Clip Studio Paint, Photoshop, or Procreate. Combining it with a tablet or digital screen offers greater flexibility and speed, especially when working or teaching online.
That said, I remain convinced that traditional pencil drawing is extremely important. These fundamentals, in my opinion, will become even more valuable as technology continues to evolve. (Hand-drawn drawing on paper will become incredibly valuable in the future.)
That said, I remain convinced that traditional pencil drawing is extremely important. These fundamentals, in my opinion, will become even more valuable as technology continues to evolve. (Hand-drawn drawing on paper will become incredibly valuable in the future.)
Question.02
What do you think is the most important trait(s) to success in your industry?
Effectively communicate drawing concepts by breaking down complex visual ideas into simple, understandable steps, while creating engaging and enjoyable learning methods.
Question.03
Is there anything else you would like to share with your students?
The goal of learning to draw, create in 3D, or work with any other medium is to tell stories and share emotions, no matter what tools you use. The entertainment industry is booming right now, so if this is truly your passion, my advice is simple: go all out and give it everything you’ve got.
Required Programs
This course will use
Clip Studio Paint, but students can follow the coures with any software of their choice.
Please purchase and install these program(s) for an optimized chapter experience.
*These programs and/or materials will not be provided with the chapter.